INSPECTION
Inspection · Vehicles built from Aug 2013
- NOTICE:
- After performing this inspection, be sure to perform initialization (initial position reset and initial position memorization) of the fold seat control ECU (Click here).
| INSPECT NO. 3 SEATBACK FRAME SUB-ASSEMBLY LH |

Check the operation of the seatback frame.
Apply battery voltage to the power seat motor, and check that the seatback moves smoothly as follows.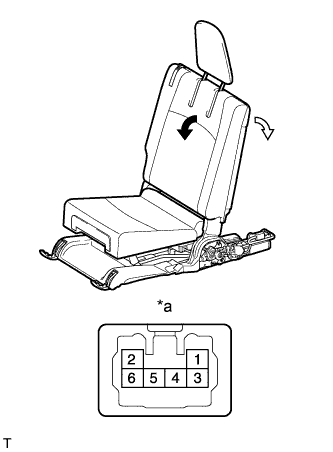

- OK:
Measurement Condition
Specified Condition
Battery positive (+) → 3
Battery negative (-) → 4
Front
Battery positive (+) → 4
Battery negative (-) → 3
Rear
Text in Illustration *a
Component without harness connected
(No. 3 Seatback Frame LH)

Front

Rear
| INSPECT NO. 3 SEATBACK FRAME SUB-ASSEMBLY RH |
Check the operation of the seatback frame.
Apply battery voltage to the power seat motor, and check that the seatback moves smoothly as follows.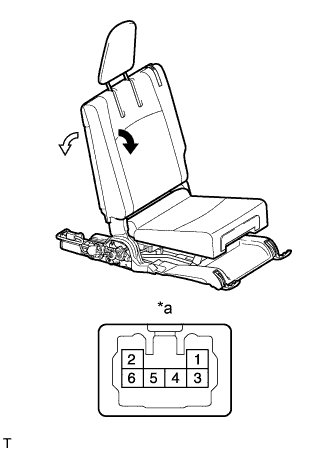
- OK:
Measurement Condition
Specified Condition
Battery positive (+) → 3
Battery negative (-) → 4
Front
Battery positive (+) → 4
Battery negative (-) → 3
Rear
Text in Illustration *a
Component without harness connected
(No. 3 Seatback Frame RH)
Front
Rear
| INSPECT NO. 3 SEAT LEG ASSEMBLY LH |
Check the operation of the seat leg.
Apply battery voltage to the power seat motor, and check that the seat leg arm moves smoothly as follows.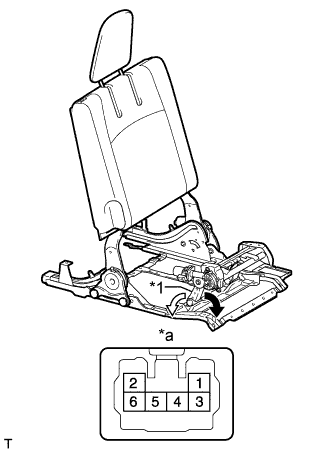
- OK:
Measurement Condition
Specified Condition
Battery positive (+) → 3
Battery negative (-) → 4
Front
Battery positive (+) → 4
Battery negative (-) → 3
Rear
Text in Illustration *1
Seat Leg Arm
*a
Component without harness connected
(No. 3 Seat Leg Assembly LH)
Front
Rear
| INSPECT NO. 2 SEAT LEG ASSEMBLY (for RH Side) |
Check the operation of the seat leg.
Apply battery voltage to the power seat motor, and check that the seat leg arm moves smoothly as follows.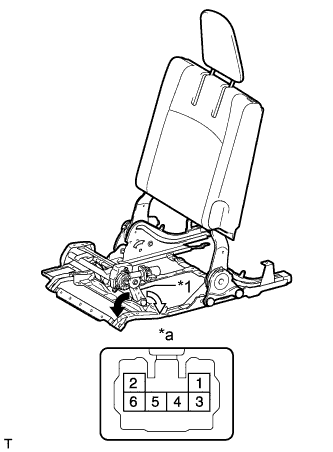
- OK:
Measurement Condition
Specified Condition
Battery positive (+) → 3
Battery negative (-) → 4
Front
Battery positive (+) → 4
Battery negative (-) → 3
Rear
Text in Illustration *1
Seat Leg Arm
*a
Component without harness connected
(No. 2 Seat Leg Assembly)
Front
Rear