INSTALLATION
Removal / installation · Vehicles built from Aug 2013
- CAUTION:
- Wear protective gloves. Sharp areas on the parts may injure your hands.
- HINT:
- Use the same procedure for RHD and LHD vehicles.
- The procedure listed below is for LHD vehicles.
- A bolt without a torque specification is shown in the standard bolt chart (Click here).
- Use the same procedure for RHD and LHD vehicles.
| 1. INSTALL REAR NO. 1 SEAT INNER BELT ASSEMBLY LH |

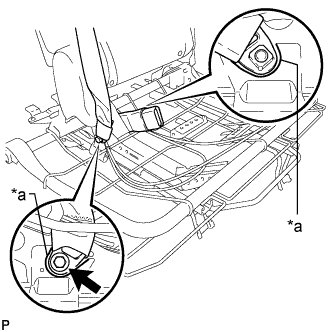  |
Install the inner belt and connect the 3 point type belt anchor with the bolt.
- Torque:
- 42 N*m{ 428 kgf*cm , 31 ft.*lbf }
- NOTICE:
- Do not allow the anchor part of the front seat inner belt assembly to overlap the protruding part of the front seat adjuster.
Text in Illustration *a
Protruding Part
| 2. INSTALL SEAT CUSHION COVER WITH PAD |
Attach the hook.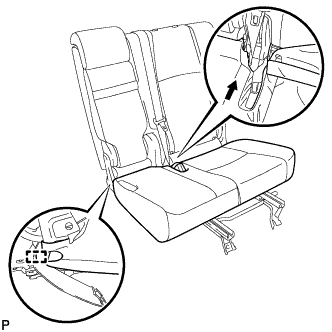
Attach the hooks to install the seat cushion cover with pad.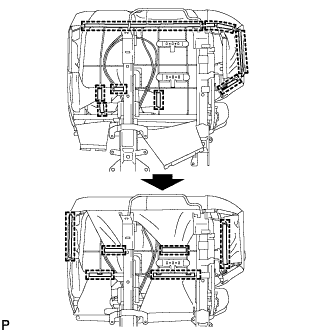
w/ Seat Heater System:
Pass the wire harness as shown in the illustration.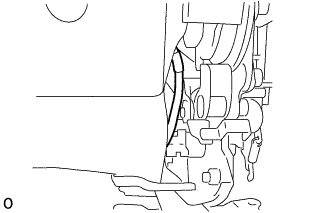
Connect the 2 rear seat heater connectors.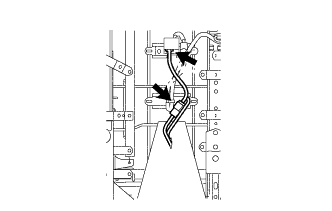
| 3. INSTALL REAR SEATBACK LOCK STRIKER COVER LH |
Attach the 3 clips to install the rear seatback lock striker cover LH.
| 4. INSTALL REAR SEAT CUSHION MOULDING LH |
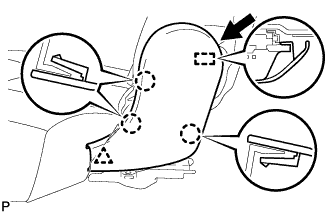 |
Move the rear seat cushion moulding LH in the direction of the arrow to attach the guide.
Attach the 3 claws and clip to install the rear seat cushion moulding LH.
| 5. INSTALL CENTER SEAT HINGE COVER LH |
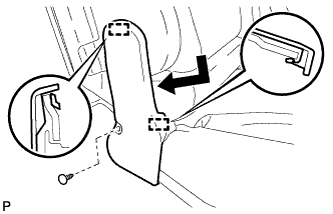 |
Attach the 2 guides and install the center seat hinge cover LH with the clip.
| 6. INSTALL RECLINING ADJUSTER RELEASE HANDLE LH |
Install the reclining adjuster release handle LH with the 3 screws.
| 7. INSTALL REAR SEAT UPPER RECLINING COVER LH |
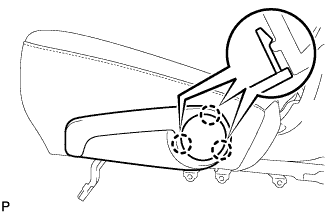 |
Attach the 3 claws to install the rear seat upper reclining cover LH.
| 8. INSTALL REAR SEAT ASSEMBLY LH |
Install the rear seat assembly LH (Click here).