DISASSEMBLY
Removal / installation · Vehicles built from Aug 2013
- CAUTION:
- Wear protective gloves. Sharp areas on the parts may injure your hands.
| 1. REMOVE REAR NO. 1 SEAT RECLINING COVER LH |

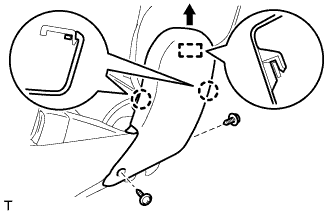  |
Remove the 2 screws.
Using a moulding remover, detach the 2 claws.
Move the cover in the direction of the arrow to detach the guide.
Detach the 2 hooks and remove the cover.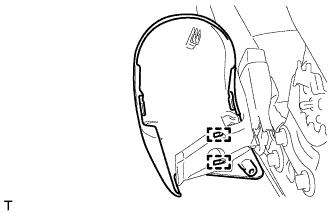
| 2. REMOVE REAR NO. 1 SEAT RECLINING COVER RH |
Remove the 2 screws.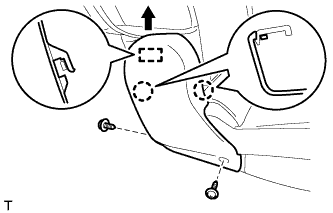
Using a moulding remover, detach the 2 claws.
Move the cover in the direction of the arrow to detach the guide and remove the cover.
| 3. REMOVE SEAT TRACK OPEN LEVER PIN SUB-ASSEMBLY |
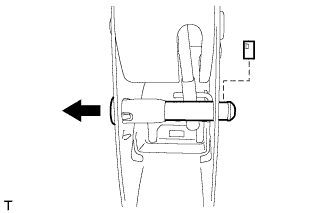 |
Using a screwdriver, remove the stopper.
Remove the pin as shown in the illustration.
- HINT:
- Use the same procedure for both pins.
| 4. REMOVE REAR SEAT HINGE PAWL GUIDE |
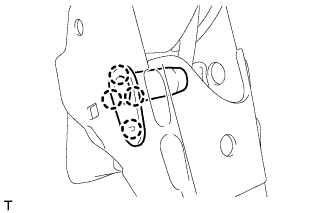 |
Detach the 4 claws and remove the pawl guide.
- HINT:
- Use the same procedure for both pawl guides.
| 5. REMOVE REAR NO. 1 SEAT HINGE SUB-ASSEMBLY LH |
Using a screwdriver, remove the E-ring.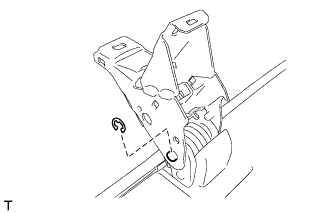
Remove the pin and hinge.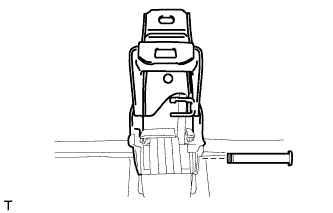
| 6. REMOVE REAR NO. 1 SEAT HINGE SUB-ASSEMBLY RH |
Using a screwdriver, remove the E-ring.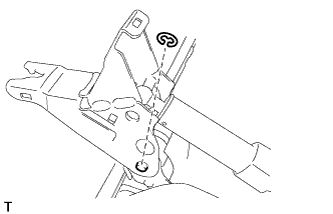
Remove the pin.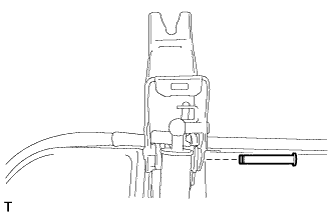
Using a screwdriver, detach the 6 claws.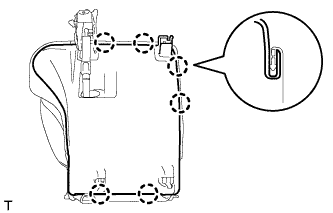
- HINT:
- Tape the screwdriver tip before use.
Remove the 4 screws.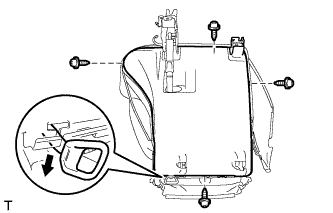
Disconnect the reclining release handle from the under cover.
Raise the under cover.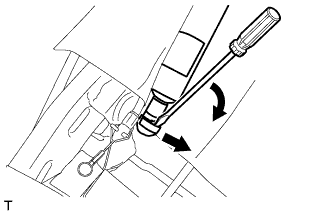
Using a screwdriver, remove the spring of the seat stay ball-joint.
Disconnect the seat stay.
Remove the seat hinge and seat stay as a unit.
- NOTICE:
- The seat stay cannot be disconnected from the seat hinge. If the stay is disconnected from the hinge, replacement of both parts is necessary.
- HINT:
- If it is necessary to replace the seat hinge, replace it together with the seat stay as the stay cannot be disconnected from the hinge.
| 7. REMOVE REAR SEAT STAY SUB-ASSEMBLY |
- HINT:
- As the seat stay cannot be disconnected from the seat hinge, it is removed in the previous step.
- If it is necessary to replace the seat stay, replace it together with the seat hinge as the stay cannot be disconnected from the hinge.
- As the seat stay cannot be disconnected from the seat hinge, it is removed in the previous step.
| 8. REMOVE REAR SEAT CUSHION EDGE PROTECTOR |
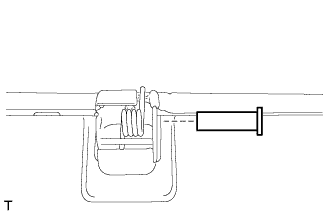 |
Remove the protector from the cushion frame.
- HINT:
- Use the same procedure for both protectors.
| 9. REMOVE FOLD SEAT LEG LOCK CUSHION |
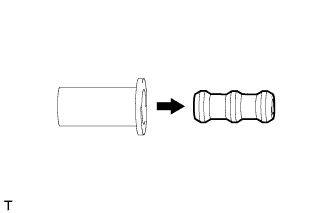 |
Remove the cushion from the protector.
- HINT:
- Use the same procedure for both cushions.
| 10. REMOVE REAR SEAT CUSHION SUPPORT SPRING |
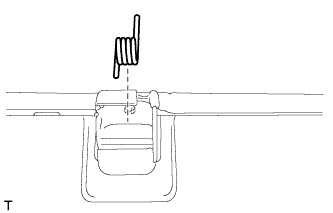 |
Remove the spring from the seat cushion frame.
- HINT:
- Use the same procedure for both springs.
| 11. REMOVE REAR SEAT CUSHION UNDER COVER SUB-ASSEMBLY RH |
Remove the under cover.
| 12. REMOVE REAR NO. 2 SEAT HINGE COVER LH |
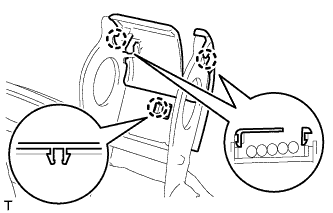 |
Detach the 3 claws and remove the cover.
| 13. REMOVE REAR NO. 2 SEAT HINGE COVER RH |
Detach the 3 claws and remove the cover.
| 14. REMOVE REAR NO. 1 SEAT INNER BELT ASSEMBLY LH |
Remove the nut and inner belt.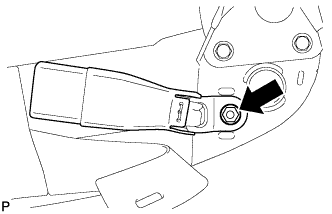
| 15. REMOVE SEAT CUSHION COVER WITH PAD |
Cut off the tack pins and remove the carpet from the cushion pad.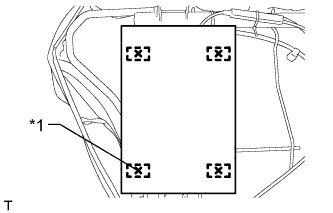
Text in Illustration *1
Tack Pin
Remove the 3 hog rings and seat cushion cover with pad.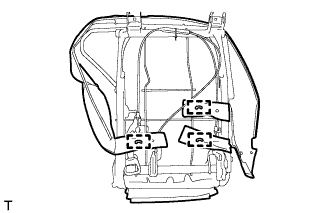
| 16. REMOVE REAR SEAT INNER CUSHION EDGE PROTECTOR RH |
Cut off the tack pins and remove the carpet from the cushion pad.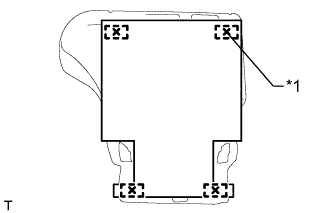
Text in Illustration *1
Tack Pin
| 17. REMOVE SEPARATE TYPE REAR SEAT CUSHION COVER |
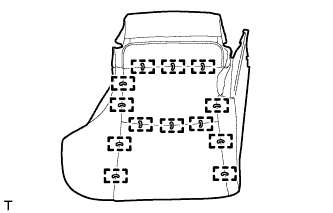 |
Remove the hog rings and seat cushion cover from the seat cushion pad.
| 18. REMOVE REAR SEATBACK COVER |
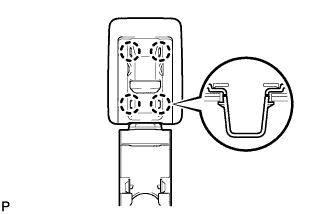 |
Using a screwdriver, detach the 4 claws and remove the cover.
- HINT:
- Tape the screwdriver tip before use.
| 19. REMOVE NO. 1 SEATBACK PAD RH |
Detach the fastening tape and open the cover.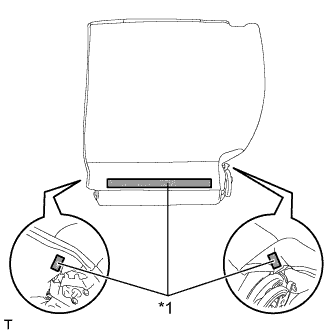
Text in Illustration *1
Fastening Tape
Remove the 3 hog rings.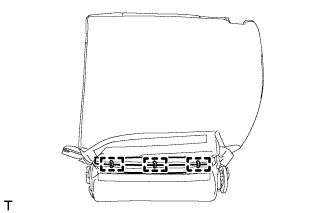
Open the 2 fasteners, and then open the seatback cover.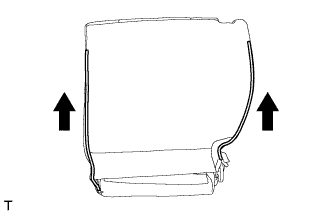
Remove the seatback pad.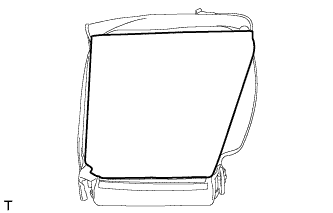
| 20. REMOVE REAR SEATBACK LOCK STRIKER COVER |
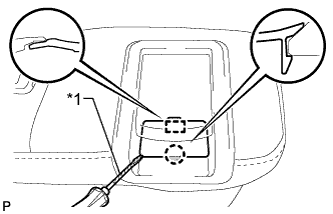 |
Using a screwdriver, detach the claw and guide, and then remove the cover.
- HINT:
- Tape the screwdriver tip before use.
Text in Illustration *1
Protective Tape
| 21. REMOVE REAR SEAT LOCK CONTROL LEVER SUB-ASSEMBLY RH |
Remove the 2 screws.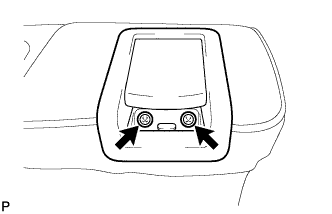
Disconnect the cable in the order shown in the illustration and remove the lever.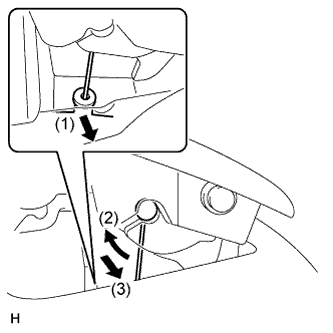
| 22. REMOVE REAR NO. 1 SEAT HEADREST SUPPORT ASSEMBLY |
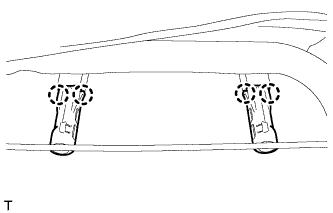 |
Detach the 4 claws and remove the 2 supports.
| 23. REMOVE SEATBACK COVER WITH PAD |
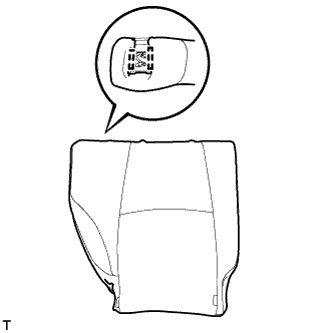 |
Detach the 2 hooks and remove the seatback cover with pad.
| 24. REMOVE SEPARATE TYPE REAR SEATBACK COVER |
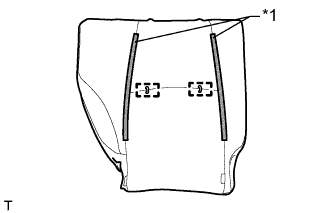 |
Detach the 2 fastening tapes.
Text in Illustration *1
Fastening Tape
Remove the hog rings and seatback cover from the seatback pad.
| 25. REMOVE REAR NO. 1 SEAT LOCK CABLE ASSEMBLY |
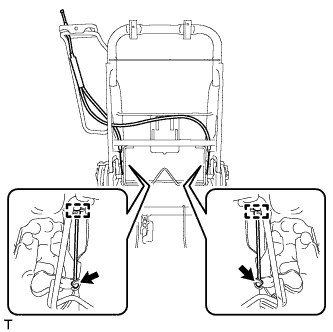 |
Detach the 2 cable clamps, and then disconnect the cable and remove it.
| 26. REMOVE REAR SEAT INNER RECLINING COVER LH |
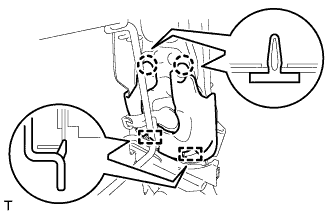 |
Detach the 2 claws and 2 guides, and then remove the cover.
| 27. REMOVE REAR SEAT INNER RECLINING COVER RH |
Detach the 2 claws and 2 guides, and then remove the cover.
| 28. REMOVE REAR SEAT RECLINING COVER INNER LH |
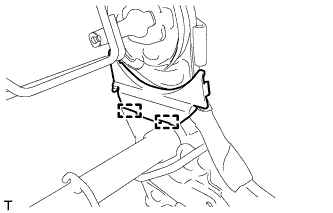 |
Detach the 2 guides and remove the cover.
| 29. REMOVE REAR SEAT RECLINING COVER INNER RH |
Detach the 2 guides and remove the cover.
| 30. REMOVE REAR SEATBACK FRAME SUB-ASSEMBLY RH |
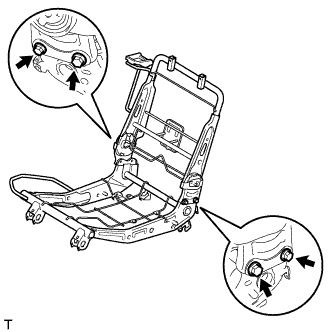 |
Remove the 4 bolts and seatback frame.
| 31. REMOVE NO. 1 FOLD SEAT LOCK CONTROL CABLE ASSEMBLY RH |
Cut off the 2 cable ties.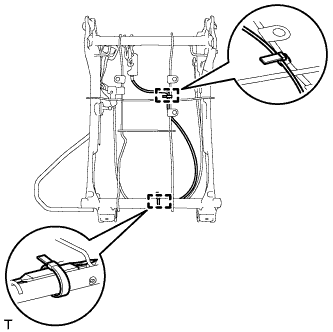
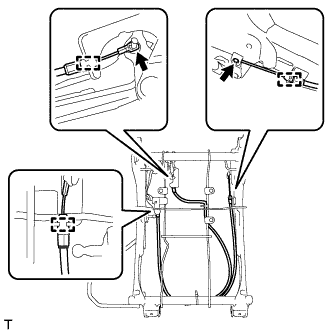
Detach the 3 cable clamps, and then disconnect the cable and remove it.