1KD-FTV ENGINE MECHANICAL ENGINE UNIT DISASSEMBLY
CAUTION / NOTICE / HINT
- NOTICE:
- ·
When replacing the injectors (including shuffling the injectors between the cylinders), common rail or cylinder head, it is necessary to replace the injection pipes with new ones.
·When replacing the fuel supply pump, common rail, cylinder block, cylinder head, cylinder head gasket or timing gear case, it is necessary to replace the fuel inlet pipe with a new one.
PROCEDURE

 12108
1.REMOVE OIL FILLER CAP SUB-ASSEMBLY
23681A
2.REMOVE NOZZLE HOLDER SEAL
11201
3.REMOVE CYLINDER HEAD COVER SUB-ASSEMBLY
23670
4.REMOVE INJECTOR ASSEMBLY
13523P
5.REMOVE CAMSHAFT TIMING PULLEY
11322B
6.REMOVE NO. 2 TIMING BELT COVER
12581C
7.REMOVE CYLINDER BLOCK INSULATOR
13511
8.REMOVE CAMSHAFT
13751
9.REMOVE VALVE LIFTER
Remove the valve lifters.
- HINT:
-
Arrange the valve lifters in the correct order.
11101
10.REMOVE CYLINDER HEAD SUB-ASSEMBLY
11115
11.REMOVE CYLINDER HEAD GASKET
16100
12.REMOVE WATER PUMP ASSEMBLY
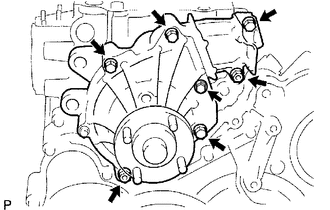
Remove the 5 bolts, 2 nuts, water pump and gasket.
13.REMOVE TIMING GEAR COVER
- NOTICE:
-
As the fuel supply pump is not installed, the injection gear is loose inside the timing gear case. Do not allow the injection gear to fall.
- HINT:
-
To prevent the injection gear from falling, temporarily install the fuel supply pump.
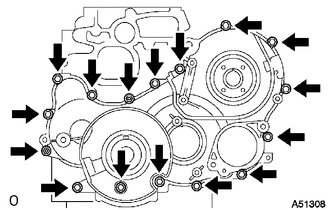
Remove the 14 bolts and 2 nuts.
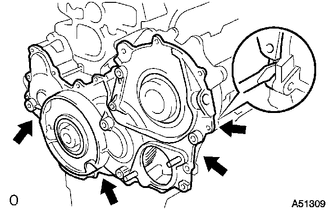
Pry the gear cover at the locations shown in the illustration, and remove the gear cover together with the injection gear.
- NOTICE:
-
Be careful not to drop the injection gear.
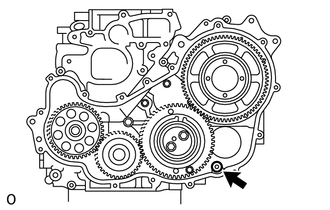
Remove the O-ring from the timing gear case.
13613E
14.REMOVE INJECTION GEAR
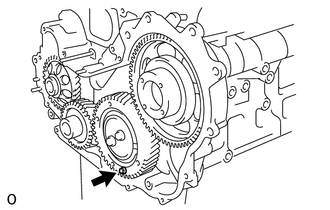
Secure the No. 2 idle sub gear to the No. 1 idle gear with a service bolt.
- Torque:
- 8.0 N*m (82 kgf*cm, 71 in.*lbf)
- NOTICE:
-
If the bolt hole of the No. 2 idle sub gear is not aligned with the bolt hole of the No. 1 idle gear, rotate the crankshaft counterclockwise to align the bolt holes. Then install the service bolt.
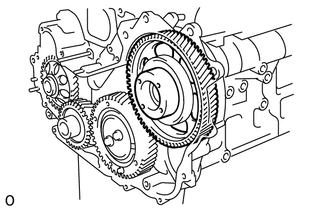
Remove the injection gear.
19315
15.REMOVE NO. 1 CRANKSHAFT POSITION SENSOR PLATE
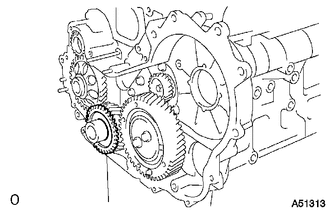
Remove the No. 1 crankshaft position sensor plate.
13521
16.REMOVE CRANKSHAFT TIMING GEAR
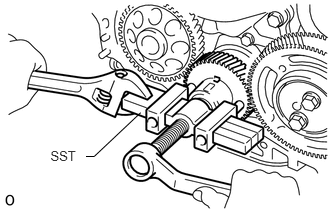
Using SST, remove the crankshaft timing gear.
- SST
- 09950-50013 (09951-05010, 09952-05010, 09953-05010, 09954-05021)
13572
17.REMOVE IDLE GEAR THRUST PLATE
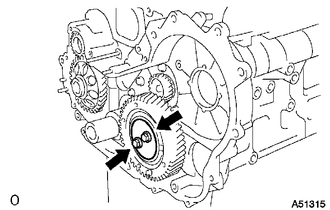
Remove the 2 bolts and thrust plate.
13525
18.REMOVE NO. 1 IDLE GEAR
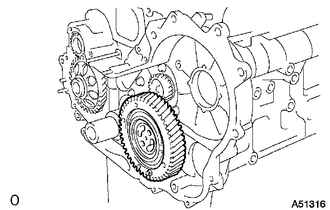
Remove the No. 1 idle gear together with No. 2 idle sub gear.
13537
19.REMOVE NO. 1 IDLE SUB GEAR
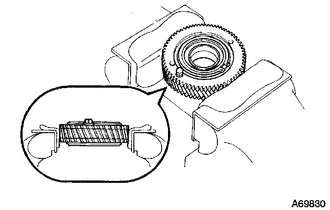
Mount the No. 1 idle gear and No. 2 idle sub gear in a vise.
- NOTICE:
-
Be careful not to damage the gears.
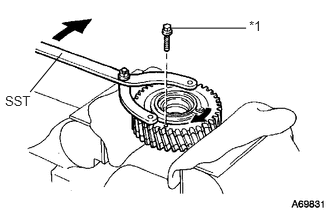
Using SST, turn the No. 1 idle sub gear clockwise and remove the service bolt.
- SST
- 09960-10010 (09962-01000, 09963-00600)
| *1 | Service Bolt |
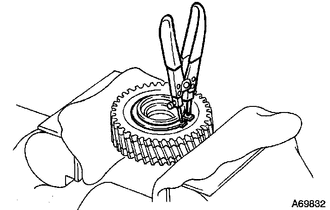
Using snap ring pliers, remove the shaft snap ring.
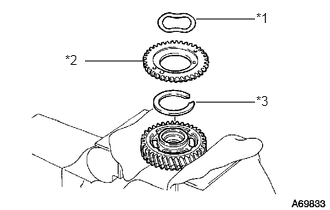
Remove the wave washer, No. 1 idle sub gear and idle gear spring.
| *1 | Wave Washer |
| *2 | No. 1 Idle Sub Gear |
| *3 | Idle Gear Spring |
13538
20.REMOVE NO. 2 IDLE SUB GEAR
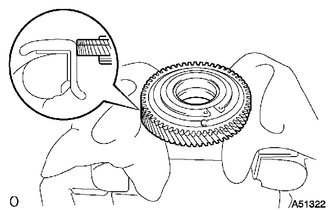
Turn the No. 1 idle gear over and set it in a vise.
- NOTICE:
-
Be careful not a damage the gear.
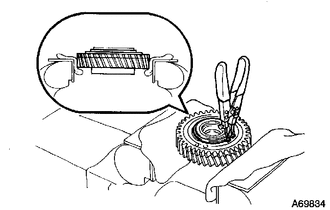
Using snap ring pliers, remove the shaft snap ring.
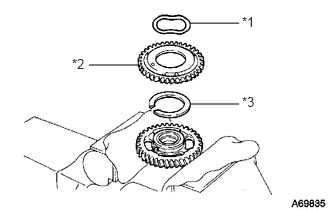
Remove the wave washer, No. 2 idle sub gear and idle gear spring.
| *1 | Wave Washer |
| *2 | No. 2 Idle Sub Gear |
| *3 | Idle Gear Spring |
13581
21.REMOVE NO. 1 IDLE GEAR SHAFT
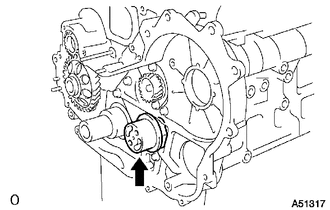
Remove the idle gear shaft.
12102A
22.REMOVE NO. 2 OIL PAN SUB-ASSEMBLY
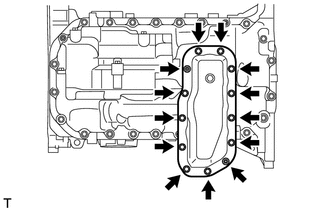
Remove the 11 bolts and 2 nuts.
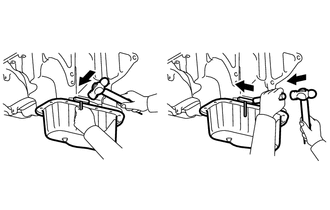
Insert the blade of an oil pan seal cutter between the oil pans. Cut through the applied sealer and remove the No. 2 oil pan.
15104
23.REMOVE OIL STRAINER SUB-ASSEMBLY
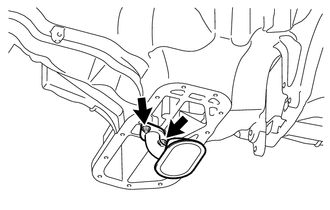
Remove the 2 nuts, oil strainer and gasket.
12101
24.REMOVE OIL PAN SUB-ASSEMBLY
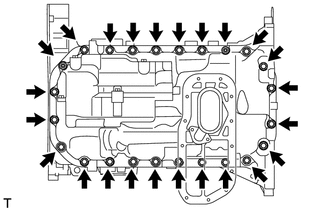
Remove the 22 bolts and 2 nuts.
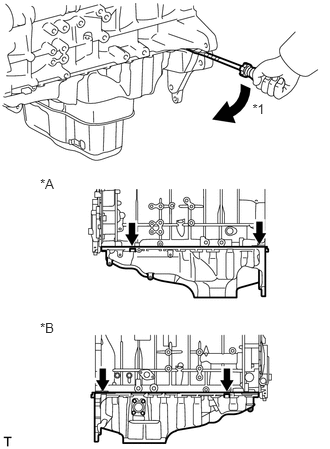
Using a screwdriver, remove the oil pan by prying between the oil pan and cylinder block as shown in the illustration.
| *A | LH Side |
| *B | RH Side |
| *1 | Pry |
- HINT:
-
Tape the screwdriver tip before use.
- NOTICE:
-
Be careful not to damage the contact surfaces of the cylinder block and oil pan.
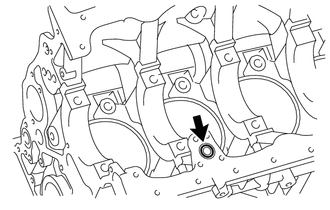
Remove the gasket.
11320
25.REMOVE TIMING GEAR CASE ASSEMBLY
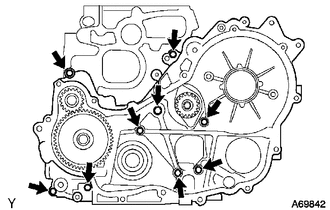
Remove the union bolt and 8 bolts.
Pry the gear case at the location shown in the illustration, and remove the gear case and gasket.
Remove the 2 O-rings.
26.INSPECT NO. 1 BALANCESHAFT THRUST CLEARANCE
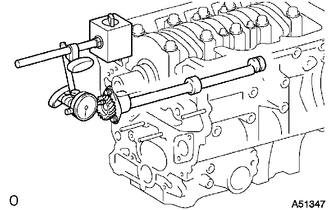
Using a dial indicator, measure the thrust clearance while moving the No. 1 balanceshaft back and forth.
- Standard thrust clearance:
0.065 to 0.140 mm (0.00256 to 0.00551 in.)
- Maximum thrust clearance:
0.25 mm (0.00984 in.)
If the thrust clearance is more than the maximum clearance, replace the balanceshaft thrust washer.
If the thrust clearance would still be more than the maximum clearance, replace the No. 1 baranceshaft sub-assembly.
13601A
27.REMOVE NO. 1 BALANCESHAFT SUB-ASSEMBLY
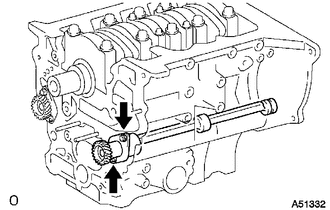
Remove the 2 bolts and balanceshaft.
13632
28.REMOVE NO. 1 BALANCESHAFT DRIVEN GEAR
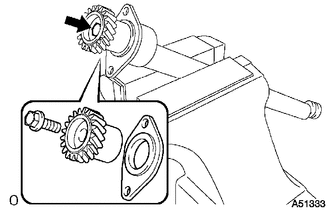
Mount the balanceshaft between aluminum plates in a vise.
- NOTICE:
-
Be careful not to damage the balanceshaft.
Remove the bolt, balanceshaft driven gear and balanceshaft thrust washer.
29.INSPECT NO. 2 BALANCESHAFT THRUST CLEARANCE
Using a dial indicator, measure the thrust clearance while moving the No. 2 balanceshaft back and forth.
- Standard thrust clearance:
0.065 to 0.140 mm (0.00256 to 0.00551 in.)
- Maximum thrust clearance:
0.25 mm (0.00984 in.)
If the thrust clearance is more than the maximum clearance, replace the balanceshaft thrust washer.
If the thrust clearance would still be more than the maximum clearance, replace the No. 2 baranceshaft sub-assembly.
13602
30.REMOVE NO. 2 BALANCESHAFT SUB-ASSEMBLY
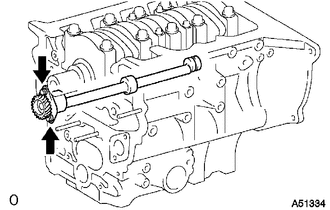
Remove the 2 bolts and balanceshaft.
13633
31.REMOVE NO. 2 BALANCESHAFT DRIVEN GEAR
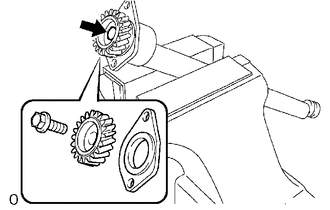
Mount the balanceshaft between aluminum plates in a vise.
- NOTICE:
-
Be careful not to damage the balanceshaft.
Remove the bolt, balance shaft driven gear and balanceshaft thrust washer.
11381
32.REMOVE REAR ENGINE OIL SEAL RETAINER
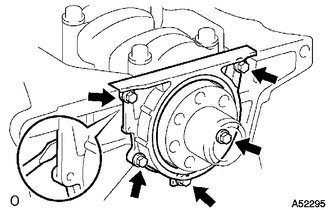
Remove the 5 bolts.
Using a screwdriver, remove the oil seal retainer by prying between the oil seal retainer and cylinder block.
33.REMOVE FRONT CRANKSHAFT OIL SEAL
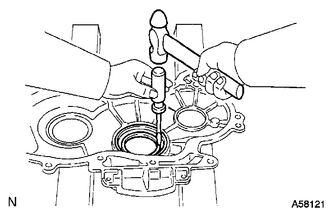
Using a screwdriver and hammer, tap out the oil seal.
11301C
34.REMOVE SUPPLY PUMP OIL SEAL
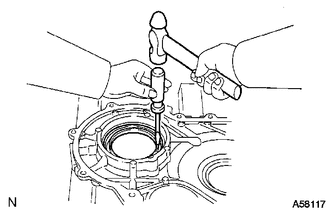
Using a screwdriver and hammer, tap out the oil seal.
35.REMOVE REAR CRANKSHAFT OIL SEAL
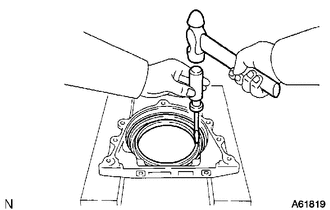
Using a screwdriver and hammer, tap out the oil seal.