AUDIO / VIDEO INSTRUMENT PANEL SPEAKER REMOVAL
CAUTION / NOTICE / HINT
- HINT:
- ·
Use the same procedure for the RH and LH sides.
·The procedure listed below is for the LH side.
PROCEDURE

 1. PRECAUTION
- NOTICE:
-
After turning the ignition switch off, waiting time may be required before disconnecting the cable from the battery terminal. Therefore, make sure to read the disconnecting the cable from the battery terminal notice before proceeding with work.
-
Click hereGeneral>INTRODUCTION>REPAIR INSTRUCTION>PRECAUTION
2.DISCONNECT CABLE FROM NEGATIVE BATTERY TERMINAL
- NOTICE:
-
When disconnecting the cable, some systems need to be initialized after the cable is reconnected.
-
Click hereGeneral>INTRODUCTION>REPAIR INSTRUCTION>INITIALIZATION
74616C
3.REMOVE FRONT NO. 1 ASSIST GRIP PLUG LH
74611F
4.REMOVE NO. 1 ASSIST GRIP
62212
5.REMOVE FRONT PILLAR GARNISH LH
55408F
6.REMOVE NO. 1 INSTRUMENT PANEL SPEAKER PANEL SUB-ASSEMBLY
86160P
7.REMOVE FRONT NO. 2 SPEAKER ASSEMBLY
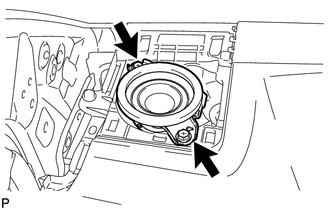
Remove the 2 screws.
Disconnect the connector and remove the front No. 2 speaker assembly.
- NOTICE:
-
Do not touch the cone of the speaker.
86140A
8.REMOVE RADIO AND DISPLAY RECEIVER ASSEMBLY (for Radio and Display Type)
55421B
9.REMOVE UPPER INSTRUMENT CLUSTER FINISH PANEL
86160L
10.REMOVE FRONT NO. 4 SPEAKER ASSEMBLY
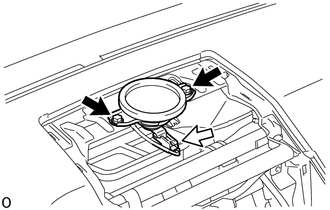

|
Screw |

|
Connector |
Remove the 2 screws.
Disconnect the connector and remove the front No. 4 speaker assembly.
- NOTICE:
-
Do not touch the cone of the speaker.