REMOVAL
Removal / installation · Vehicles built from Jan 2012
Versions by build date: Sep 2011 – Dec 2011 from Jan 2012
| 1.
REMOVE V-BANK COVER
|
 |
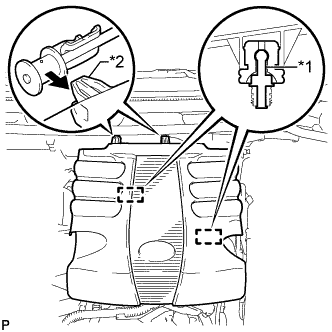
- Raise the front of the V-bank cover to detach the 2 pins. Then remove the 2 V-bank cover hooks from the bracket, and remove the V-bank cover.
Text in Illustration
*1
|
Pin
|
*2
|
Hook
|
| 2.
REMOVE NO. 1 AIR CLEANER HOSE
|
|
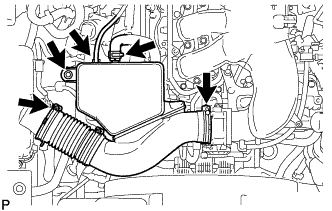
- Disconnect the No. 2 PCV hose and vacuum hose.
Remove the bolt and loosen the 2 hose clamps.
Remove the No. 1 air cleaner hose.
| 3.
REMOVE NO. 2 EMISSION CONTROL VALVE SET (w/ Secondary Air Injection System) |
|
(Click here)
| 4.
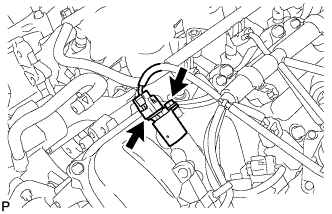
REMOVE CAMSHAFT TIMING OIL CONTROL VALVE ASSEMBLY (for Intake Side of Bank 1) |
|
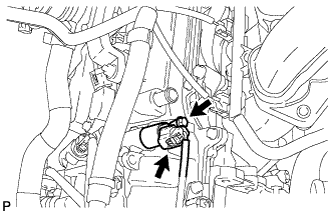
- Disconnect the camshaft timing oil control valve connector.
Remove the bolt and camshaft timing oil control valve.
Remove the O-ring from the camshaft timing oil control valve.
| 5.
REMOVE CAMSHAFT TIMING OIL CONTROL VALVE ASSEMBLY (for Exhaust Side of Bank 1) |
|
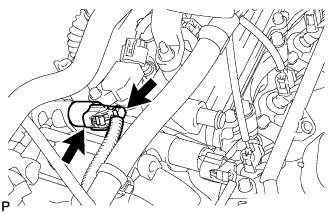
- Disconnect the camshaft timing oil control valve connector.
Remove the bolt and camshaft timing oil control valve.
Remove the O-ring from the camshaft timing oil control valve.
| 6.
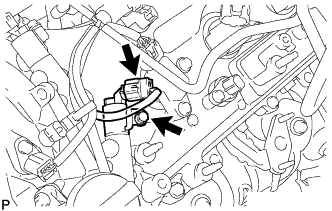
REMOVE CAMSHAFT TIMING OIL CONTROL VALVE ASSEMBLY (for Intake Side of Bank 2) |
|
- Disconnect the camshaft timing oil control valve connector.
Remove the bolt and camshaft timing oil control valve.
Remove the O-ring from the camshaft timing oil control valve.
| 7.
REMOVE CAMSHAFT TIMING OIL CONTROL VALVE ASSEMBLY (for Exhaust Side of Bank 2) |
|
- Disconnect the camshaft timing oil control valve connector.
Remove the bolt and camshaft timing oil control valve.
Remove the O-ring from the camshaft timing oil control valve.