2.
DISCONNECT CABLE FROM NEGATIVE BATTERY TERMINAL
NOTICE:
When disconnecting the cable, some systems need to be initialized after the cable is reconnected (Click here).
3.
REMOVE FRONT FENDER SPLASH SHIELD SUB-ASSEMBLY RH
HINT:
Use the same procedures described for the LH side.
4.
REMOVE FRONT FENDER SPLASH SHIELD SUB-ASSEMBLY LH
Remove the 3 bolts and screw.
Turn the clip indicated by the arrow in the illustration to remove the fender splash shield.
5.
REMOVE NO. 1 ENGINE UNDER COVER SUB-ASSEMBLY
Remove the 10 bolts and under cover.
6.
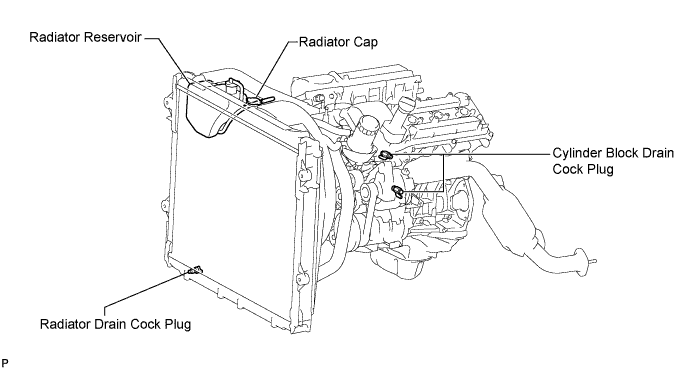
DRAIN ENGINE COOLANT
CAUTION:
Do not remove the radiator cap while the engine and radiator are still hot. Pressurized, hot engine coolant and steam may be released and cause serious burns.
Loosen the radiator drain cock plug and 2 cylinder block drain cock plugs.
Remove the radiator cap. Then drain the coolant.
HINT:
Collect the coolant in a container and dispose of it according to the regulations in your area.
Tighten the 2 cylinder block drain cock plugs.
Torque:
13 N*m{
133 kgf*cm
, 10 ft.*lbf
}
Tighten the radiator drain cock plug by hand.
7.
REMOVE COWL TOP VENTILATOR LOUVER SUB-ASSEMBLY
Remove the cowl top ventilator louver (Click here).
8.
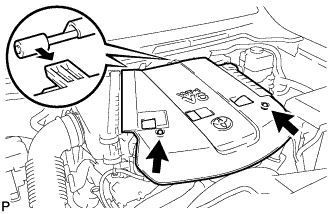
REMOVE V-BANK COVER
Remove the 2 nuts and V-bank cover.
9.
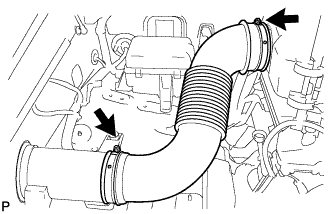
REMOVE NO. 2 AIR CLEANER HOSE
Loosen the 2 hose clamps and remove the air cleaner hose.
10.
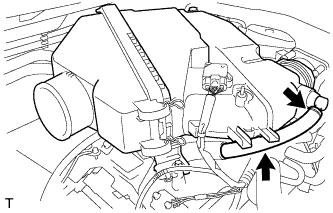
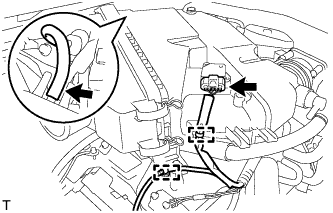
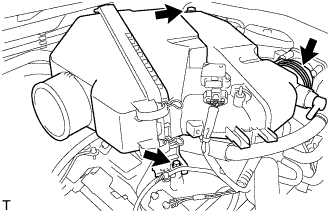
REMOVE AIR CLEANER ASSEMBLY
Disconnect the No. 2 ventilation hose.
Detach the hose clamp.
Disconnect the vacuum hose.
Disconnect the MAF meter connector.
Using a clip remover, detach the 2 wire harness clamps.
Loosen the hose clamp.
Remove the 2 bolts and air cleaner assembly.
11.
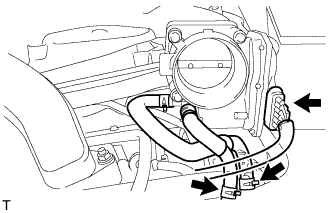
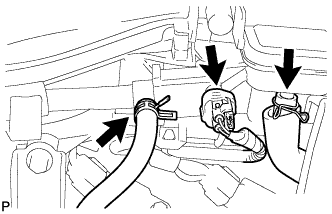
REMOVE INTAKE AIR SURGE TANK
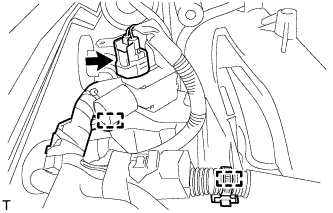
Disconnect the throttle body connector.
Disconnect the No. 4 water by-pass hose.
Disconnect the No. 5 water by-pass hose.
Disconnect the purge line hose.
Disconnect the purge VSV connector.
Disconnect the No. 1 ventilation hose.
Disconnect the vacuum switching valve (for ACIS) connector.
Using a clip remover, detach the 2 wire harness clamps.
Remove the 2 bolts and throttle body bracket.
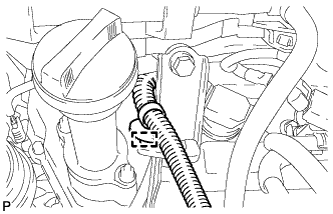
Using a clip remover, detach the wire harness clamp.
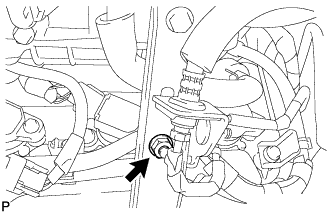
Remove the bolt and bracket from the No. 1 surge tank stay.
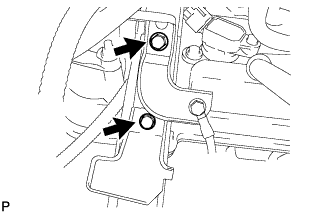
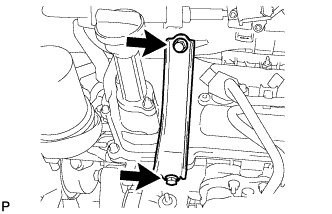
Remove the bolt and oil baffle plate.
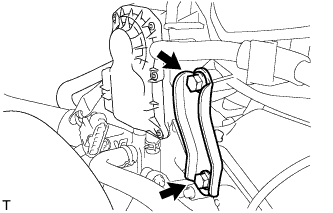
Remove the 2 bolts and No. 1 surge tank stay.
for Manual Transmission:
Remove the nut.
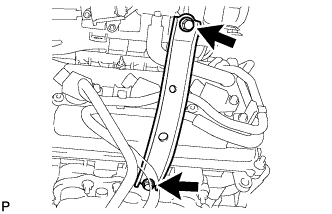
Remove the 2 bolts and No. 2 surge tank stay.
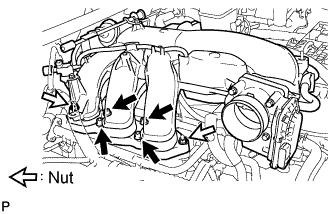
Remove the 2 nuts.
Using an 8 mm hexagon wrench, remove the 4 bolts. Then remove the intake air surge tank and gasket.
12.
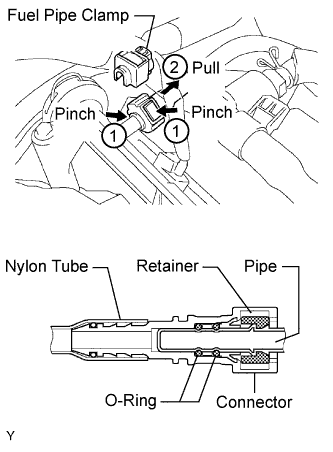
DISCONNECT NO. 1 FUEL PIPE SUB-ASSEMBLY
Remove the fuel pipe clamp.
Pinch the tube connector, and then pull the fuel pipe out of the delivery pipe as shown in the illustration.
NOTICE:
Remove any dirt and foreign objects from the fuel tube connector before performing this work.
Do not allow any scratches or foreign objects on the parts when disconnecting, as the fuel tube connector has the O-ring that seals the pipe.
Perform this work by hand. Do not use any tools.
Do not forcibly bend, twist or turn the nylon tube.
Keep the plug free from foreign objects.
Protect the disconnected part by covering it with a plastic bag after disconnecting the fuel tube.
If the fuel tube connector and pipe are stuck, push and pull to release them.
13.
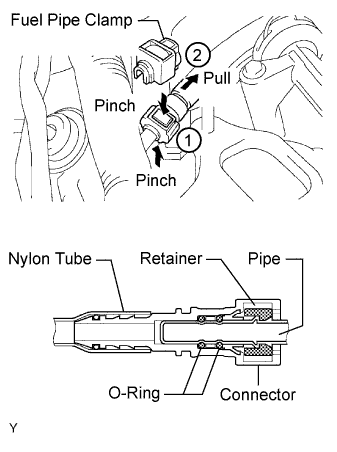
DISCONNECT NO. 2 FUEL PIPE SUB-ASSEMBLY
Remove the fuel pipe clamp.
Pinch the tube connector, and then pull the fuel pipe out of the pipe as shown in the illustration.
NOTICE:
Remove any dirt and foreign objects from the fuel tube connector before performing this work.
Do not allow any scratches or foreign objects on the parts when disconnecting, as the fuel tube connector has the O-ring that seals the pipe.
Perform this work by hand. Do not use any tools.
Do not forcibly bend, twist or turn the nylon tube.
Keep the plug free from foreign objects.
Protect the disconnected part by covering it with a plastic bag after disconnecting the fuel tube.
If the fuel tube connector and pipe are stuck, push and pull to release them.
14.
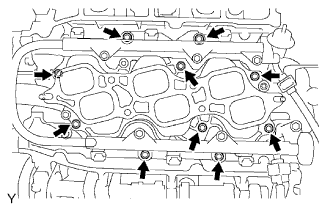
REMOVE INTAKE MANIFOLD
Disconnect the 6 fuel injector connectors.
Remove the 10 bolts, intake manifold and 2 gaskets.
15.
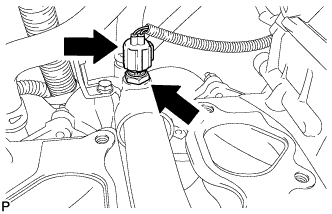
REMOVE ENGINE COOLANT TEMPERATURE SENSOR
Disconnect the sensor connector.
Using a 19 mm deep socket wrench, remove the sensor.