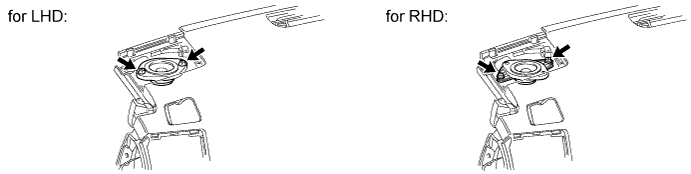
Use the same procedures for the LH side and RH side.
The procedures listed below are for the LH side.
1.
PRECAUTION
NOTICE:
After turning the ignition switch off, waiting time may be required before disconnecting the cable from the battery terminal. Therefore, make sure to read the disconnecting the cable from the battery terminal notice before proceeding with work (Click here).
2.
DISCONNECT CABLE FROM NEGATIVE BATTERY TERMINAL
NOTICE:
When disconnecting the cable, some systems need to be initialized after the cable is reconnected (Click here).
3.
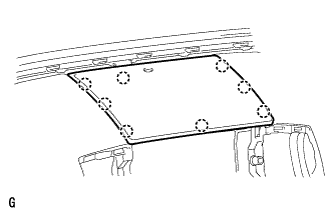
REMOVE NO. 1 SPEAKER OPENING COVER ASSEMBLY
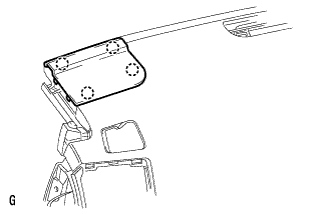
Detach the 8 claws and remove the opening cover.
4.
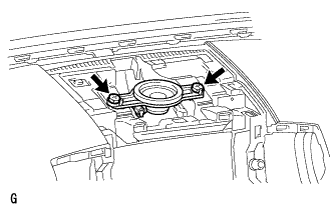
REMOVE FRONT NO. 4 SPEAKER ASSEMBLY
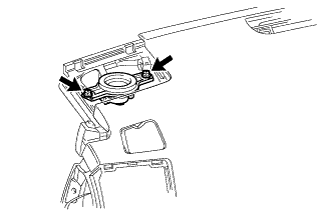
Remove the 2 bolts.
Remove the speaker and then disconnect the speaker connector.
NOTICE:
Do not touch the cone part of the speaker.
5.
REMOVE FRONT ASSIST GRIP SUB-ASSEMBLY
HINT:
Use the same procedure to remove the front assist grip on the other side.
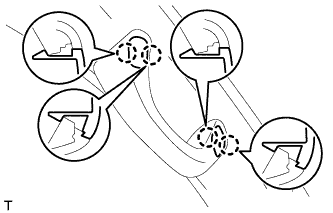
Detach the 4 claws and remove the 2 assist grip plugs.
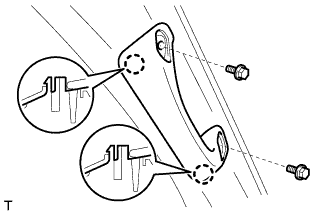
Remove the 2 bolts.
Detach the 2 claws and remove the front assist grip.
6.
REMOVE FRONT PILLAR GARNISH LH
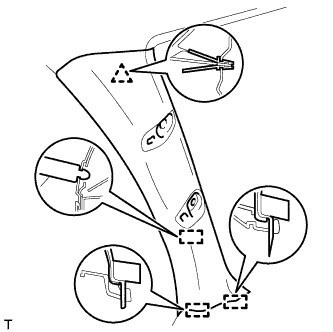
Detach the clip and 3 guides, and remove the front pillar garnish.
for 9, 14 Speakers: Disconnect the speaker connector and then remove the front pillar garnish.
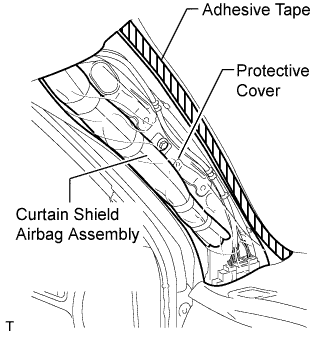
Protect the curtain shield airbag.
Thoroughly cover the airbag with a cloth or nylon sheet and fix the ends of the cover with adhesive tape, as shown in the illustration.
NOTICE:
Cover the curtain shield airbag with a protective cover as soon as the front pillar garnish is removed.