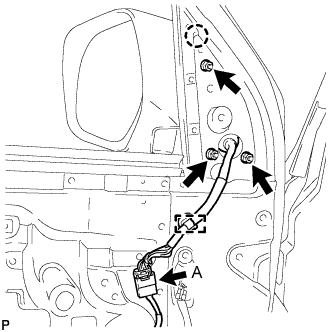
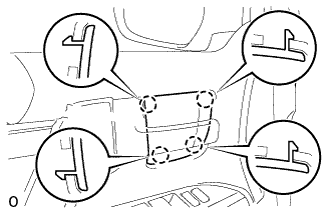
Attach the claw and Install the mirror with the 3 nuts.
Torque:
8.0 N*m{
82 kgf*cm
, 71 in.*lbf
}
w/ Power Mirror Control System:
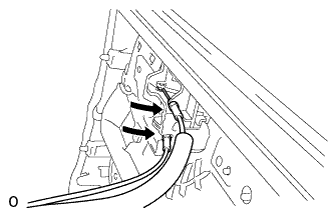
Attach the clamp.
Connect the connector labeled A.
2.
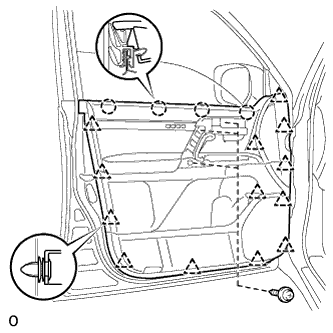
INSTALL FRONT DOOR TRIM BOARD SUB-ASSEMBLY
Connect the connector.
Connect the front door lock remote control cable assembly LH and front door inside locking cable assembly LH to the front door inside handle sub-assembly LH.
Attach the 4 claws and 13 clips to install the front door trim board sub-assembly LH.
Install the 3 screws.
3.
INSTALL FRONT DOOR LOWER FRAME BRACKET GARNISH
Attach the clip and claw, and install the front door lower frame bracket garnish LH.
4.
INSTALL DOOR ASSIST GRIP COVER
Attach the 8 claws to install the door assist grip cover LH to the front door trim board sub-assembly LH.
5.
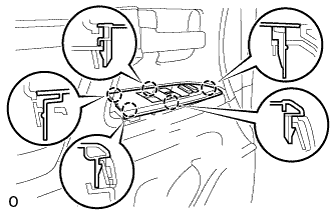
INSTALL FRONT UPPER ARMREST BASE PANEL LH
Connect the connector.
Attach the 5 claws to install the armrest base panel.
6.
INSTALL FRONT DOOR INSIDE HANDLE BEZEL
Attach the 4 claws to install the front door inside handle bezel LH.
7.
CONNECT CABLE TO NEGATIVE BATTERY TERMINAL
NOTICE:
When disconnecting the cable, some systems need to be initialized after the cable is reconnected (Click here).