2011-2013 Land Cruiser · Service Manual Engine / Hybrid / EV System

REMOVAL

Removal / installation · Vehicles built from Jan 2012

Versions by build date: Sep 2011 – Dec 2011 from Jan 2012


1. REMOVE GENERATOR ASSEMBLY
(Click here)

2. REMOVE COOLER COMPRESSOR ASSEMBLY
(Click here)

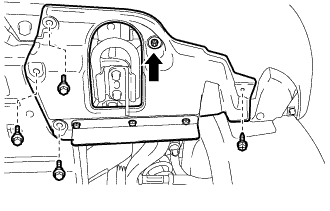
3. REMOVE FRONT FENDER SPLASH SHIELD SUB-ASSEMBLY LH

  1. B310791
    Remove the 3 bolts and screw.

  1. Turn the clip indicated by the arrow in the illustration to remove the front fender splash shield sub-assembly LH.


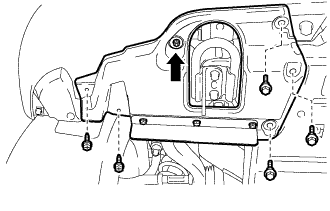
4. REMOVE FRONT FENDER SPLASH SHIELD SUB-ASSEMBLY RH

  1. B310792
    Remove the 3 bolts and 2 screws.

  1. Turn the clip indicated by the arrow in the illustration to remove the front fender splash shield sub-assembly RH.


5. REMOVE NO. 1 ENGINE UNDER COVER SUB-ASSEMBLY

  1. A178461
    Remove the 10 bolts and No. 1 engine under cover.


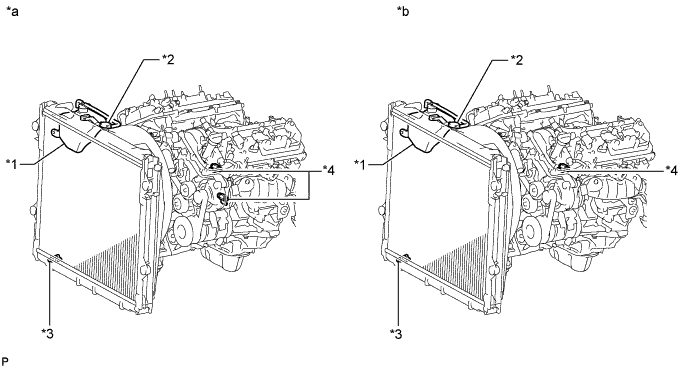
6. DRAIN ENGINE COOLANT

CAUTION:
Do not remove the radiator cap while the engine and radiator are still hot. Pressurized, hot engine coolant and steam may be released and cause serious burns.


A274035E01
Text in Illustration 
*1
Radiator Reservoir
*2
Radiator Cap
*3
Radiator Drain Cock Plug
*4
Cylinder Block Water Drain Cock Plug
*a
for Type A
*b
for Type B
  1. for Type A:
    Loosen the radiator drain cock plug and 2 cylinder block water drain cock plugs.

  1. for Type B:
    Loosen the radiator drain cock plug and cylinder block water drain cock plug.

  1. Remove the radiator cap. Then drain the coolant.

    HINT:
    Collect the coolant in a container and dispose of it according to the regulations in your area.

  1. for Type A:
    Tighten the 2 cylinder block water drain cock plugs.

    Torque:
    13 N*m{ 130 kgf*cm , 9 ft.*lbf }

  1. for Type B:
    Tighten the cylinder block water drain cock plug.

    Torque:
    13 N*m{ 130 kgf*cm , 9 ft.*lbf }

  1. Tighten the radiator drain cock plug by hand.


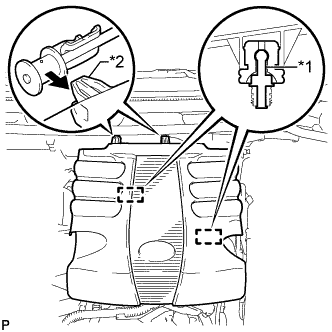
7. REMOVE V-BANK COVER

  1. A267633E01
    Raise the front of the V-bank cover to detach the 2 pins. Then remove the 2 V-bank cover hooks from the bracket, and remove the V-bank cover.
    Text in Illustration 
    *1
    Pin
    *2
    Hook


8. REMOVE NO. 1 RADIATOR HOSE

9. REMOVE NO. 2 RADIATOR HOSE

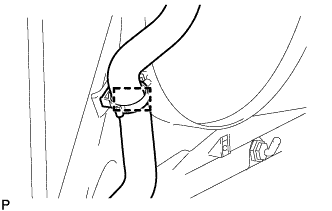
  1. A273588
    Detach the clamp and remove the No. 2 radiator hose.


10. DISCONNECT OIL COOLER TUBE (w/ Air Cooled Transmission Oil Cooler)

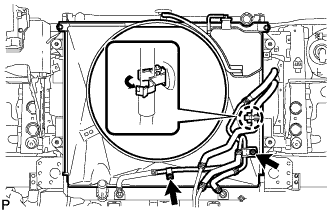
  1. A266158
    Detach the claw to open the flexible hose clamp, and then remove the 2 bolts to disconnect the oil cooler tube from the fan shroud.


11. REMOVE FAN SHROUD
  1. Loosen the 4 nuts holding the fluid coupling fan.

  1. Remove the fan and generator V-belt (Click here).

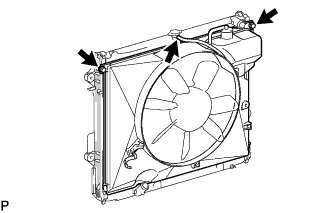
  1. A273614
    Disconnect the reservoir hose from the upper side of the radiator tank.

  1. Remove the 2 bolts holding the fan shroud.

  1. Remove the 4 nuts of the fluid coupling fan, and then remove the shroud together with the coupling fan.

    NOTICE:
    Be careful not to damage the radiator core.

  1. Remove the fan pulley from the water pump.


12. DISCONNECT AIR TUBE ASSEMBLY (w/ Secondary Air Injection System)

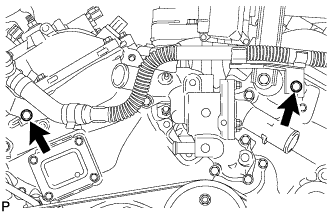
  1. A223014
    Remove the 2 bolts and disconnect the air tube.


13. REMOVE WATER INLET HOUSING
  1. Disconnect the throttle body connector.

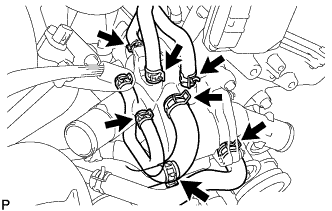
  1. A273503
    Disconnect the 5 water by-pass hoses.

  1. Disconnect the oil cooler hose.

  1. Disconnect the No. 2 oil cooler hose.

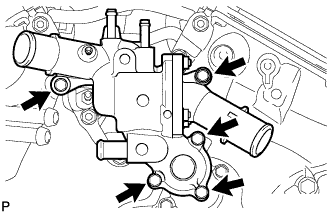
  1. A223012
    Remove the 5 bolts and water inlet.

  1. Remove the O-ring from the water outlet pipe.

  1. Remove the gasket from the water pump.


14. REMOVE NO. 2 IDLER PULLEY SUB-ASSEMBLY

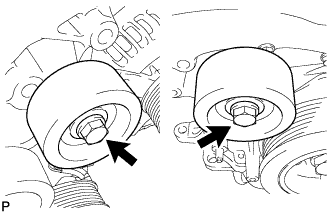
  1. A223006
    Remove the 2 bolts and 2 No. 2 idler pulleys.


15. DISCONNECT VANE PUMP ASSEMBLY

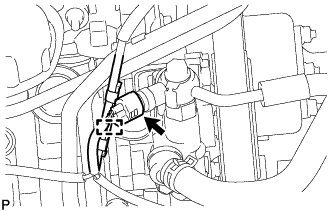
  1. A270981
    Disconnect the connector.

  1. Detach the wire harness clamp.

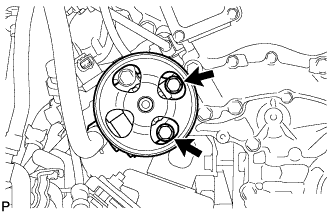
  1. A223015
    Remove the 2 bolts and disconnect the vane pump.


16. REMOVE V-RIBBED BELT TENSIONER ASSEMBLY

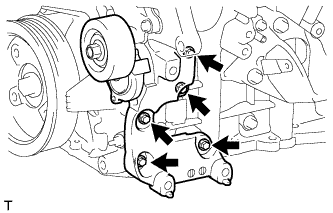
  1. A222180
    Remove the 5 bolts and V-ribbed belt tensioner.


17. REMOVE ENGINE WATER PUMP ASSEMBLY

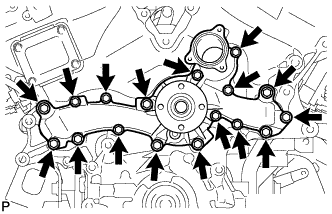
  1. A223007
    Remove the 17 bolts, engine water pump and gasket.

← REMOVAL (Sep 2011 – Dec 2011)INSTALLATION (Sep 2011 – Dec 2011) →