REMOVAL
Removal / installation · Vehicles built from Jan 2012
Versions by build date: Sep 2011 – Dec 2011 from Jan 2012
| 1.
REMOVE INTERCOOLER ASSEMBLY |
 |
Remove the intercooler assembly (Click here).
| 2.
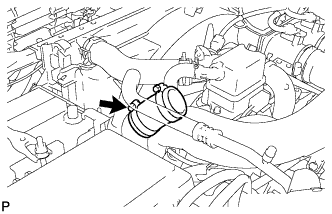
REMOVE NO. 2 AIR HOSE
|
|
- Loosen the hose clamp and remove the No. 2 air hose.
| 3.
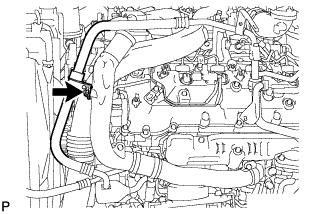
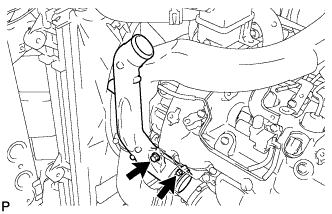
REMOVE NO. 4 AIR TUBE
|
|
- Remove the bolt and disconnect the suction hose.
- Loosen the hose clamp and remove the bolt and No. 4 air tube.
| 4.
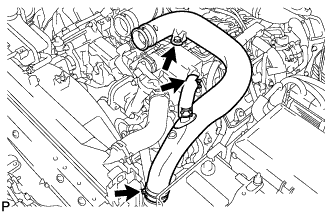
REMOVE NO. 2 AIR CLEANER PIPE SUB-ASSEMBLY
|
|
- Disconnect the ventilation hose from the oil separator.
Loosen the hose clamp.
Remove the bolt and No. 2 air cleaner pipe.
| 5.
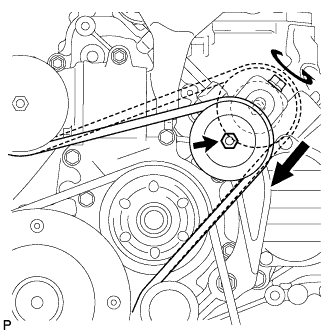
REMOVE V-RIBBED BELT (w/ Viscous Heater)
|
|
- Loosen the lock nut and turn the bolt counterclockwise.
Remove the V-ribbed belt.
| 6.
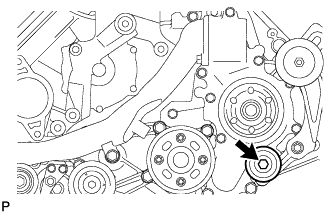
REMOVE NO. 2 IDLER PULLEY (w/ Viscous Heater)
|
|
- Remove the bolt, cover, No. 2 idler pulley and collar.
| 7.
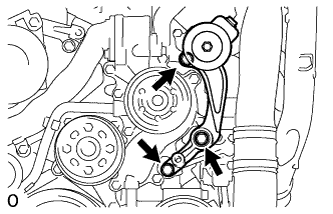
REMOVE NO. 2 IDLER PULLEY BRACKET (w/ Viscous Heater)
|
|
- Remove the 3 bolts and idler pulley bracket.
| 8.
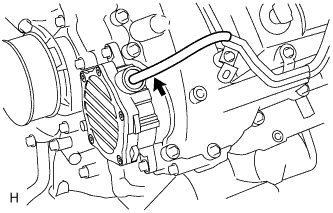
DISCONNECT UNION TO CONNECTOR TUBE HOSE |
|
- Disconnect the hose from the vacuum pump.
| 9.
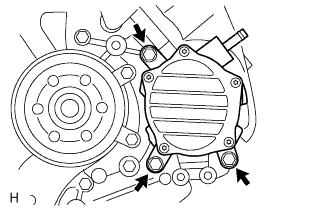
REMOVE VACUUM PUMP ASSEMBLY |
|
- Remove the 3 bolts and vacuum pump.
Remove the 2 O-rings.