DISASSEMBLY
Removal / installation · Vehicles built Sep 2011 – Dec 2011
Versions by build date: Sep 2011 – Dec 2011 from Jan 2012
| 1.
DISCONNECT CABLE FROM NEGATIVE BATTERY TERMINAL |
 |
- NOTICE:
- When disconnecting the cable, some systems need to be initialized after the cable is reconnected (Click here).
| 2.
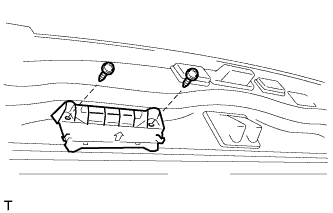
REMOVE BACK DOOR GRIP |
|
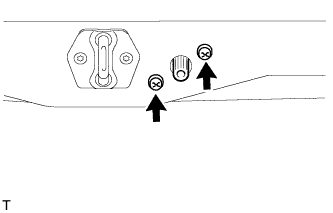
- Remove the 2 screws and back door grip.
| 3.
REMOVE LOWER BACK DOOR STOPPER CUSHION |
|
Remove the 4 bolts and 2 lower back door stopper cushions.
| 4.
REMOVE CENTER BACK DOOR GARNISH |
|
- Detach the 5 clips and 2 claws, and remove the back door garnish.
| 5.
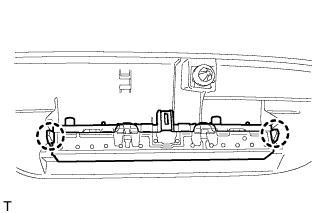
REMOVE CENTER STOP LIGHT ASSEMBLY
|
|
- Detach the 2 claws and remove the stop light.
| 6.
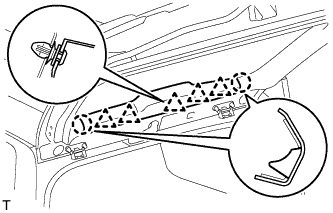
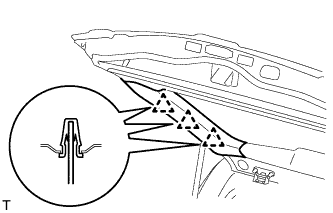
REMOVE BACK DOOR SIDE GARNISH LH |
|
- Detach the 3 clips and remove the back door side garnish.
| 7.
REMOVE BACK DOOR SIDE GARNISH RH |
|
- HINT:
- Use the same procedures described for the LH side.
| 8.
REMOVE ASSIST GRIP (for Face to Face Seat Type) |
|
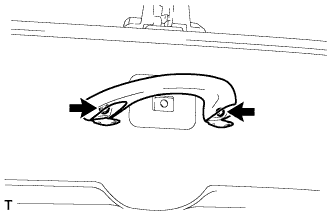
- Remove the 2 screws and assist grip.
| 9.
REMOVE NO. 2 BACK DOOR SERVICE HOLE COVER (for Face to Face Seat Type) |
|
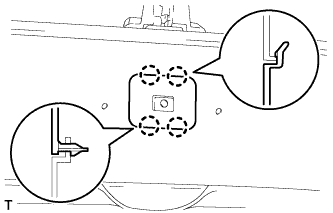
- Using a screwdriver, detach the 4 claws and remove the back door service hole cover.
Disconnect connector.
| 10.
REMOVE POWER BACK DOOR MAIN SWITCH (for Face to Face Seat Type) |
|
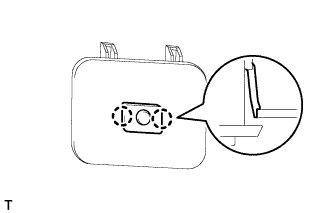
- Detach the 2 claws and remove the power back door main switch.
| 11.
REMOVE BACK DOOR GARNISH |
|
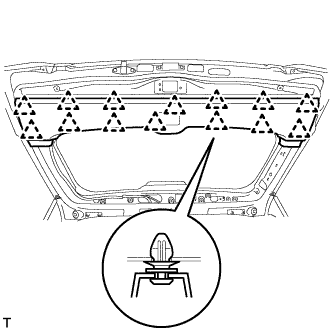
Using a screwdriver, detach the 14 clips and remove the back door garnish.
- HINT:
- Tape the screwdriver tip before use.
| 12.
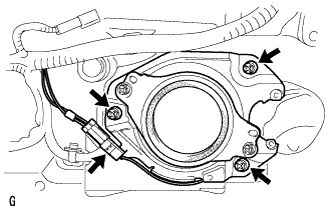
REMOVE REAR HEADER SPEAKER ASSEMBLY (for 14 Speakers)
|
|
- HINT:
- Use the same procedure as for the opposite side.
- Remove the 3 screws.
Disconnect the connector and remove the rear header speaker assembly.
| 13.
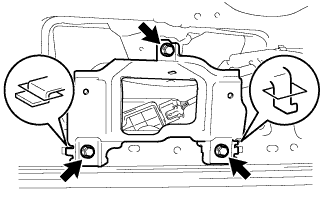
REMOVE REAR ASSIST GRIP REINFORCEMENT (for Face to Face Seat Type) |
|
- Remove the 3 bolts.
Detach the 2 claws and remove the rear assist grip reinforcement.
| 14.
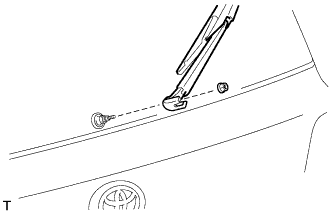
REMOVE REAR WIPER ARM (w/ Rear Wiper) |
|
- Open the cover.
Remove the nut and rear wiper arm.
| 15.
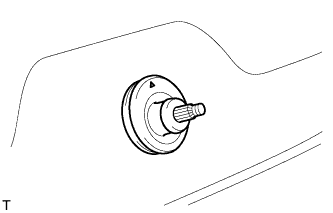
REMOVE REAR WIPER MOTOR GROMMET (w/ Rear Wiper) |
|
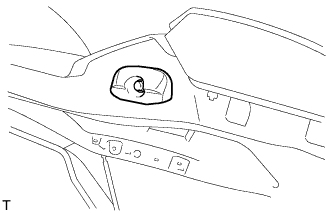
- Detach the wiper motor grommet.
| 16.
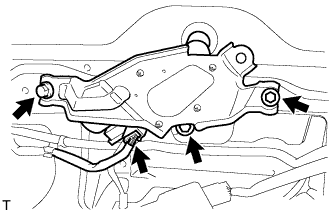
REMOVE REAR WIPER MOTOR ASSEMBLY (w/ Rear Wiper) |
|
- Disconnect the connector.
Remove the 3 bolts and rear wiper motor assembly.
| 17.
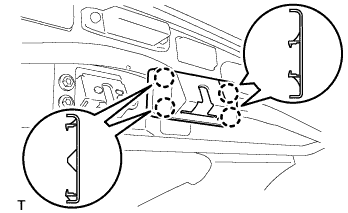
REMOVE BACK DOOR LOCK COVER |
|
- Detach the 4 claws and remove the back door lock cover.
| 18.
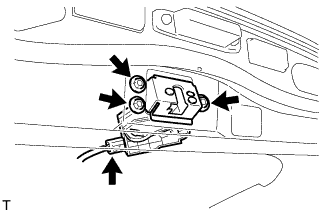
REMOVE BACK DOOR LOCK ASSEMBLY |
|
- Disconnect the connector.
Remove the 3 bolts and back door lock.
| 19.
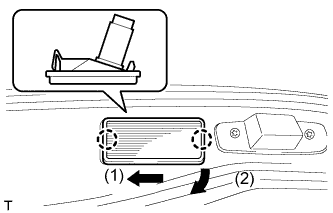
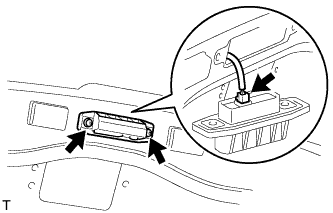
REMOVE LICENSE PLATE LIGHT LENS (for Standard)
|
|
- Detach the 2 claws in the order shown in the illustration and remove the license plate light.
Disconnect the connector.
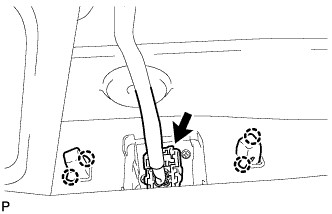
| 20.
REMOVE BACK DOOR OPENER SWITCH ASSEMBLY |
|
- Remove the 2 screws.
Disconnect the connector and then remove the back door opener switch.
| 21.
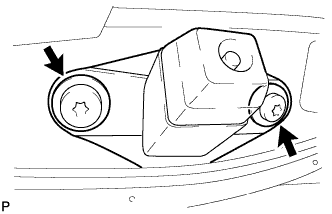
REMOVE REAR TELEVISION CAMERA ASSEMBLY (w/ Parking Assist Monitor System or Rear Veiw Monitor System)
|
|
Using a T30 "TORX" socket wrench, remove the 2 screws.
- Detach the 4 claws and remove the rear television camera assembly.
Disconnect the connector.
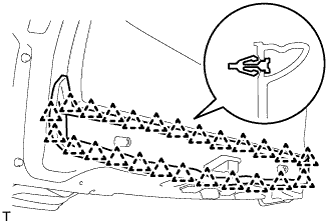
| 22.
REMOVE LIFT GATE WEATHERSTRIP |
|
- Detach the 25 clips and remove the lift gate weatherstrip.
- NOTICE:
- Do not pull strongly on the weatherstrip as it may tear.
| 23.
REMOVE LOWER BACK DOOR STOPPER |
|
- Remove the bolt and lower back door stopper.
| 24.
REMOVE BACK DOOR GARNISH SUB-ASSEMBLY OUTSIDE
|
|
Put protective tape around the back door garnish.
Detach the 4 clips and remove the double-sided tape to remove the back door garnish.
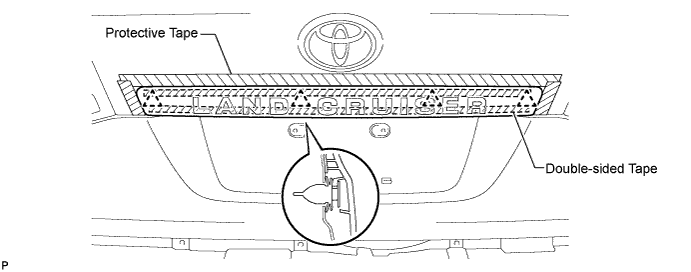

| 25.
REMOVE REAR SPOILER SUB-ASSEMBLY (w/ Rear Spoiler)
|
|
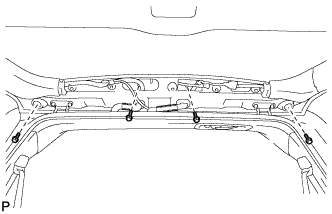
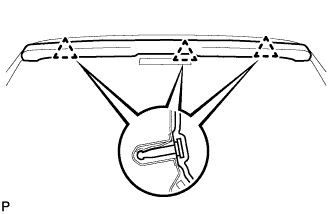
Remove the 4 bolts.
- Detach the 3 clips and remove the rear spoiler.
| 26.
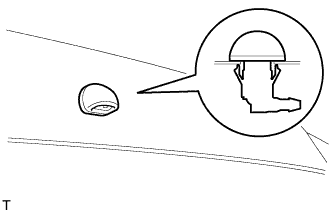
REMOVE REAR WASHER NOZZLE (w/ Rear Wiper) |
|
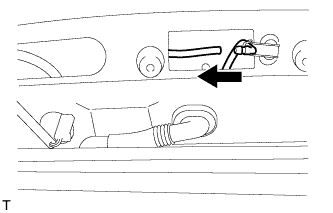
- Detach the hose.
- Detach the 2 claws and remove the washer nozzle.
| 27.
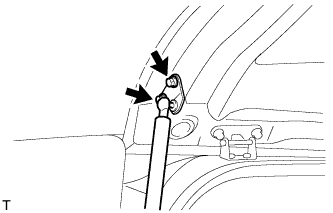
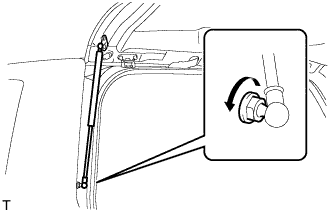
REMOVE BACK DOOR STAY ASSEMBLY LH
|
|
- Remove the 2 bolts and stay.
- CAUTION:
- Remove the door stay while supporting the back door with one hand.
- Remove the bolt and stay.
- CAUTION:
- Remove the door stay while supporting the back door with one hand.
| 28.
REMOVE BACK DOOR STAY ASSEMBLY RH |
|
- HINT:
- Use the same procedures described for the LH side.
| 29.
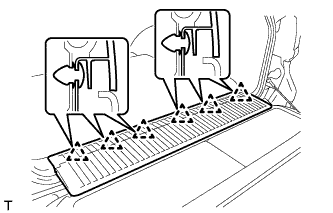
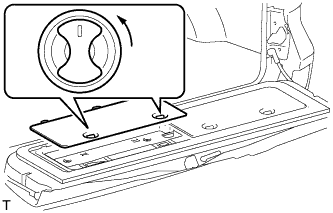
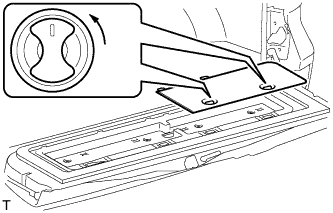
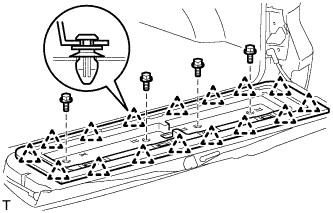
REMOVE REAR FLOOR MAT REAR SUPPORT PLATE
|
|
Detach the 6 clips and remove the support plate.
| 30.
REMOVE BACK DOOR TRIM COVER LH |
|
- Remove the back door trim cover LH as shown in the illustration.
| 31.
REMOVE BACK DOOR TRIM COVER RH |
|
- Remove the back door trim cover RH as shown in the illustration.
| 32.
REMOVE BACK DOOR TRIM PANEL ASSEMBLY |
|
- Remove the 4 bolts.
Detach the 16 clips and remove the back door trim panel.
| 33.
REMOVE NO. 2 BACK DOOR GARNISH SUB-ASSEMBLY OUTSIDE (w/ Tire Carrier) |
|
| 34.
REMOVE LICENSE PLATE LIGHT ASSEMBLY (w/ Tire Carrier) |
|
| 35.
REMOVE REAR LICENSE LIGHT COVER (w/ Tire Carrier) |
|
| 36.
REMOVE REAR BUMPER COVER |
|
for Standard:
Remove the bumper cover (Click here).
w/ Towing Hitch:
Remove the bumper cover (Click here)
w/ Pintle Hook:
Remove the bumper cover (Click here)
| 38.
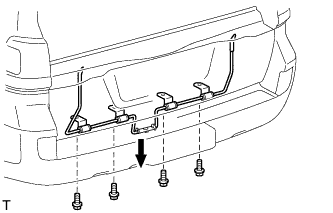
REMOVE LOWER BACK DOOR TORSION BAR ASSEMBLY |
|
- Remove the 4 bolts and lower back door torsion bar.
| 39.
REMOVE BACK DOOR TORSION BAR GUIDE |
|
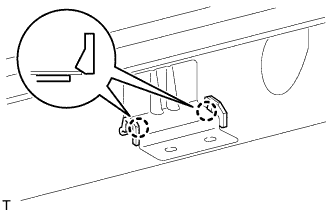
- Detach the 2 claws and remove the back door torsion bar guide.
| 40.
REMOVE BACK DOOR INSIDE HANDLE ASSEMBLY |
|
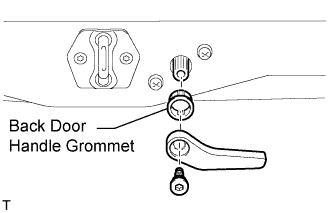
- Remove the screw and back door inside handle.
Remove the back door handle grommet.
| 41.
REMOVE LOWER TAIL GATE LOCK ASSEMBLY RH |
|
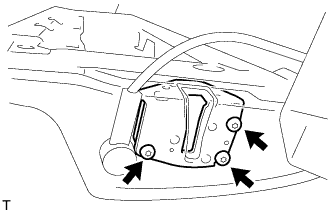
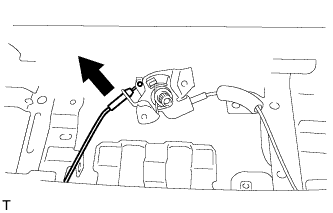
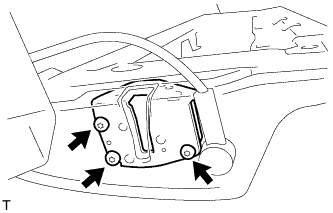
- Using a T30 "TORX" wrench, remove the 3 screws and lower tail gate lock.
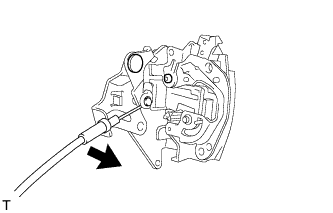
- Disconnect the cable from the the lower tail gate lock.
| 42.
REMOVE BACK DOOR REMOTE CONTROL ASSEMBLY |
|
- Remove the 2 screws.
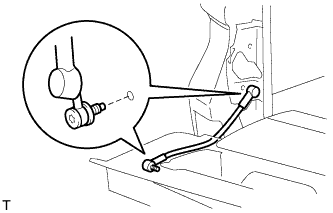
- Disconnect the left side cable.
Remove the back door remote control.
| 43.
REMOVE LOWER TAIL GATE LOCK ASSEMBLY LH |
|
- Using a T30 "TORX" wrench, remove the 3 screws and lower tail gate lock.
| 44.
REMOVE TAIL GATE STAY SUB-ASSEMBLY LH |
|
- Using a T40 "TORX" socket, remove the 2 screws and tail gate stay.
| 45.
REMOVE TAIL GATE STAY SUB-ASSEMBLY RH |
|
- HINT:
- Use the same procedures described for the LH side.