2011-2013 Land Cruiser · Service Manual Vehicle Exterior

DISASSEMBLY

Removal / installation · Vehicles built from Jan 2012

Versions by build date: Sep 2011 – Dec 2011 from Jan 2012


1. PRECAUTION

NOTICE:
After turning the ignition switch off, waiting time may be required before disconnecting the cable from the battery terminal. Therefore, make sure to read the disconnecting the cable from the battery terminal notice before proceeding with work (Click here).


2. DISCONNECT CABLE FROM NEGATIVE BATTERY TERMINAL

NOTICE:
When disconnecting the cable, some systems need to be initialized after the cable is reconnected (Click here).


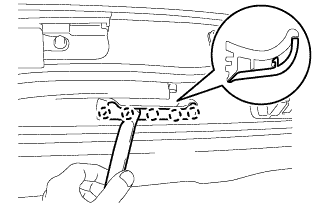
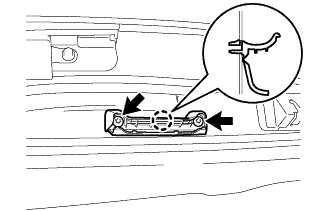
3. REMOVE BACK DOOR GRIP

  1. B309321
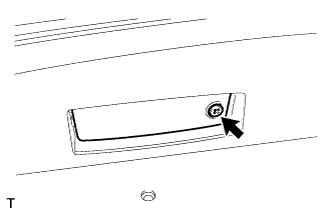
    Using a moulding remover, detach the 5 claws and open the cover.

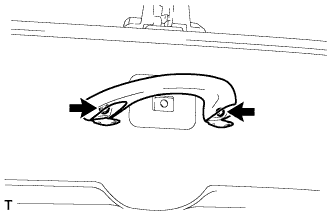
  1. B309322
    Using a T30 "TORX" wrench, remove the 2 screws.

  1. Detach the claw and remove the back door grip.


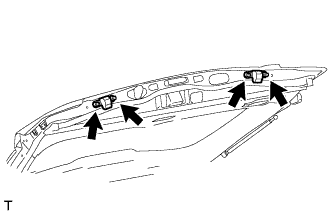
4. REMOVE LOWER BACK DOOR STOPPER CUSHION

  1. B232127
    Remove the 4 bolts and 2 lower back door stopper cushions.


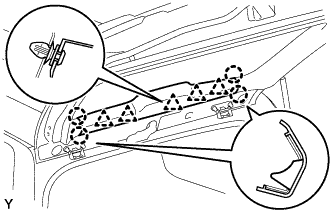
5. REMOVE CENTER BACK DOOR GARNISH

  1. B313300
    Detach the 5 clips and 4 claws, and remove the center back door garnish.


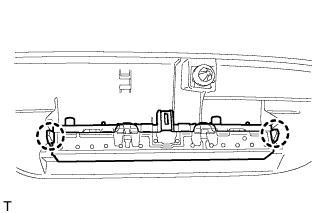
6. REMOVE CENTER STOP LIGHT ASSEMBLY

  1. E156856
    Detach the 2 claws and remove the stop light.


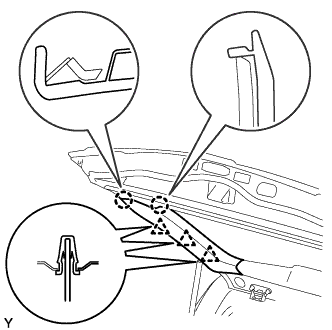
7. REMOVE BACK DOOR SIDE GARNISH LH

  1. B313301
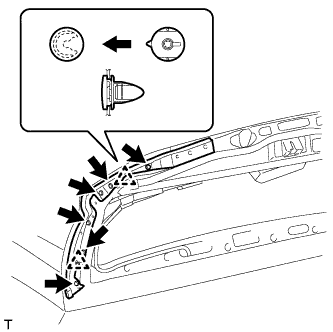
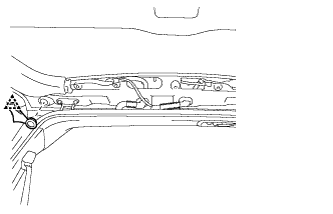
    Detach the 3 clips and 2 claws, and remove the back door side garnish LH.


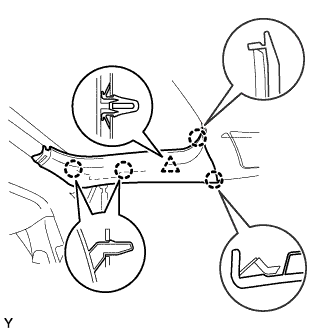
8. REMOVE BACK DOOR SIDE GARNISH RH
  1. w/o Power Back Door:

    HINT:
    Use the same procedure described for the LH side.

  1. B313302
    w/ Power Back Door:

    1. Detach the clip and 4 claws, and remove the back door side garnish RH.


9. REMOVE BACK DOOR SERVICE HOLE COVER RH (w/ Power Back Door)

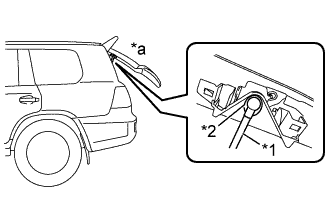
  1. B309323E01
    Move the back door to a half-open position so that the hole in the center of the back door service hole cover RH is aligned lengthwise with the power back door rod.
    Text in Illustration 
    *1
    Power Back Door Rod
    *2
    Hole of Back Door Service Hole Cover RH
    *a
    Back Door is Half-open

  1. B266396
    Detach the 2 clips and separate the back door service hole cover RH, passing the power back door rod through the hole of the back door service hole cover RH.

    NOTICE:
    If the back door is in a fully-open position, the power back door rod will interfere with the hole of the back door service hole cover RH, so do not perform this operation with the back door in a fully open position.

    HINT:
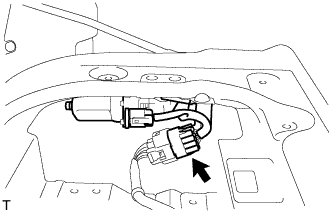
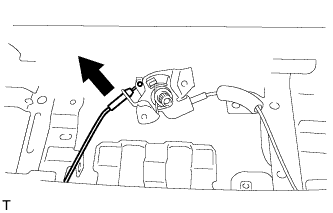
    If any of the clips have remained on the back door, remove the clips from the back door and install them to the back door service hole cover RH.

  1. B193888
    Remove the ball joint bolt, power back door rod and back door stay plate.

  1. Remove the back door service hole cover RH from the power back door rod.


10. REMOVE ASSIST GRIP (for Face to Face Seat Type)

  1. B188374
    Remove the 2 screws and assist grip.


11. REMOVE NO. 2 BACK DOOR SERVICE HOLE COVER (for Face to Face Seat Type)

  1. B186428
    Using a screwdriver, detach the 4 claws and remove the No. 2 back door service hole cover.

  1. Disconnect connector.


12. REMOVE DOOR OPENING SWITCH SUB-ASSEMBLY (for Face to Face Seat Type)

  1. B186429
    Detach the 2 claws and remove the door opening switch sub-assembly.


13. REMOVE BACK DOOR GARNISH

  1. B181329
    Using a screwdriver, detach the 14 clips and remove the back door garnish.

    HINT:
    Tape the screwdriver tip before use.


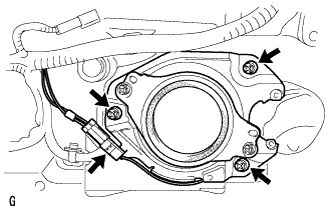
14. REMOVE REAR HEADER SPEAKER ASSEMBLY (for 14 Speakers)

HINT:
Use the same procedure as for the opposite side.

  1. B181526
    Remove the 3 screws.

  1. Disconnect the connector and remove the rear header speaker assembly.


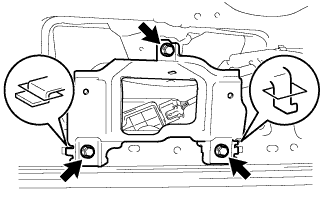
15. REMOVE REAR ASSIST GRIP REINFORCEMENT (for Face to Face Seat Type)

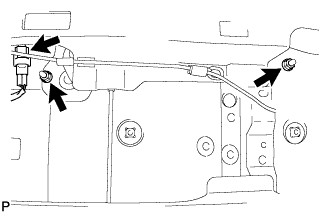
  1. B186430
    Remove the 3 bolts.

  1. Detach the 2 claws and remove the rear assist grip reinforcement.


16. REMOVE POWER BACK DOOR SENSOR ASSEMBLY LH (w/ Power Back Door)

  1. B192442
    Disconnect the connector.

  1. B232114
    Using a T25 "TORX" wrench, remove the 6 screws.

  1. Detach the 2 clips and remove the power back door sensor assembly LH.


17. REMOVE POWER BACK DOOR SENSOR ASSEMBLY RH (w/ Power Back Door)

HINT:
Use the same procedure described for the LH side.


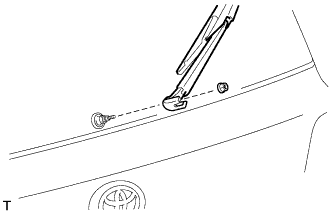
18. REMOVE REAR WIPER ARM (w/ Rear Wiper)

  1. B181332
    Open the cover.

  1. Remove the nut and rear wiper arm.


19. REMOVE REAR WIPER MOTOR GROMMET (w/ Rear Wiper)

  1. E156014
    Detach the rear wiper motor grommet.


20. REMOVE REAR WIPER MOTOR ASSEMBLY (w/ Rear Wiper)

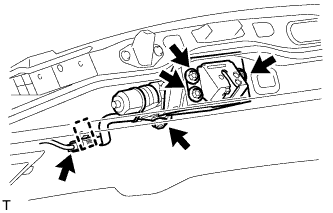
  1. B181333
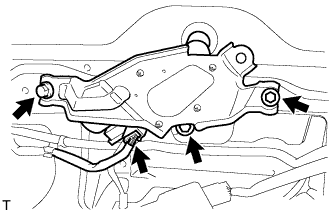
    Disconnect the connector.

  1. Remove the 3 bolts and rear wiper motor assembly.


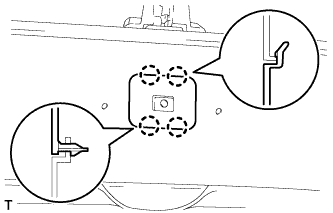
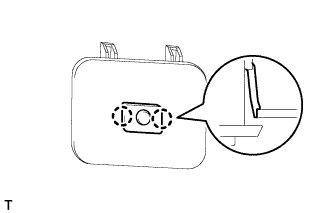
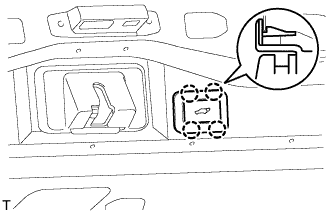
21. REMOVE BACK DOOR LOCK COVER

  1. B300746
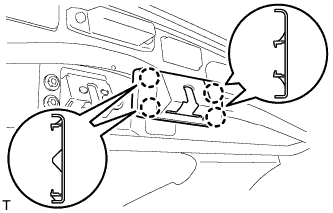
    Detach the 4 claws and remove the back door lock cover.


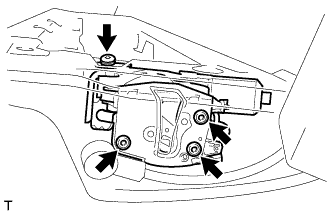
22. REMOVE BACK DOOR LOCK ASSEMBLY

  1. B181330
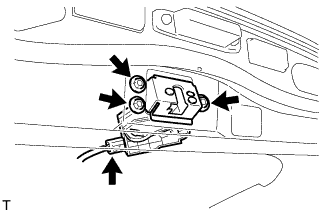
    w/o Power Back Door:

    1. Disconnect the connector.

    2. Remove the 3 bolts and back door lock assembly.

  1. B300764
    w/ Power Back Door:

    1. Disconnect the connector.

    2. Detach the guide.

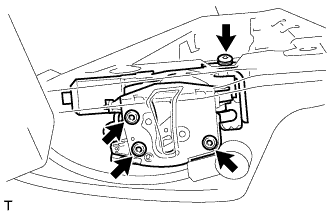
    3. Remove the 4 bolts and back door lock assembly.


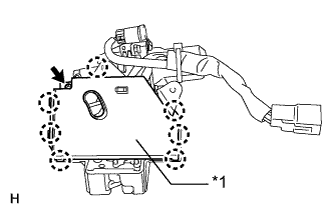
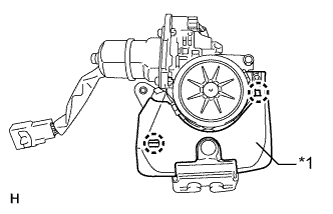
23. REMOVE BACK DOOR LOCK PROTECTOR (w/ Power Back Door)

  1. B300763E01
    Remove the screw.

  1. Detach the 7 claws, and remove the protector (B).

    Text in Illustration 
    *1
    Protector (B)

  1. B300762E01
    Detach the 2 claws, and remove the protector (A).
    Text in Illustration 
    *1
    Protector (A)


24. REMOVE BACK DOOR CONTROL SWITCH (w/ Power Back Door)
  1. Disconnect the connector.

  1. B191292
    Detach the 4 claws and remove the back door control switch.


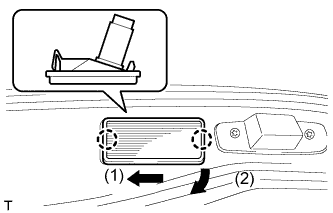
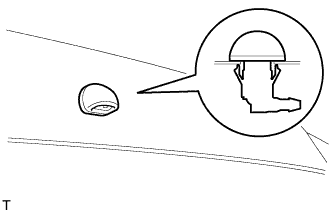
25. REMOVE LICENSE PLATE LIGHT LENS (for Standard)

  1. E155855E01
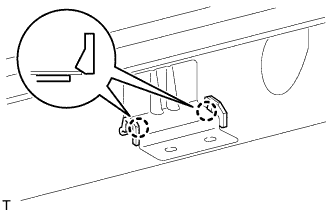
    Detach the 2 claws in the order shown in the illustration and remove the license plate light.

  1. Disconnect the connector.


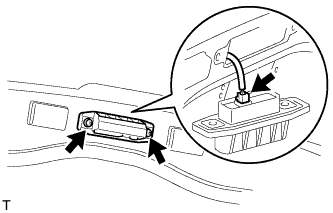
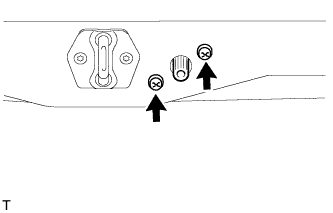
26. REMOVE BACK DOOR OPENER SWITCH ASSEMBLY

  1. B184339
    Remove the 2 screws.

  1. Disconnect the connector and then remove the back door opener switch assembly.


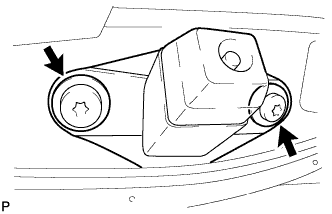
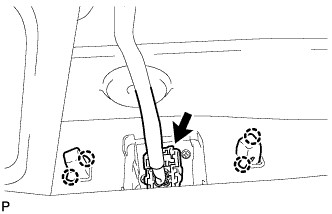
27. REMOVE REAR TELEVISION CAMERA ASSEMBLY (w/ Parking Assist Monitor System or Rear View Monitor System)

B180274
  1. Using a T30 "TORX" socket wrench, remove the 2 screws.

  1. B180789
    Detach the 4 claws and remove the rear television camera assembly.

  1. Disconnect the connector.


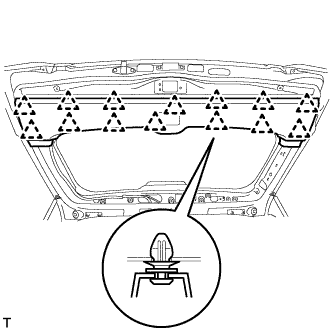
28. REMOVE LIFT GATE WEATHERSTRIP

  1. B181334
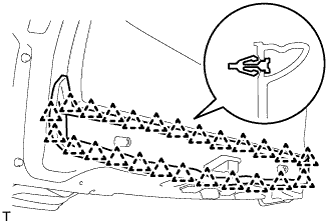
    Detach the 25 clips and remove the lift gate weatherstrip.

    NOTICE:
    Do not pull strongly on the lift gate weatherstrip as it may tear.


29. REMOVE CUSHION

  1. B232921
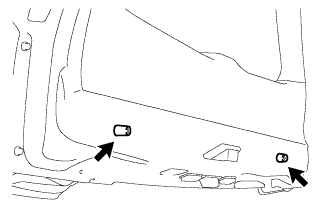
    Remove the 2 cushions.


30. REMOVE LOWER BACK DOOR STOPPER

  1. B192431
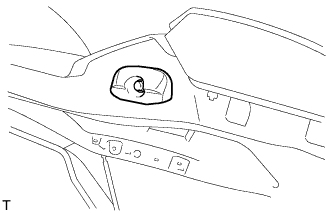
    Remove the bolt and lower back door stopper.


31. REMOVE BACK DOOR OUTSIDE GARNISH SUB-ASSEMBLY
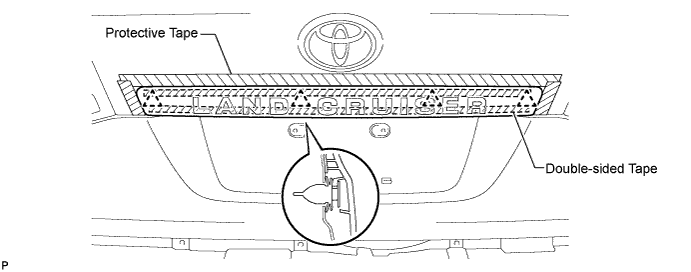
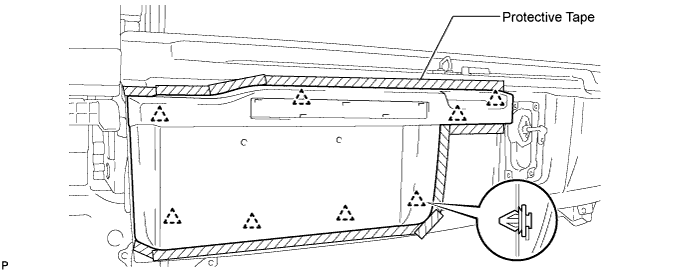
  1. Put protective tape around the back door garnish.

  1. Detach the 4 clips and remove the double-sided tape to remove the back door garnish.
    B181925E01


32. REMOVE BACK DOOR GLASS CHANNEL LH (w/o Power Back Door)

B189693E02
  1. Using a clip remover, remove the clip.

  1. Remove the back door glass channel LH.


33. REMOVE BACK DOOR GLASS CHANNEL RH (w/o Power Back Door)

HINT:
Use the same procedure described for the LH side.


34. REMOVE REAR SPOILER SUB-ASSEMBLY (w/ Rear Spoiler)

  1. B193121
    w/ Power Back Door:

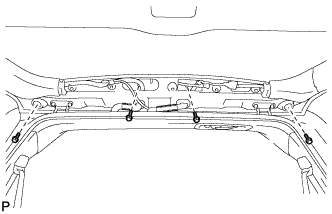
    1. Remove the 2 hole plugs and 4 bolts.

  1. B180983
    w/o Power Back Door:
    Remove the 4 bolts.

  1. B180984
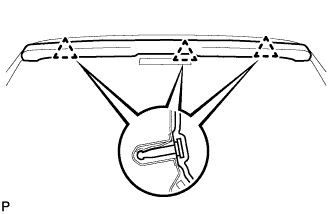
    Detach the 3 clips and remove the rear spoiler sub-assembly.


35. REMOVE REAR WASHER NOZZLE (w/ Rear Wiper)

  1. E156018
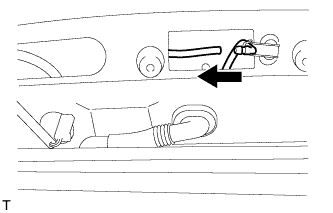
    Disconnect the washer hose.

  1. E156019
    Detach the 2 claws and remove the rear washer nozzle.


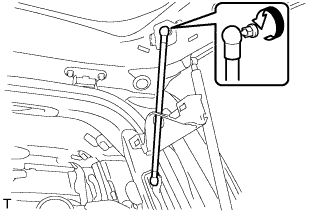
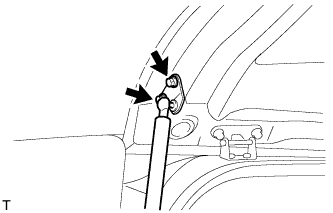
36. REMOVE BACK DOOR STAY ASSEMBLY LH

  1. B181318
    Remove the 2 bolts and stay.

    CAUTION:
    Remove the door stay while supporting the back door with one hand.

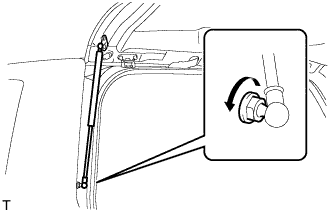
  1. B184292
    Remove the bolt and stay.

    CAUTION:
    Remove the door stay while supporting the back door with one hand.


37. REMOVE BACK DOOR STAY ASSEMBLY RH

HINT:
Use the same procedure described for the LH side.


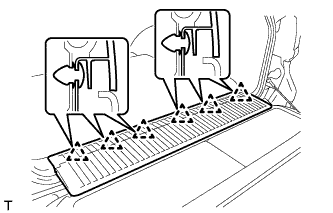
38. REMOVE REAR FLOOR MAT REAR SUPPORT PLATE

B181672
  1. Detach the 6 clips and remove the support plate.


39. REMOVE BACK DOOR TRIM COVER LH

  1. B313304
    Remove the back door trim cover LH as shown in the illustration.


40. REMOVE BACK DOOR TRIM COVER RH

  1. B313305
    Remove the back door trim cover RH as shown in the illustration.


41. REMOVE BACK DOOR TRIM PANEL ASSEMBLY

  1. B181336
    Remove the 4 bolts.

  1. Detach the 16 clips and remove the back door trim panel assembly.


42. REMOVE NO. 2 BACK DOOR OUTSIDE GARNISH SUB-ASSEMBLY (w/ Tire Carrier)

B186238
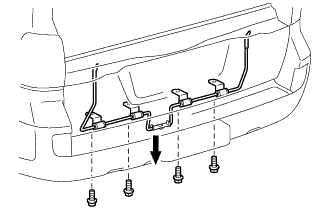
  1. Remove the 2 nuts and disconnect the connector.

  1. Put protective tape around the No. 2 back door garnish.
  1. Detach the 8 clips.

  1. Pull out the wire harness of the license plate light from the tail gate, and remove the No. 2 back door garnish.
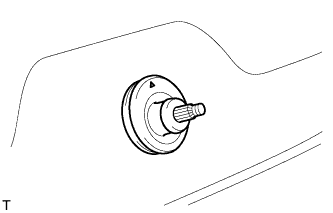
    B186239E01


43. REMOVE LICENSE PLATE LIGHT ASSEMBLY (w/ Tire Carrier)
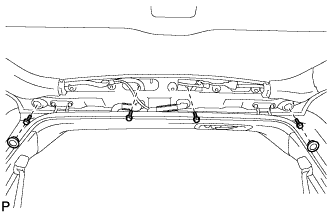
  1. E156994
    Remove the 2 screws and 2 lights.


44. REMOVE REAR LICENSE LIGHT COVER (w/ Tire Carrier)

B188295E01
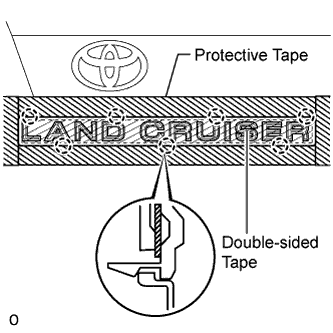
  1. Put protective tape around the rear license light cover.

  1. Detach the 7 claws and remove the double-sided tape to remove the rear license light cover.


45. REMOVE REAR BUMPER ASSEMBLY
  1. for Standard:

    1. Remove the rear bumper assembly (Click here).

  1. w/ Towing Hitch:

    1. Remove the rear bumper assembly (Click here).

  1. w/ Pintle Hook:

    1. Remove the rear bumper assembly (Click here).


46. REMOVE SPARE TIRE

47. REMOVE LOWER BACK DOOR TORSION BAR ASSEMBLY

  1. B309324
    Remove the 4 bolts and lower back door torsion bar assembly.


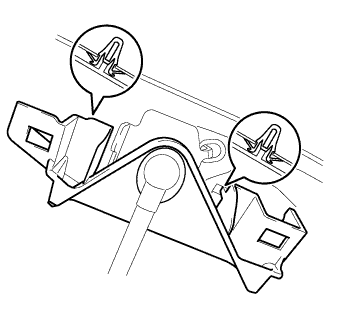
48. REMOVE BACK DOOR TORSION BAR GUIDE

  1. B181476
    Detach the 2 claws and remove the back door torsion bar guide.


49. REMOVE BACK DOOR INSIDE HANDLE ASSEMBLY

  1. B181339E02
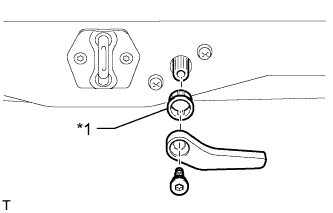
    Remove the screw and back door inside handle.
    Text in Illustration 
    *1
    Back Door Handle Grommet

  1. Remove the back door handle grommet.


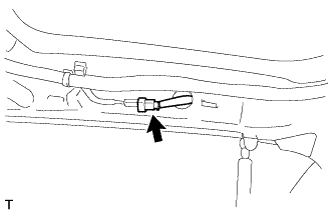
50. REMOVE LOWER TAIL GATE LOCK ASSEMBLY RH

  1. w/o Power Back Door:

    1. B184140
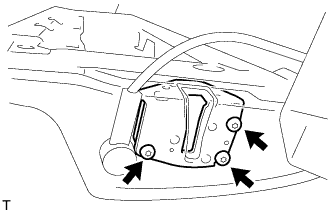
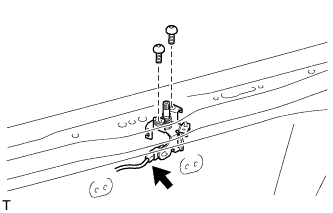
      Using a T30 "TORX" wrench, remove the 3 screws and lower tail gate lock assembly RH.

    2. B184137
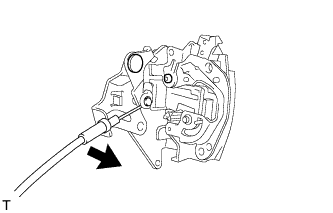
      Disconnect the cable from the lower tail gate lock assembly RH.

  1. w/ Power Back Door:

    1. B193800
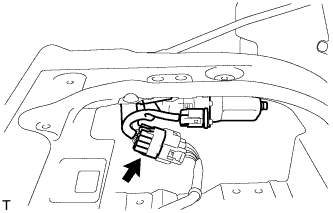
      Disconnect the connector.

    2. B232132
      Using a T30 "TORX" wrench, remove the 4 screws and lower tail gate lock assembly RH.


51. REMOVE BACK DOOR REMOTE CONTROL ASSEMBLY

  1. w/o Power Back Door:

    1. B184087
      Remove the 2 screws.

    2. B181340
      Disconnect the left side cable.

    3. Remove the back door remote control assembly.

  1. w/ Power Back Door:

    1. B191287
      Disconnect the connector.

    2. Remove the 2 screws and back door remote control assembly.


52. REMOVE LOWER TAIL GATE LOCK ASSEMBLY LH

  1. w/o Power Back Door:

    1. B181341
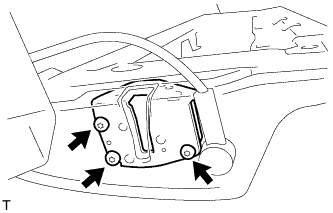
      Using a T30 "TORX" wrench, remove the 3 screws and lower tail gate lock assembly LH.

  1. w/ Power Back Door:

    1. B191286
      Disconnect the connector.

    2. B232185
      Using a T30 "TORX" wrench, remove the 4 screws and lower tail gate lock assembly LH.


53. REMOVE TAIL GATE STAY SUB-ASSEMBLY LH

  1. B181343
    Using a T40 "TORX" socket, remove the 2 screws and tail gate stay sub-assembly LH.


54. REMOVE TAIL GATE STAY SUB-ASSEMBLY RH

HINT:
Use the same procedure described for the LH side.


55. REMOVE BACK DOOR DAMPER ASSEMBLY (w/ Power Back Door)

  1. B191284
    Remove the bolt and back door damper assembly.

← DISASSEMBLY (Sep 2011 – Dec 2011)INSPECTION (from Jan 2012) →