7.
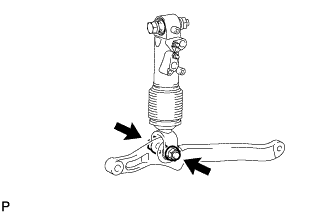
TEMPORARILY INSTALL FRONT STABILIZER CONTROL ARM ASSEMBLY
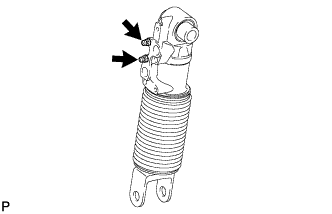
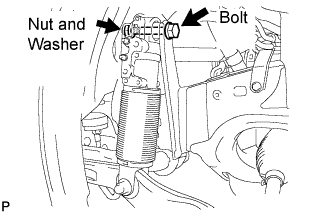
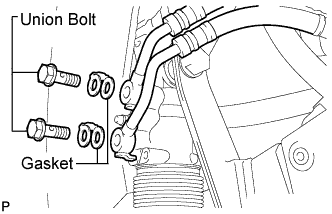
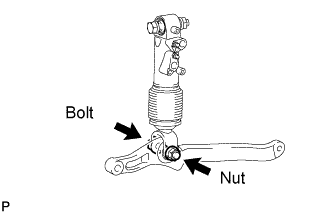
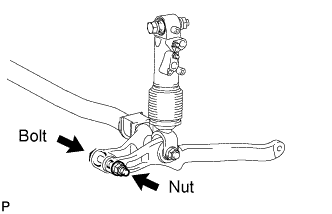
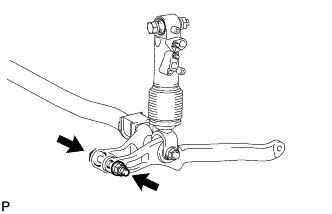
Temporarily install the stabilizer control arm to the front stabilizer control cylinder with the nut and bolt.
8.
BLEED AIR FROM SUSPENSION FLUID
Bleed the air from the suspension fluid (Click here).
9.
INSTALL FRONT NO. 1 STABILIZER BAR BUSH
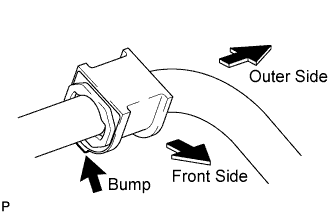
Install the 2 bushes to the outer side of the bush stoppers on the front stabilizer bar as shown in the illustration.
NOTICE:
Be sure to install the front No. 1 stabilizer bar bushes so that the bump of each bush faces the inside of the vehicle.
10.
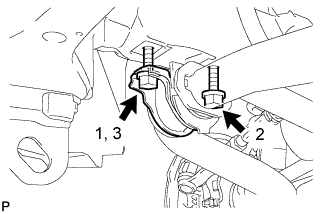
TEMPORARILY INSTALL FRONT STABILIZER BAR
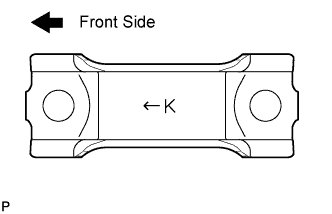
Set the stabilizer bracket so that the arrow mark is facing the front side of the vehicle.
Temporarily install the 2 stabilizer brackets and front stabilizer bar with the 4 bolts.
Temporarily install the front stabilizer bar to the stabilizer control arm with the bolt and nut.
11.
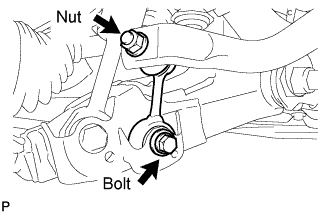
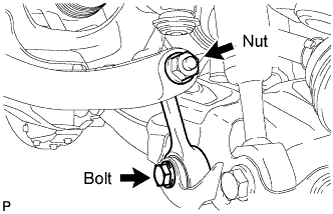
TEMPORARILY INSTALL FRONT STABILIZER LINK ASSEMBLY RH
Temporarily install the stabilizer link with the bolt.
Temporarily install the stabilizer link with the nut.
Tighten the nut.
Torque:
128 N*m{
1305 kgf*cm
, 94 ft.*lbf
}
HINT:
If the ball joint turns together with the nut, use a 6 mm hexagon wrench to hold the stud bolt.
12.
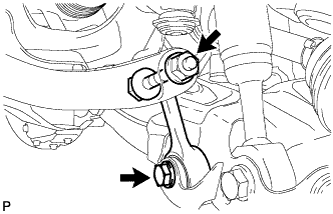
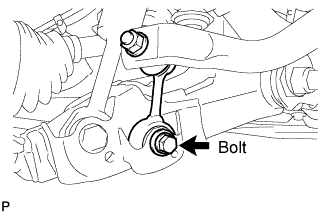
TEMPORARILY INSTALL FRONT STABILIZER LINK ASSEMBLY LH
Temporarily install the stabilizer link to the lower arm with the bolt.
Temporarily install the stabilizer link to the stabilizer control arm with the bolt and nut.
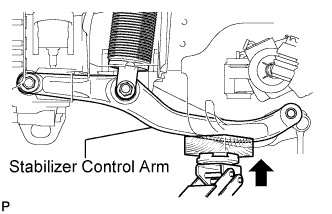
HINT:
If the front stabilizer control cylinder extends and it is difficult to temporarily install the stabilizer link to the stabilizer control arm, raise the stabilizer control arm with a jack and temporarily install the stabilizer link.
13.
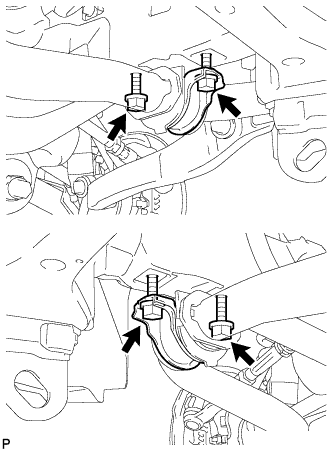
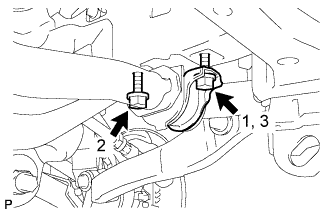
TIGHTEN FRONT NO. 1 STABILIZER BRACKET LH
Tighten the 2 bolts of the front stabilizer brackets.
Torque:
87 N*m{
887 kgf*cm
, 64 ft.*lbf
}
NOTICE:
Tighten the bolts in 3 steps, in the order shown in the illustration.
14.
TIGHTEN FRONT NO. 1 STABILIZER BRACKET RH
Tighten the 2 bolts of the front stabilizer brackets.
Torque:
87 N*m{
887 kgf*cm
, 64 ft.*lbf
}
NOTICE:
Tighten the bolts in 3 steps, in the order shown in the illustration.
15.
INSTALL NO. 1 ENGINE UNDER COVER SUB-ASSEMBLY
Install the No. 1 engine under cover with the 10 bolts.
Torque:
29 N*m{
296 kgf*cm
, 21 ft.*lbf
}
16.
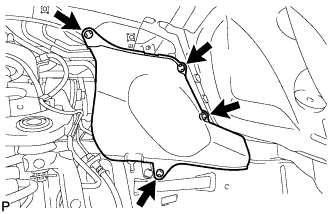
INSTALL FRONT FENDER SPLASH SHIELD SUB-ASSEMBLY LH
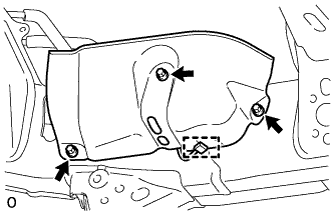
Push in the clip indicated by the arrow in the illustration to install the fender splash shield.
Install the 3 bolts and screw.
17.
INSTALL FRONT FENDER SPLASH SHIELD SUB-ASSEMBLY RH
HINT:
Use the same procedures described for the LH side.
18.
STABILIZE SUSPENSION
Install the front wheels.
Torque:
for aluminum wheel:
131 N*m{
1336 kgf*cm
, 97 ft.*lbf
}
for steel wheel:
209 N*m{
2131 kgf*cm
, 154 ft.*lbf
}
Lower the vehicle.
Press down on the vehicle several times to stabilize the suspension.
19.
TIGHTEN FRONT STABILIZER LINK ASSEMBLY LH
NOTICE:
Perform this procedure with all 4 wheels on the ground.
Tighten the bolt.
Torque:
135 N*m{
1377 kgf*cm
, 100 ft.*lbf
}
Tighten the nut.
Torque:
140 N*m{
1428 kgf*cm
, 103 ft.*lbf
}
20.
TIGHTEN FRONT STABILIZER LINK ASSEMBLY RH
Tighten the bolt.
Torque:
135 N*m{
1376 kgf*cm
, 100 ft.*lbf
}
NOTICE:
Perform this procedure with all 4 wheels on the ground.
21.
TIGHTEN FRONT STABILIZER CONTROL ARM ASSEMBLY
Tighten the nut.
Torque:
190 N*m{
1937 kgf*cm
, 140 ft.*lbf
}
NOTICE:
Perform this procedure with all 4 wheels on the ground.
22.
TIGHTEN FRONT STABILIZER BAR
Tighten the nut.
Torque:
230 N*m{
2345 kgf*cm
, 170 ft.*lbf
}
NOTICE:
Perform this procedure with all 4 wheels on the ground.
23.
INSTALL FRONT FENDER APRON SEAL REAR LH
Install the apron seal with the 4 clips.
24.
INSTALL FRONT FENDER APRON SEAL LH
Install the apron seal with the 3 clips.
25.
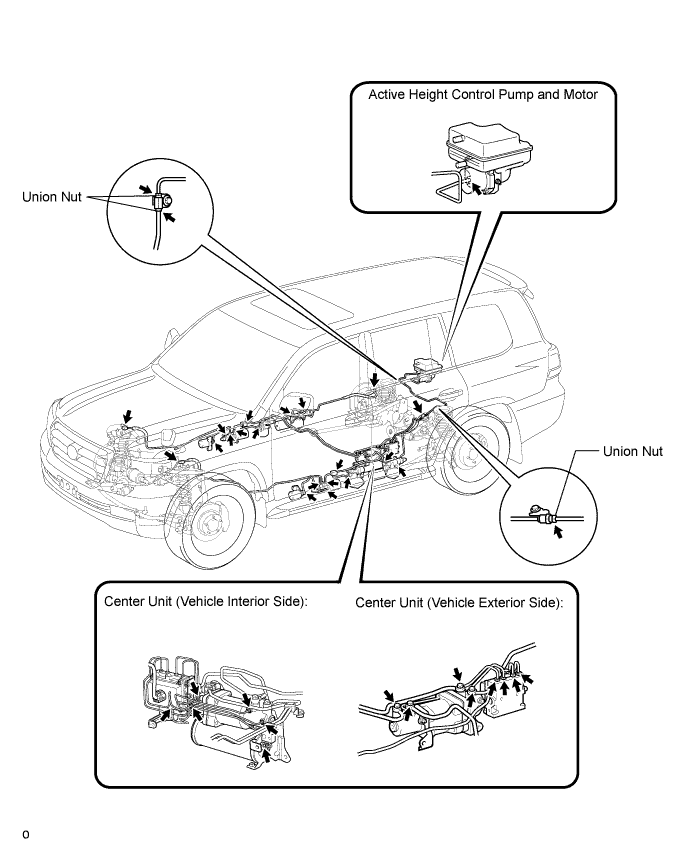
INSPECT FOR SUSPENSION FLUID LEAK
Check that the union nuts shown in the illustration are tightened to the specified torque.
Torque:
without union nut wrench:
15 N*m{
155 kgf*cm
, 11 ft.*lbf
}
with union nut wrench:
14 N*m{
143 kgf*cm
, 10 ft.*lbf
}
HINT:
Use a torque wrench with a fulcrum length of 300 mm (11.8 in.).
The torque value for use with a union nut wrench is effective when the union nut wrench is parallel to the torque wrench.
Check for fluid leakage from the parts and connections.
HINT:
For union nuts and union bolts not shown in the illustration, refer to the installation procedures for each title.
26.
MEASURE VEHICLE HEIGHT
NOTICE:
Perform the inspection on a level surface.
Ensure that the wheels are on the ground and facing straight ahead.
Perform the inspection with the vehicle load completely on the suspension.
HINT:
Perform this step with the fuel tank full.
If there are any parts installed to the vehicle which place any unbalanced load on the left or right side of the vehicle, remove them.
Set the tire pressure to the specified value(s) (Click here).
Bounce the vehicle to stabilize the suspension.
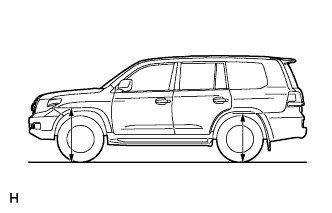
Measure the distance from the ground to the top of the bumper and calculate the difference in the vehicle height between left and right. Perform this procedure for both the front and rear wheels.
Height difference of left and right sides:
15 mm (0.591 in.) or less
HINT:
If not as specified, perform the vehicle tilt calibration.
27.
CLOSE STABILIZER CONTROL WITH ACCUMULATOR HOUSING SHUTTER VALVE
NOTICE:
Perform the inspection on a level surface.
Ensure that the wheels are on the ground and facing straight ahead.
Perform the inspection with the vehicle load completely on the suspension.
HINT:
Perform this step with the fuel tank full.
If there are any parts installed to the vehicle which place any unbalanced load on the left or right side of the vehicle, remove them.
Using a 5 mm hexagon socket wrench, tighten the lower and upper chamber shutter valves of the stabilizer control with accumulator housing.
Torque:
14 N*m{
143 kgf*cm
, 10 ft.*lbf
}
28.
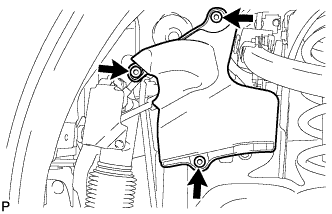
INSTALL STABILIZER CONTROL VALVE PROTECTOR
Install the valve protector with the 3 bolts.
Torque:
18 N*m{
184 kgf*cm
, 13 ft.*lbf
}
Attach the clamp, and connect the connector to the valve protector.
29.
INSPECT FOR EXHAUST GAS LEAK
If gas is leaking, tighten the areas necessary to stop the leak. Replace damaged parts as necessary.