After turning the engine switch off, waiting time may be required before disconnecting the cable from the battery terminal. Therefore, make sure to read the disconnecting the cable from the battery terminal notice before proceeding with work (Click here).
2.
DISCONNECT CABLE FROM NEGATIVE BATTERY TERMINAL
CAUTION:
Wait at least 90 seconds after disconnecting the cable from the negative (-) battery terminal to disable the SRS system.
NOTICE:
When disconnecting the cable, some systems need to be initialized after the cable is reconnected (Click here).
3.
REMOVE FRONT WHEEL RH
4.
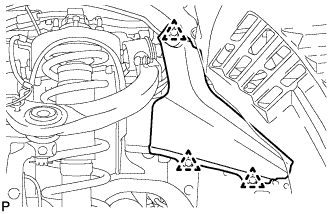
REMOVE FRONT FENDER APRON TRIM PACKING A
Using a clip remover, remove the 3 clips and fender apron seal.
5.
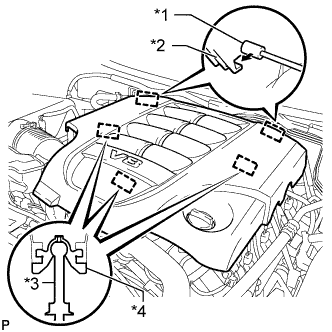
REMOVE V-BANK COVER SUB-ASSEMBLY
Raise the front of the V-bank cover to detach the 3 pins. Then remove the 2 V-bank cover hooks from the bracket, and remove the V-bank cover.
Text in Illustration
*1
Bracket
*2
Hook
*3
Pin
*4
Grommet
6.
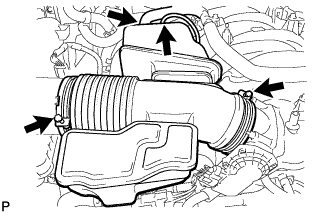
REMOVE AIR CLEANER HOSE ASSEMBLY
Disconnect the vacuum hose and No. 2 ventilation hose.
Loosen the 2 hose clamps.
Remove the air cleaner hose.
7.
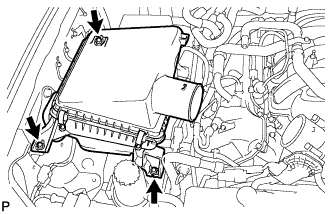
REMOVE AIR CLEANER ASSEMBLY
Remove the 3 bolts and air cleaner.
8.
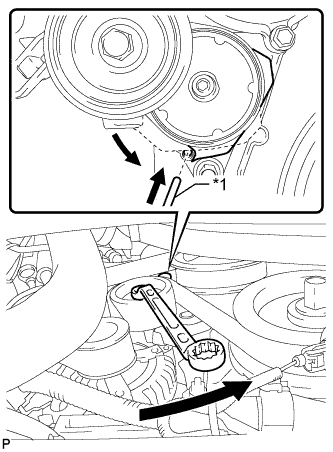
REMOVE FAN AND GENERATOR V BELT
While turning the belt tensioner counterclockwise, align the service hole for the belt tensioner and the belt tensioner fixing position, and then insert a bar of 5 mm (0.197 in.) into the service hole to fix the belt tensioner in place.
Text in Illustration
*1
Bar
HINT:
The pulley bolt for the belt tensioner has a left-hand thread.
Remove the V belt.
9.
DRAIN POWER STEERING FLUID
10.
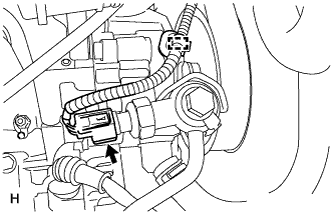
DISCONNECT POWER STEERING OIL PRESSURE SENSOR CONNECTOR
Detach the wire harness clamp and disconnect the connector.
11.
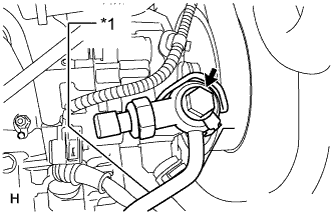
DISCONNECT PRESSURE FEED TUBE
Remove the bolt and disconnect the pressure feed tube.
Text in Illustration
*1
Pressure feed tube
Remove the gasket.
12.
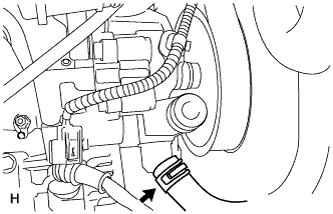
DISCONNECT SUCTION HOSE
Slide the clip and disconnect the suction hose from the vane pump.