INSTALLATION
Removal / installation · Vehicles built Sep 2011 – Dec 2011
Versions by build date: Sep 2011 – Dec 2011 from Jan 2012
- HINT:
- Use the same procedures for the LH side and RH side.
- The procedures listed below are for the LH side.
| 1.
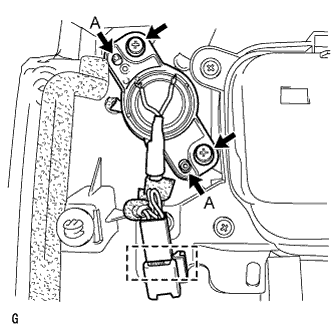
INSTALL REAR NO. 3 SPEAKER ASSEMBLY (for 14 Speakers) |
 |
- Align the speaker to the door position pins labeled A.
Install the speaker with the 2 screws.
- NOTICE:
- Do not touch the cone part of the speaker.
Attach the clamp and connect the connector.
| 2.
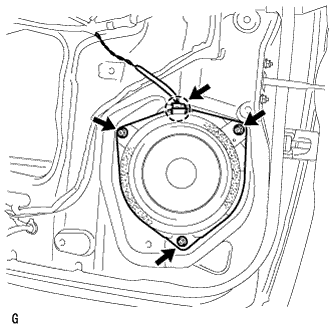
INSTALL REAR SPEAKER SET |
|
- Temporarily install the speaker by attaching the claw of the speaker to the door panel.
Install the speaker with the 3 screws.
- NOTICE:
- Do not touch the cone part of the speaker.
Connect the connector.
| 3.
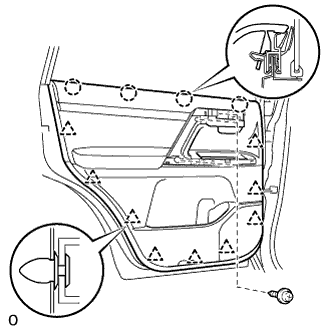
INSTALL REAR DOOR TRIM BOARD SUB-ASSEMBLY
|
|
Connect the connector.
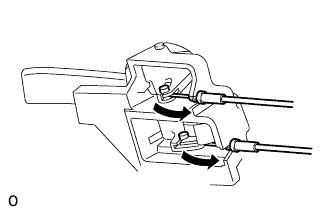
- Connect the rear door lock remote control cable and rear door inside locking cable to the rear door inside handle sub-assembly.
- Attach the 4 claws and 9 clips to install the rear door trim board sub-assembly.
Install the 3 screws.
| 4.
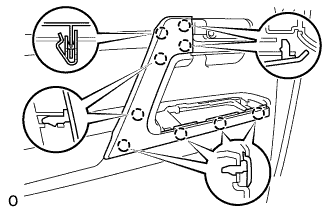
INSTALL DOOR ASSIST GRIP COVER LH
|
|
- Attach the 9 claws to install the door assist grip cover to the door trim panel.
| 5.
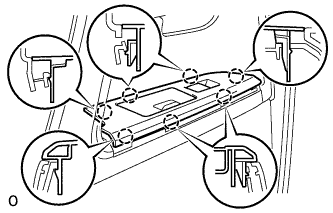
INSTALL REAR DOOR ARMREST BASE PANEL ASSEMBLY LH
|
|
Connect the connector.
- Attach the 7 claws to install the armrest base panel.
| 6.
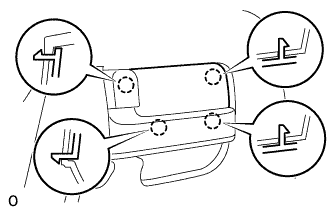
INSTALL REAR DOOR INSIDE HANDLE BEZEL LH
|
|
- Attach the 4 claws to install the bezel.
| 7.
CONNECT CABLE TO NEGATIVE BATTERY TERMINAL |
|
- NOTICE:
- When disconnecting the cable, some systems need to be initialized after the cable is reconnected (Click here).