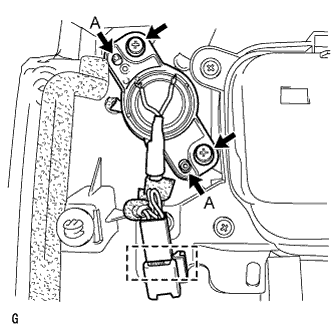
Align the speaker to the door position pins labeled A.
Install the speaker with the 2 screws.
NOTICE:
Do not touch the cone part of the speaker.
Attach the clamp and connect the connector.
2.
INSTALL REAR SPEAKER SET
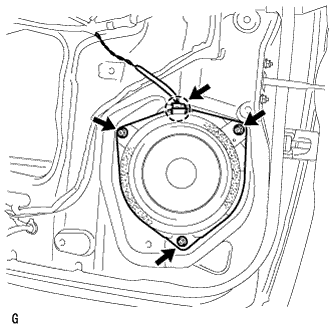
Temporarily install the speaker by attaching the claw of the speaker to the door panel.
Install the speaker with the 3 screws.
NOTICE:
Do not touch the cone part of the speaker.
Connect the connector.
3.
INSTALL REAR DOOR TRIM BOARD SUB-ASSEMBLY
Connect the connector.
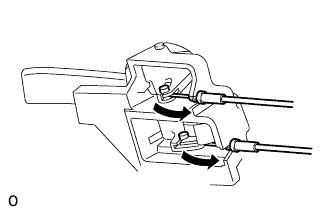
Connect the rear door lock remote control cable assembly LH and rear door inside locking cable assembly LH to the rear door inside handle sub-assembly LH.
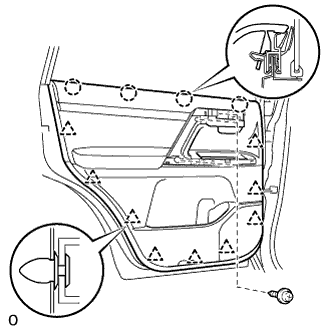
Attach the 4 claws and 9 clips to install the rear door trim board sub-assembly LH.
Install the 3 screws.
4.
INSTALL DOOR ASSIST GRIP COVER LH
Attach the 9 claws to install the assist grip cover LH to the rear door trim board sub-assembly LH.
5.
INSTALL REAR DOOR ARMREST BASE PANEL ASSEMBLY LH
Connect the connector.
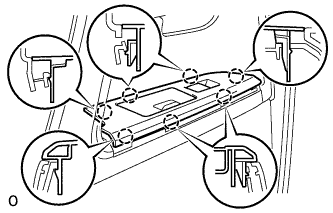
Attach the 7 claws to install the armrest base panel.
6.
INSTALL REAR DOOR INSIDE HANDLE BEZEL LH
Attach the 4 claws to install the rear door inside handle bezel LH.
7.
CONNECT CABLE TO NEGATIVE BATTERY TERMINAL
NOTICE:
When disconnecting the cable, some systems need to be initialized after the cable is reconnected (Click here).