INSTALLATION
Removal / installation · Vehicles built from Jan 2012
Versions by build date: Sep 2011 – Dec 2011 from Jan 2012
| 1. INSTALL ELECTRICAL KEY ANTENNA |

Install the antenna with the 2 screws.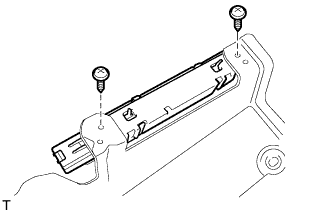

| 2. INSTALL REAR BUMPER ARM BRACKET LH |
Install the rear bumper arm bracket LH with the 2 bolts.
Connect the connector.
| 3. INSTALL REAR BUMPER COVER |
- HINT:
- For the rear bumper cover with tire carrier, use the procedures described below.
w/ TOYOTA Parking Assist-sensor System or w/ Rear Fog Light:
Connect the No. 2 frame wire connector.
Attach the 14 claws to install the rear bumper cover.
Install the 7 bolts, 6 screws and 2 clips.
Open the tail gate and install the 4 clips.
Close the tail gate.
| 4. INSTALL REAR NO. 1 BUMPER PLATE |
Attach the 20 claws to install the rear No. 1 bumper plate.
| 5. INSTALL REAR QUARTER PANEL MUDGUARD LH |
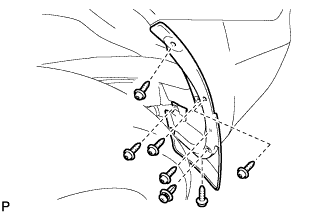 |
Install the mudguard with the clip.
Using a T30 "TORX" socket, install the 6 screws.
| 6. INSTALL REAR QUARTER PANEL MUDGUARD RH |
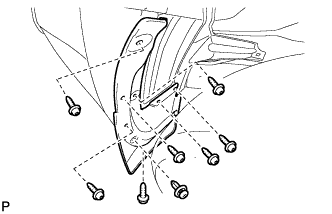 |
Install the mudguard with the clip.
Using a T30 "TORX" socket, install the 7 screws.
| 7. INSTALL SPARE WHEEL CARRIER SUB-ASSEMBLY (w/ Tire Carrier) |
Install the spare wheel carrier sub-assembly (Click here).
| 8. INSTALL PINTLE HOOK ASSEMBLY (w/ Pintle Hook) |
Install the pintle hook assembly (Click here).