2011-2013 Land Cruiser · Service Manual Engine / Hybrid / EV System

REMOVAL

Removal / installation · Vehicles built Sep 2011 – Dec 2011

Versions by build date: Sep 2011 – Dec 2011 from Jan 2012


1. REMOVE FRONT FENDER SPLASH SHIELD SUB-ASSEMBLY LH

B180991
  1. Remove the 3 bolts and screw.

  1. Turn the clip indicated by the arrow in the illustration to remove the fender splash shield.


2. REMOVE FRONT FENDER SPLASH SHIELD SUB-ASSEMBLY RH

HINT:
Use the same procedures described for the LH side.


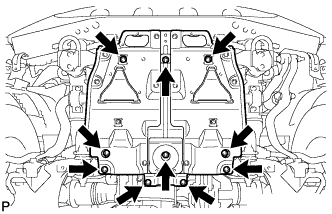
3. REMOVE NO. 1 ENGINE UNDER COVER SUB-ASSEMBLY

  1. A238241
    Remove the 10 bolts and No. 1 engine under cover.


4. DRAIN ENGINE COOLANT

CAUTION:
Do not remove the radiator cap while the engine and radiator are still hot. Pressurized, hot engine coolant and steam may be released and cause serious burns.

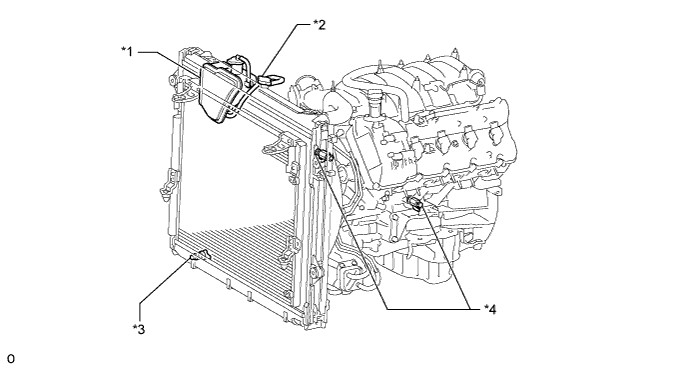
  1. Loosen the radiator drain cock plug.

    HINT:
    Collect the coolant in a container and dispose of it according to the regulations in your area.

  1. Remove the radiator cap. Then drain the coolant from the radiator.

  1. Loosen the 2 cylinder block drain cock plugs. Then drain the coolant from the engine.

  1. Tighten the 2 cylinder block drain cock plugs.

    Torque:
    13 N*m{ 133 kgf*cm , 10 ft.*lbf }


    A174123E02
    Text in Illustration 
    *1
    Radiator Reservoir
    *2
    Radiator Cap
    *3
    Radiator Drain Cock Plug
    *4
    Cylinder Block Drain Cock Plug

  1. Tighten the radiator drain cock plug by hand.


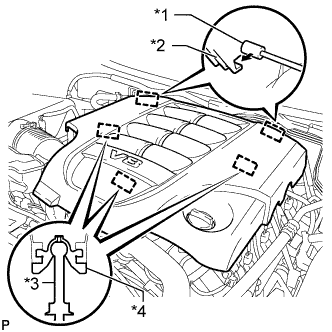
5. REMOVE V-BANK COVER SUB-ASSEMBLY

  1. A174196E03
    Raise the front of the V-bank cover to detach the 3 pins. Then remove the 2 V-bank cover hooks from the bracket, and remove the V-bank cover.
    Text in Illustration 
    *1
    Bracket
    *2
    Hook
    *3
    Pin
    *4
    Grommet


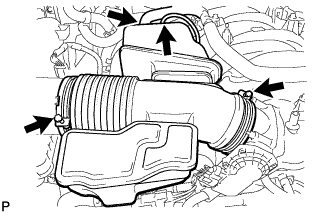
6. REMOVE AIR CLEANER HOSE ASSEMBLY

  1. A243375
    Disconnect the vacuum hose and No. 2 ventilation hose.

  1. Loosen the 2 hose clamps.

  1. Remove the air cleaner hose.


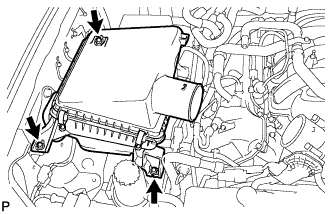
7. REMOVE AIR CLEANER ASSEMBLY

  1. A174195
    Remove the 3 bolts and air cleaner.


8. REMOVE NO. 1 RADIATOR HOSE

9. REMOVE NO. 2 RADIATOR HOSE

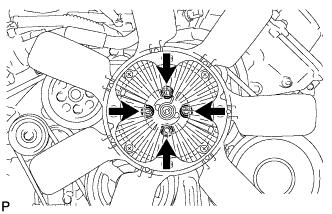
10. REMOVE FAN SHROUD

  1. A151842
    Loosen the 4 nuts holding the fluid coupling fan.

  1. Remove the fan and generator V-belt (Click here).

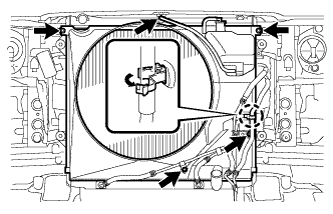
  1. A238869
    Disconnect the reservoir hose from the upper radiator tank.

  1. Detach the claw to open the flexible hose clamp.

  1. Remove the 2 bolts and disconnect the oil cooler tube from the fan shroud.

  1. Remove the 2 bolts holding the fan shroud.

  1. Remove the 4 nuts of the fluid coupling fan, and then remove the shroud together with the coupling fan.

    NOTICE:
    Be careful not to damage the radiator core.

  1. Remove the fan pulley.


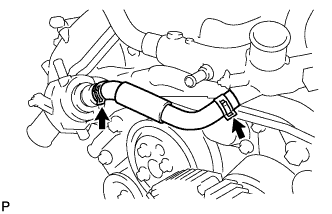
11. REMOVE NO. 1 WATER BY-PASS HOSE

  1. A237017
    Remove the No. 1 water by-pass hose by disconnecting the hose from the water inlet housing and front water by-pass joint.


12. DISCONNECT NO. 2 WATER BY-PASS PIPE SUB-ASSEMBLY

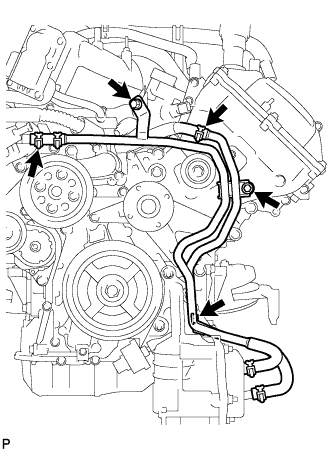
A151836
  1. Disconnect the No. 6 water by-pass hose.

  1. Remove the 3 bolts.

  1. Disconnect the water by-pass pipe with water hose.


13. REMOVE WATER INLET HOUSING

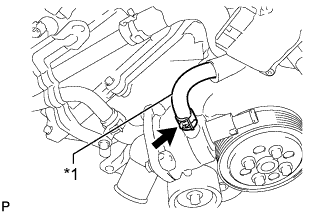
  1. A238833E02
    Disconnect the No. 5 water by-pass hose.
    Text in Illustration 
    *1
    No. 5 Water By-pass Hose

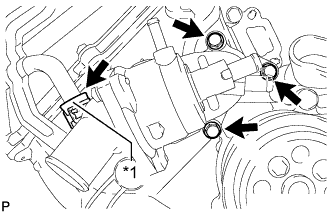
  1. A151829E02
    Disconnect the No. 3 water by-pass hose and remove the 3 bolts and water inlet housing.
    Text in Illustration 
    *1
    No. 3 Water By-pass Hose

  1. Remove the gasket from the water pump.


14. REMOVE WATER PUMP PULLEY

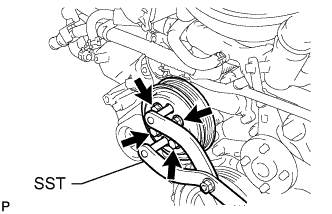
  1. A151837E03
    Using SST, hold the water pump pulley.
    SST
    09960-10010   (09962-01000, 09963-01000)

  1. Remove the 4 bolts and water pump pulley.


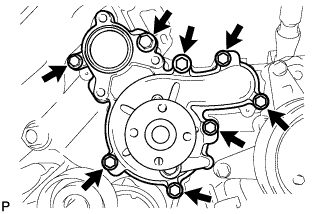
15. REMOVE WATER PUMP ASSEMBLY

  1. A151828
    Remove the 8 bolts, water pump and gasket.

← ON-VEHICLE INSPECTION (from Sep 2011)REMOVAL (from Jan 2012) →