REMOVAL
Removal / installation · Vehicles built from Sep 2011
| 1. LOCK REAR DIFFERENTIAL |

Turn the engine switch on (IG).
Push on the 4WD switch.
Turn the differential lock control switch to the RR position and lock the rear differential.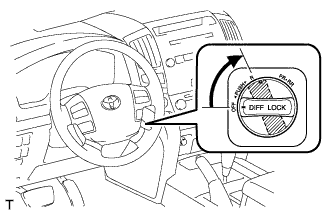

- HINT:
- Rotate the rear wheels to check that they are in the differential lock condition.
| 2. DRAIN DIFFERENTIAL OIL |
Stop the vehicle on a level place.
for Front Differential: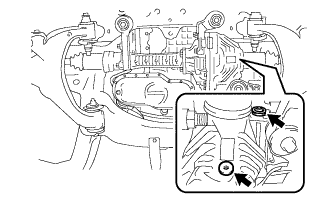
Remove the engine under cover.
Using a 10 mm hexagon wrench, remove the filler plug and gasket.
Using a 10 mm hexagon wrench, remove the drain plug and gasket, and drain the oil.
Using a 10 mm hexagon wrench, install a new gasket and the drain plug.
- Torque:
- 39 N*m{ 400 kgf*cm , 29 ft.*lbf }
for Rear Differential:
Remove the filler plug and gasket.
Remove the drain plug and gasket, and drain the oil.
Install a new gasket and the drain plug.
- Torque:
- 49 N*m{ 500 kgf*cm , 36 ft.*lbf }
| 3. REMOVE REAR AXLE SHAFT |
Remove the axle shaft (Click here).
| 4. REMOVE DIFFERENTIAL PROTECTOR ASSEMBLY |
Detach the 2 connector clamps and wire harness clamp.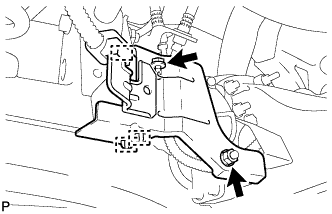
Remove the bolt, nut and protector.
| 5. REMOVE REAR DIFFERENTIAL LOCK ACTUATOR PROTECTOR |
Remove the 2 nuts and protector.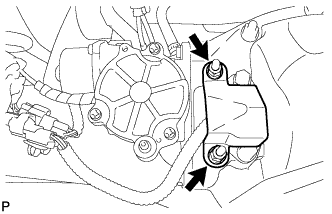
| 6. DISCONNECT REAR PROPELLER SHAFT ASSEMBLY |
Place matchmarks on the rear propeller shaft and companion flange.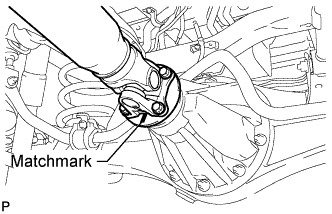
Remove the 4 nuts, 4 washers and 4 bolts, and disconnect the propeller shaft from the differential side.
Support the propeller shaft securely.
| 7. REMOVE REAR DIFFERENTIAL CARRIER ASSEMBLY |
Disconnect the lock differential lock shift actuator and No. 4 transfer indicator switch connectors.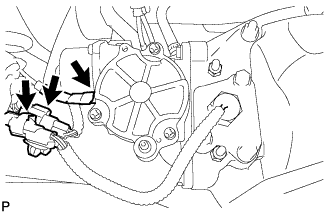
Disconnect the breather hose.
Remove the 10 nuts, 10 washers and differential carrier assembly.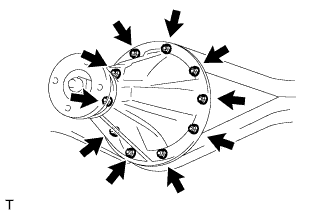
- NOTICE:
- Be careful not to damage the contact surfaces of the differential carrier and rear axle housing.
Remove the gasket.