INSTALLATION
Removal / installation · Vehicles built Sep 2011 – Dec 2011
Versions by build date: Sep 2011 – Dec 2011 from Jan 2012
- HINT:
- A bolt without a torque specification is shown in the standard bolt chart (Click here).
| 1.
INSTALL REAR TELEVISION CAMERA ASSEMBLY |
 |
Connect the connector.
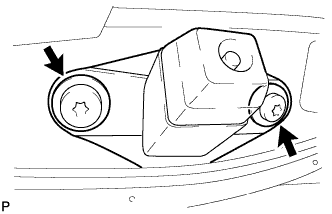
Attach the 4 claws to install the rear television camera assembly.
- Using a T30 "TORX" socket wrench, install the rear television camera with the 2 screws.
| 2.
INSTALL BACK DOOR GARNISH
|
|
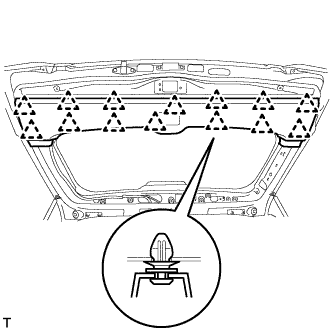
- Attach the 14 clips to install the back door garnish.
| 3.
INSTALL BACK DOOR SIDE GARNISH LH
|
|
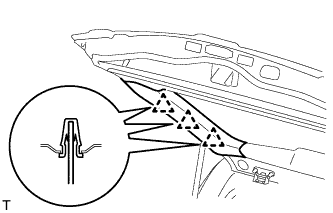
- Attach the 3 clips to install the back door side garnish.
| 4.
INSTALL BACK DOOR SIDE GARNISH RH
|
|
- HINT:
- Use the same procedures described for the LH side.
| 5.
INSTALL CENTER BACK DOOR GARNISH
|
|
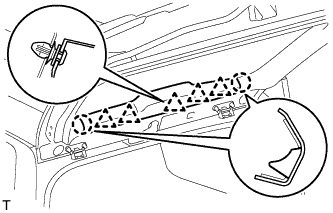
- Attach the 5 clips and 2 claws to install the back door garnish.
| 6.
ADJUST REAR TELEVISION CAMERA ASSEMBLY (w/ Parking Assist Monitor System) |
|
Adjust the rear television camera assembly (Click here).