REMOVAL
Removal / installation · Vehicles built Sep 2011 – Dec 2011
Versions by build date: Sep 2011 – Dec 2011 from Jan 2012
- CAUTION:
- Wear protective gloves. Sharp areas on the parts may injure your hands.
- HINT:
- Use the same procedure for RHD and LHD vehicles.
- The procedure listed below is for LHD vehicles.
- Use the same procedure for the RH and LH sides.
- The procedure listed below is for the LH side.
- Use the same procedure for RHD and LHD vehicles.
| 1. REMOVE FRONT SEAT ASSEMBLY LH |

Remove the front seat assembly (Click here).
| 2. REMOVE SLIDE AND VERTICAL POWER SEAT SWITCH KNOB |
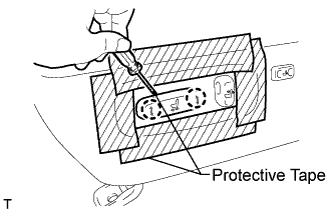  |
Apply protective tape around the cushion shield.
Using a screwdriver, detach the 2 claws and remove the knob.
- HINT:
- Tape the screwdriver tip before use.
| 3. REMOVE RECLINING POWER SEAT SWITCH KNOB |
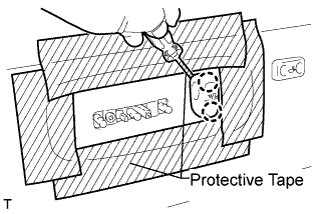 |
Using a screwdriver, detach the 2 claws and remove the knob.
- HINT:
- Tape the screwdriver tip before use.
| 4. REMOVE FRONT SEAT CUSHION SHIELD LH |
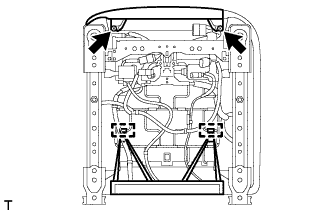 |
Disconnect the 2 rubber bands from the 2 hooks.
Remove the 2 screws.
Remove the 3 screws.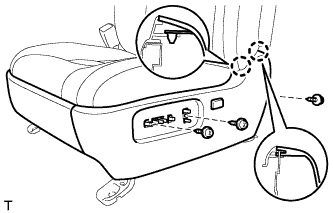
Detach the 2 claws and remove the cushion shield.
for Driver Side:
Disconnect the lumbar switch connector.
| 5. REMOVE FRONT POWER SEAT SWITCH LH |
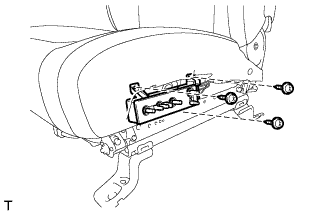 |
Disconnect the switch connector.
Remove the 3 screws and switch.