INSTALLATION
Removal / installation · Vehicles built from Sep 2011
| 1. INSTALL REAR NO. 2 SEAT INNER BELT SUB-ASSEMBLY |

Install the belt.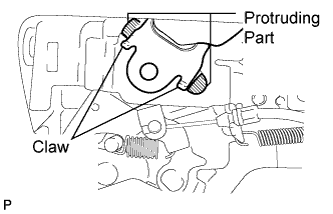

- NOTICE:
- Make sure the claws are facing away from the seat.
- Do not overlap the anchor part of the seat belt and protruding parts of the seat.
- Make sure the claws are facing away from the seat.
| 2. INSTALL REAR SEAT INNER BELT SUB-ASSEMBLY (for LH Side) |
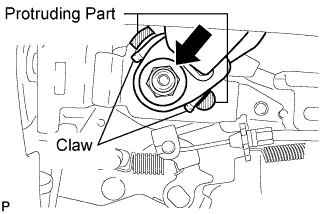 |
Install the belt with the nut.
- Torque:
- 42 N*m{ 428 kgf*cm , 31 ft.*lbf }
- NOTICE:
- Do not overlap the anchor part of the seat belt and protruding parts of the seat.
- HINT:
- The rear No. 2 seat inner belt is fixed with the same nut as the rear seat inner belt. Therefore, connect it when installing the rear seat inner belt.
| 3. INSTALL NO. 3 SEAT LEG COVER NO. 2 |
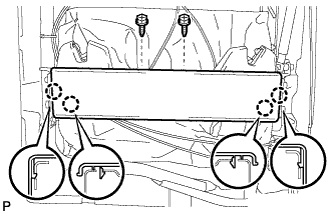 |
Attach the 4 claws to install the cover.
Install the 2 screws.
| 4. INSTALL NO. 3 SEAT FRONT BRACKET COVER LH |
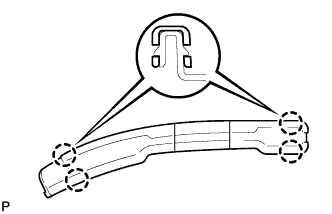 |
Attach the 4 claws to install the cover.
| 5. INSTALL REAR SEAT CUSHION UNDER COVER LH |
Install the cover with the 7 screws.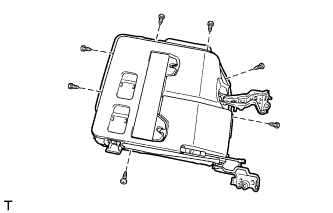
Attach the 16 claws.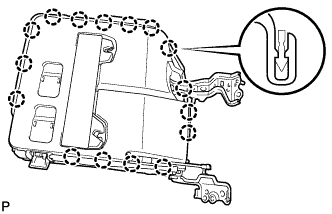
| 6. INSTALL 3RD SEAT LINK SUB-ASSEMBLY LH |
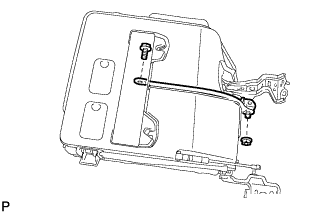 |
Install the seat link with the bolt and nut.
- Torque:
- 8.5 N*m{ 87 kgf*cm , 75 in.*lbf }
| 7. INSTALL NO. 2 SEAT LEG COVER NO. 2 |
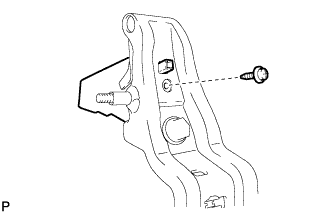 |
Install the seat leg cover with the screw.
| 8. INSTALL REAR NO. 3 SEAT LEG COVER LH |
Install the seat leg cover with the 2 screws.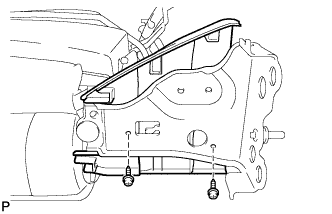
Install the spring of the seat stay ball-joint.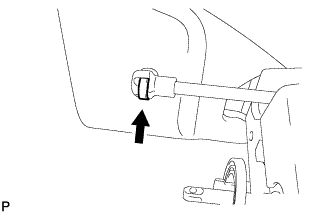
Connect the seat stay to the seat frame.
| 9. INSTALL REAR SEAT REAR BRACKET COVER REAR |
Attach the 2 claws to install the cover.
| 10. INSTALL RECLINING ADJUSTER COVER RH |
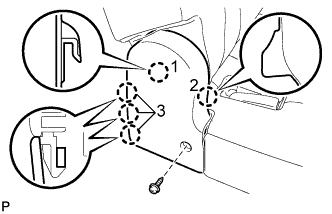 |
Attach the 5 claws in the order shown in the illustration to install the cover.
Install the screw.
| 11. INSTALL RECLINING ADJUSTER COVER LH |
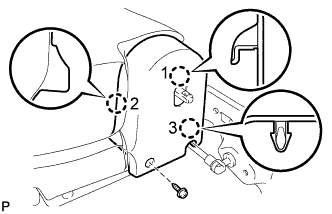 |
Attach the 3 claws in the order shown in the illustration to install the cover.
Install the screw.
| 12. INSTALL NO. 2 RECLINING ADJUSTER RELEASE HANDLE LH |
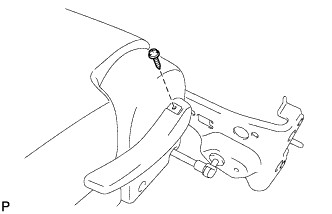 |
Install the release handle with the screw.
| 13. INSTALL SEAT ADJUSTER BOLT COVER |
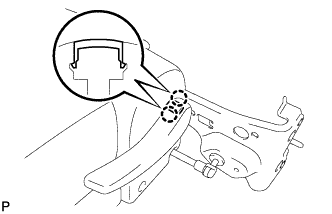 |
Attach the 2 claws to install the cover.
| 14. INSTALL REAR NO. 2 SEAT ASSEMBLY LH |
Install the rear No. 2 seat assembly (Click here).