2011-2013 Land Cruiser · Service Manual Steering

INSTALLATION

Removal / installation · Vehicles built from Jan 2012

Versions by build date: Sep 2011 – Dec 2011 from Jan 2012


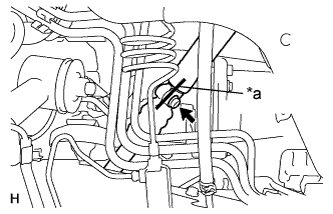
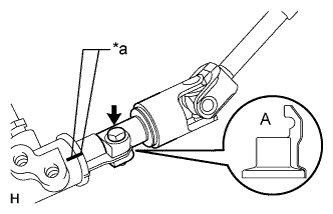
1. CONNECT NO. 2 STEERING INTERMEDIATE SHAFT

  1. C172652E02
    Align the part of the dust cover labeled A with the No. 2 steering intermediate shaft, and install the No. 2 steering intermediate shaft assembly to the steering link assembly.
    Text in Illustration 
    *a
    Matchmark

  1. Install the bolt.

    Torque:
    35 N*m{ 360 kgf*cm , 26 ft.*lbf }

    NOTICE:
    Be careful not to damage the dust cover.


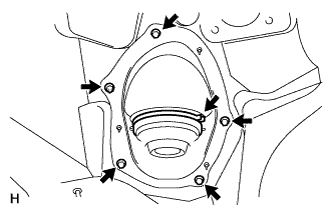
2. INSTALL STEERING COLUMN HOLE COVER SUB-ASSEMBLY

  1. C179100
    Install the 4 bolts and nut.

    Torque:
    5.0 N*m{ 51 kgf*cm , 44 in.*lbf }

    NOTICE:
    Do not fold back the boot part of the steering hole cover or extend it excessively. if it is extended excessively, return it to its original position.

    HINT:
    Install the steering intermediate shaft assembly from the inside of the vehicle.

  1. Using needle nose pliers, lock the clamp to the steering column hole cover to install it.

    NOTICE:
    Be careful when performing the operation as the clamp may not lock if the claws of the clamp are deformed.


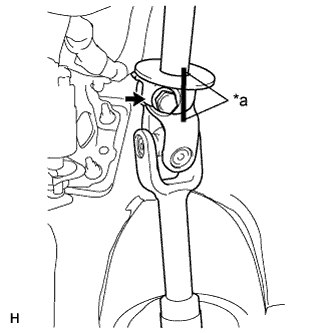
3. CONNECT STEERING INTERMEDIATE SHAFT ASSEMBLY

  1. C172649E02
    Align the matchmarks on the No. 2 steering intermediate shaft assembly and the steering intermediate shaft assembly.
    Text in Illustration 
    *a
    Matchmark

    HINT:
    Install the steering intermediate shaft from the inside of the vehicle.

  1. Install the bolt.

    Torque:
    35 N*m{ 360 kgf*cm , 26 ft.*lbf }


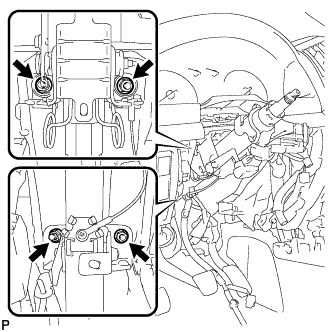
4. INSTALL STEERING COLUMN ASSEMBLY
  1. Align the matchmarks on the steering intermediate shaft and the steering column.

  1. C172648E02
    Install the bolt.
    Text in Illustration 
    *a
    Matchmark

    Torque:
    35 N*m{ 360 kgf*cm , 26 ft.*lbf }

  1. w/o Entry and Start System:

    1. C246797E01
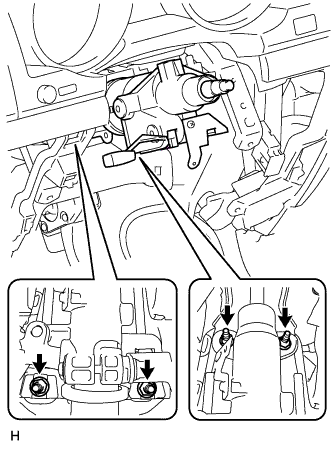
      Install the steering column with the 4 nuts.

      Torque:
      21 N*m{ 214 kgf*cm , 15 ft.*lbf }

  1. w/ Entry and Start System

    1. C172654
      Install the steering column with the 4 nuts.

      Torque:
      26 N*m{ 265 kgf*cm , 19 ft.*lbf }


5. INSTALL NO. 3 AIR DUCT SUB-ASSEMBLY
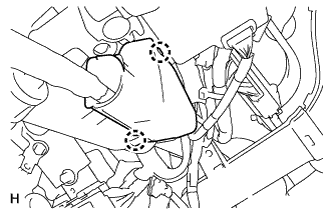
  1. Attach the 2 claws to install the duct.

  1. Install the clip.


6. INSTALL WIRE HARNESS PROTECTOR AND WIRE HARNESS

  1. C172656
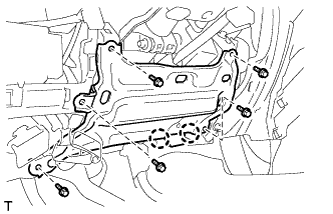
    Attach the 2 claws to connect the wire harness protector and wire harness.


7. INSTALL DRIVER SIDE KNEE AIRBAG ASSEMBLY (w/ Driver Side Knee Airbag)

  1. B189604E01
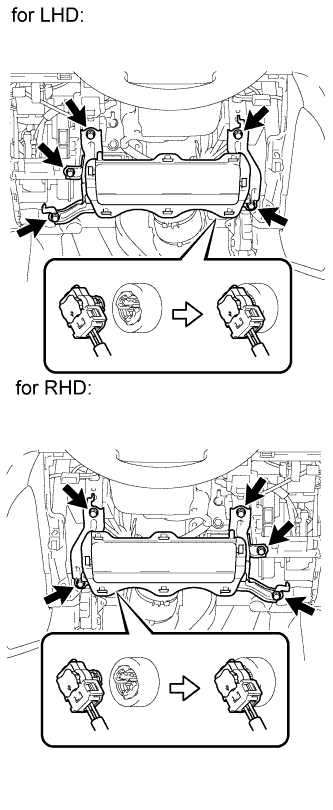
    Connect the connector.

    NOTICE:
    When handling the airbag connector, take care not to damage the airbag wire harness.

  1. Install the driver side knee airbag with the 5 bolts.

    Torque:
    10 N*m{ 102 kgf*cm , 7 ft.*lbf }


8. INSTALL LOWER INSTRUMENT PANEL SUB-ASSEMBLY (w/o Driver Side Knee Airbag)

B180299
  1. Attach the 2 claws and connect the DLC3.

  1. Install the lower instrument panel with the 5 bolts.


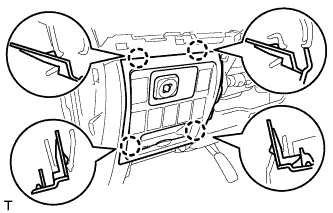
9. INSTALL NO. 1 SWITCH HOLE BASE

B180298
  1. Connect the connectors.

  1. Attach the 4 claws to install the No. 1 switch hole base.


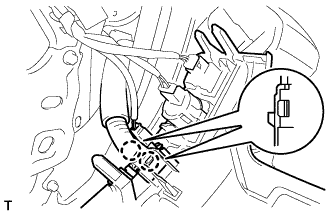
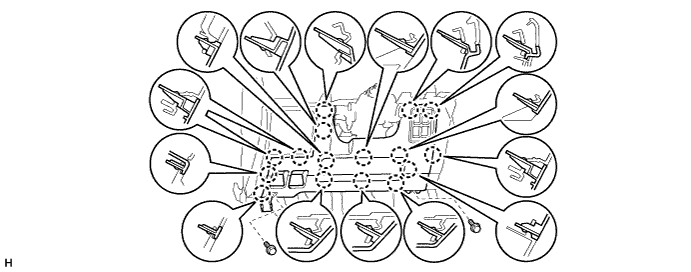
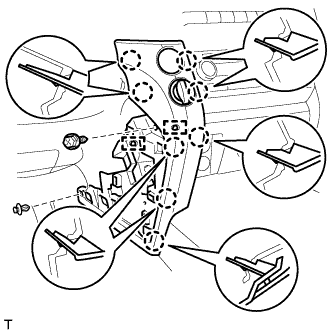
10. INSTALL LOWER NO. 1 INSTRUMENT PANEL FINISH PANEL
  1. Connect the connectors.

  1. B180296
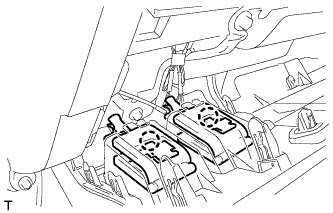
    for Automatic Air Conditioning System:

    1. Attach the 2 claws to install the room temperature sensor.

  1. B181942
    Attach the 2 claws to connect the 2 control cables.

  1. w/ Driver Side Knee Airbag:

    1. Attach the 16 claws to install the lower No. 1 instrument panel finish panel.

    2. Install the 2 bolts.

      B291249

  1. w/o Driver Side Knee Airbag:

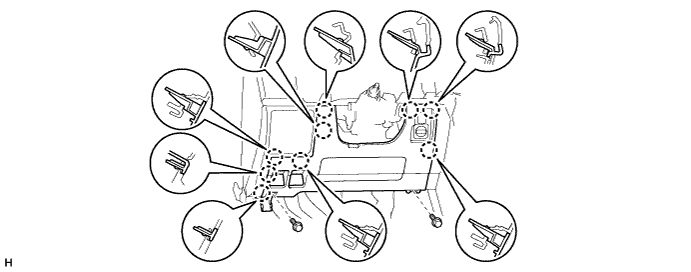
    1. Attach the 9 claws to install the lower No. 1 instrument panel finish panel.

    2. Install the 2 bolts.

      B291250

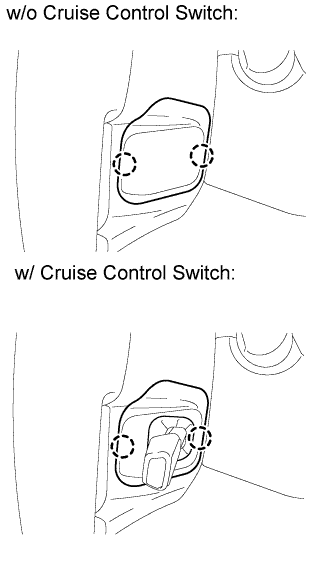
  1. B182569
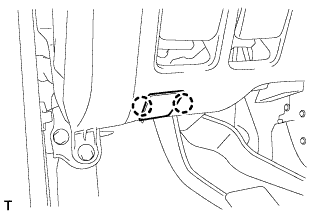
    Attach the 2 claws to close the hole cover.


11. INSTALL COWL SIDE TRIM BOARD LH

B181911
  1. Attach the 2 clips to install the cowl side trim board.

  1. Install the cap nut.


12. INSTALL NO. 1 INSTRUMENT PANEL UNDER COVER SUB-ASSEMBLY (w/ Floor Under Cover)

B182553
  1. Connect the connectors.

  1. Attach the 3 claws to install the No. 1 instrument panel under cover.

  1. Install the 2 screws.


13. INSTALL FRONT DOOR SCUFF PLATE LH

B181682
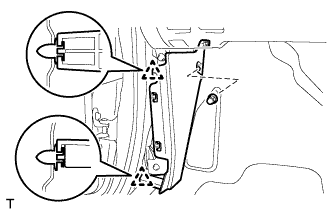
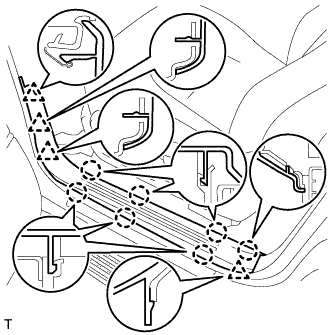
  1. Attach the 7 claws and 4 clips to install the scuff plate.


14. INSTALL INSTRUMENT CLUSTER FINISH PANEL SUB-ASSEMBLY (w/o Multi-information Display)

B180016
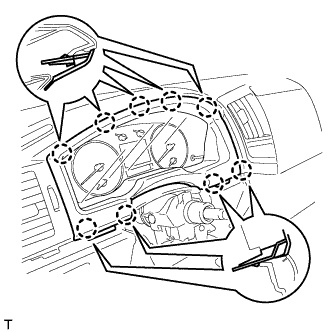
  1. Attach the 9 claws to install the instrument cluster finish panel.


15. REMOVE INSTRUMENT CLUSTER FINISH PANEL SUB-ASSEMBLY (w/ Multi-information Display)

B180017
  1. Connect the connector.

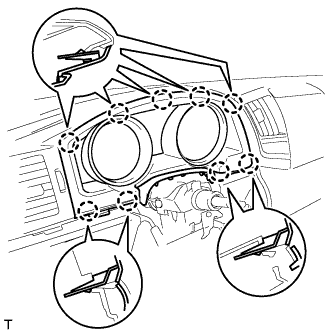
  1. Attach the 9 claws to install the instrument cluster finish panel.


16. INSTALL NO. 2 INSTRUMENT CLUSTER FINISH PANEL GARNISH

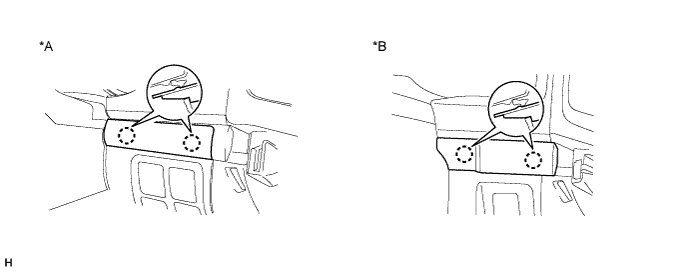
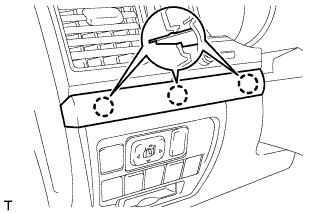
  1. Attach the 2 claws to install the No. 2 instrument cluster finish panel garnish.

    B291252E01

    Text in Illustration 
    *A
    w/ Entry and Start System
    *B
    w/o Entry and Start System


17. INSTALL NO. 1 INSTRUMENT CLUSTER FINISH PANEL GARNISH

E155133
  1. Attach the 3 claws to install the No. 1 instrument cluster finish panel garnish.


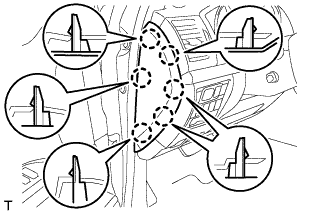
18. INSTALL INSTRUMENT SIDE PANEL LH

E155518
  1. Attach the 6 claws to install the instrument side panel.


19. INSTALL LOWER INSTRUMENT PANEL PAD SUB-ASSEMBLY LH

B292995
  1. Connect the connectors and attach the 2 clamps.

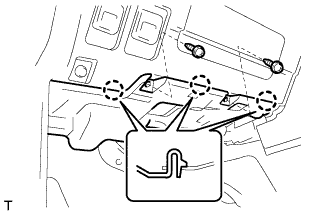
  1. Attach the 8 claws to install the lower instrument panel pad sub-assembly.

  1. Install the clip and screw.


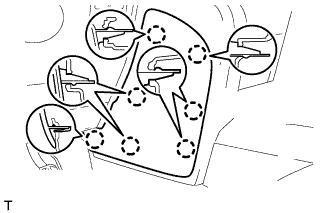
20. INSTALL NO. 2 INSTRUMENT PANEL FINISH PANEL CUSHION

B292997
  1. Attach the 7 claws to install the No. 2 instrument panel finish panel cushion.


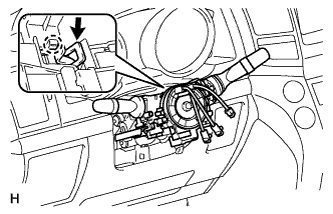
21. INSTALL COMBINATION SWITCH ASSEMBLY WITH SPIRAL CABLE SUB-ASSEMBLY

  1. C179484E01
    Using pliers, grip the claws of the clamp and install the combination switch assembly with spiral cable sub-assembly to the steering column assembly with the clamp.

  1. Connect the connectors to the combination switch with spiral cable.


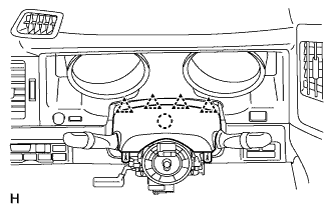
22. INSTALL UPPER STEERING COLUMN COVER

  1. C179482
    Attach the claw to install the upper steering column cover.

  1. Attach the 4 clips to install the upper steering column cover onto the instrument cluster finish panel.


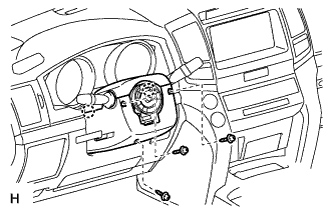
23. INSTALL LOWER STEERING COLUMN COVER

  1. C179481
    Attach the 2 claws to install the lower steering column cover.

    NOTICE:
    Do not damage the tilt and telescopic switch.

  1. Install the 3 screws.

    Torque:
    2.0 N*m{ 20 kgf*cm , 18 in.*lbf }


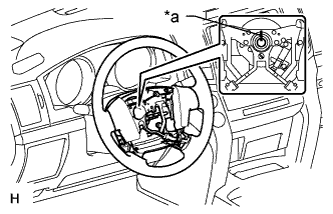
24. INSTALL STEERING WHEEL ASSEMBLY

  1. C174823E02
    Align the matchmarks on the steering wheel assembly and steering main shaft assembly.
    Text in Illustration 
    *a
    Matchmark

  1. Install the steering wheel assembly set nut.

    Torque:
    50 N*m{ 510 kgf*cm , 37 ft.*lbf }


25. INSTALL STEERING PAD
  1. With the steering pad installed on the vehicle, perform a visual check. If there are any defects as mentioned below, replace the steering pad with a new one:
    Cuts, minute cracks or marked discoloration on the steering pad top surface or in the grooved portion.

  1. Make sure that the horn sounds.

    HINT:
    If the horn does not sound, inspect the horn system.


26. INSTALL LOWER NO. 2 STEERING WHEEL COVER

  1. B189186E01
    Attach the 2 claws to install the cover.


27. INSTALL LOWER NO. 3 STEERING WHEEL COVER

  1. B181563
    Attach the 2 claws to install the cover.


28. CHECK FRONT WHEELS FACING STRAIGHT AHEAD

29. INSTALL FRONT WHEELS

30. CONNECT CABLE TO NEGATIVE BATTERY TERMINAL

NOTICE:
When disconnecting the cable, some systems need to be initialized after the cable is reconnected (Click here).

31. INSPECT SRS WARNING LIGHT
  1. Inspect the SRS warning light (Click here).
← INSTALLATION (Sep 2011 – Dec 2011)COMPONENTS (from Sep 2011) →