INSTALLATION
Removal / installation · Vehicles built Sep 2011 – Dec 2011
Versions by build date: Sep 2011 – Dec 2011 from Jan 2012
| 1.
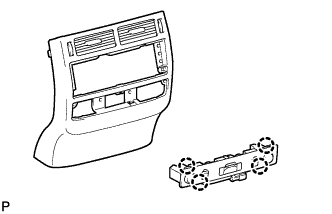
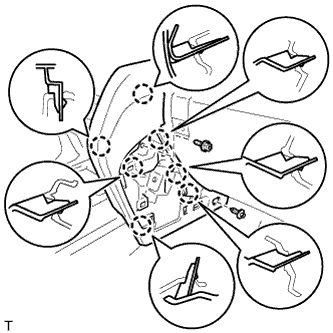
INSTALL HEADPHONE TERMINAL |
 |
- Attach the 4 claws to install the headphone terminal.
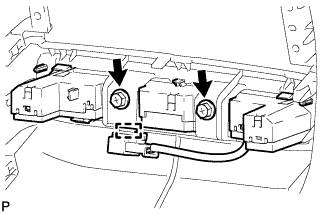
- Install the 2 screws.
Attach the connector clamp.
| 2.
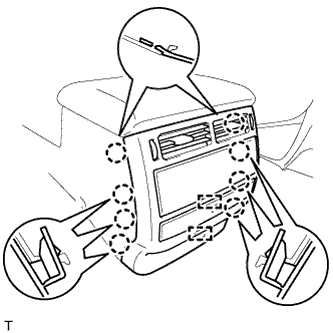
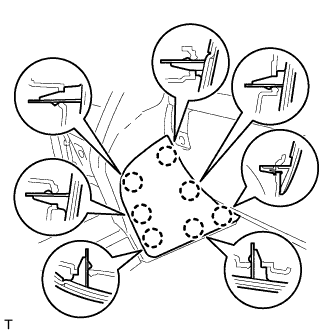
INSTALL REAR CONSOLE END PANEL SUB-ASSEMBLY
|
|
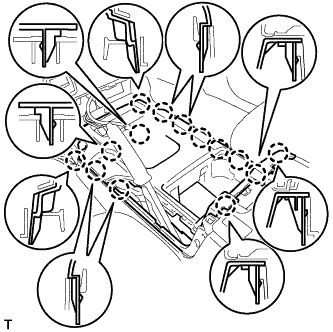
- Connect the connectors and 2 clamps.
Attach the 8 claws to install the end panel.
| 3.
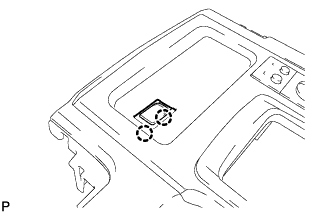
INSTALL NO. 1 STEREO JACK ADAPTER ASSEMBLY |
|
- Attach the 2 claws to install the stereo jack adapter.
| 4.
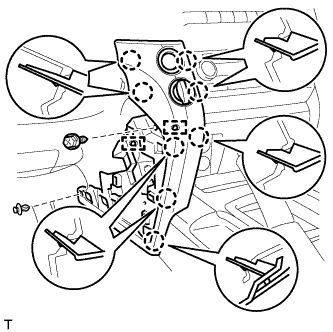
INSTALL UPPER CONSOLE PANEL SUB-ASSEMBLY
|
|
- Connect the connectors.
Attach the 14 claws to install the console panel.
| 5.
INSTALL CONSOLE CUP HOLDER BOX SUB-ASSEMBLY
|
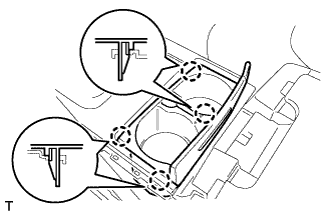
|
- Attach the 4 claws to install the box.
| 6.
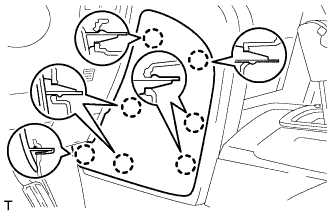
INSTALL REAR UPPER CONSOLE PANEL SUB-ASSEMBLY
|
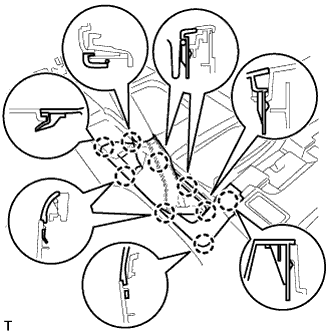
|
- Attach the 9 claws to install the panel.
| 7.
INSTALL LOWER CENTER INSTRUMENT CLUSTER FINISH PANEL SUB-ASSEMBLY
|
|
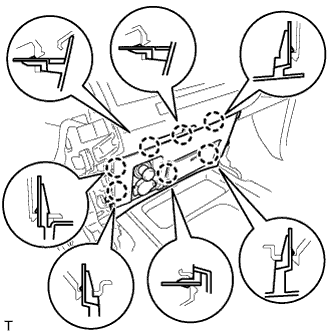
- Connect the connectors.
Attach the 7 claws to install the panel.
| 8.
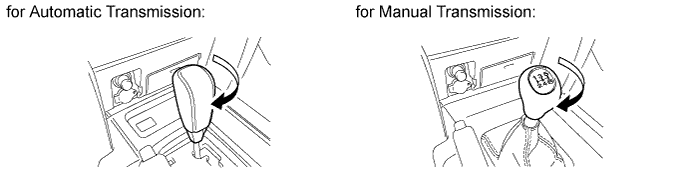
INSTALL SHIFT LEVER KNOB SUB-ASSEMBLY
|
|
Install the shift lever knob and twist it in the direction indicated by the arrow.

| 9.
INSTALL LOWER INSTRUMENT PANEL PAD SUB-ASSEMBLY RH
|
|
- Attach the 7 claws to install the panel pad.
Install the screw.
Install the clip.
| 10.
INSTALL NO. 1 INSTRUMENT PANEL FINISH PANEL CUSHION
|
|
- Attach the 7 claws to install the panel cushion.
| 11.
INSTALL LOWER INSTRUMENT PANEL PAD SUB-ASSEMBLY LH
|
|
- Connect the connectors and 2 clamps.
Attach the 8 claws to install the panel pad.
Install the screw.
Install the clip.
| 12.
INSTALL NO. 2 INSTRUMENT PANEL FINISH PANEL CUSHION
|
|
- Attach the 7 claws to install the panel cushion.
| 13.
CONNECT CABLE TO NEGATIVE BATTERY TERMINAL |
|