REMOVAL
Removal / installation · Vehicles built from Sep 2011
| 1. DISCONNECT CABLE FROM NEGATIVE BATTERY TERMINAL |

- CAUTION:
- Wait at least 90 seconds after disconnecting the cable from the negative (-) battery terminal to disable the SRS system.
- NOTICE:
- w/ Navigation System:
After the engine switch is turned off, the HDD navigation system requires approximately 6 minutes to record various types of memory and settings. As a result, after turning the engine switch off, wait 6 minutes or more before disconnecting the cable from the negative (-) battery terminal
- When disconnecting the cable, some systems need to be initialized after the cable is reconnected (Click here).
- w/ Navigation System:
| 2. REMOVE FRONT SEAT ASSEMBLY RH (for Manual Seat) |
Remove the front seat assembly RH (Click here).
| 3. REMOVE FRONT SEAT ASSEMBLY RH (for Power Seat) |
Remove the front seat assembly RH (Click here).
| 4. REMOVE INSTRUMENT SIDE PANEL RH (w/o Airbag Cut Off Switch) |
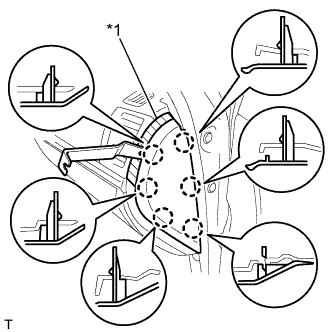  |
Place protective tape as shown in the illustration.
Text in Illustration *1
Protective Tape
Using a moulding remover, detach the 6 claws and remove the instrument side panel.
| 5. REMOVE INSTRUMENT SIDE PANEL RH (w/ Airbag Cut Off Switch) |
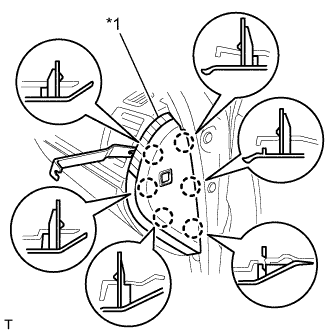 |
Place protective tape as shown in the illustration.
Text in Illustration *1
Protective Tape
Using a moulding remover, detach the 6 claws.
Disconnect the connector and remove the instrument side panel.
| 6. REMOVE FRONT DOOR SCUFF PLATE RH |
- HINT:
- Use the same procedures described for the LH side.
| 7. REMOVE COWL SIDE TRIM BOARD RH |
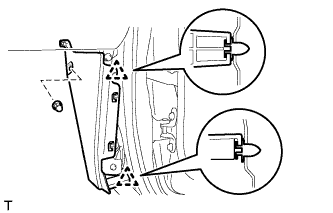 |
Remove the cap nut.
Detach the 2 clips and remove the cowl side trim board.
| 8. REMOVE FRONT FLOOR CARPET ASSEMBLY |
Pull back the carpet far enough so that the selector can be removed. For further details, refer to the removal procedure (Click here).
| 9. REMOVE MULTI-MEDIA INTERFACE ECU |
Disconnect the connectors.
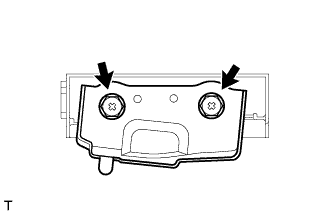
Remove the 2 bolts and multi-media interface ECU.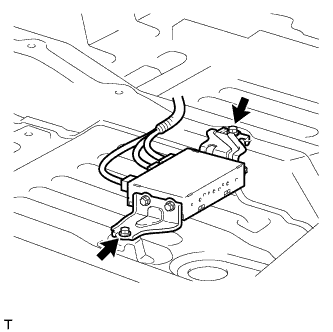
| 10. REMOVE NO. 1 MULTI-MEDIA INTERFACE BRACKET |
Remove the 2 bolts and bracket.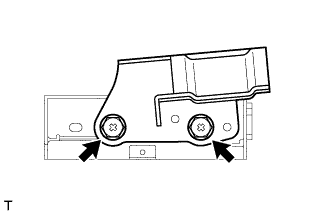
| 11. REMOVE NO. 2 MULTI-MEDIA INTERFACE BRACKET |
Remove the 2 bolts and bracket.