REMOVAL
Removal / installation · Vehicles built Sep 2011 – Dec 2011
Versions by build date: Sep 2011 – Dec 2011 from Jan 2012
| 1.
DISCONNECT CABLE FROM NEGATIVE BATTERY TERMINAL |
 |
- CAUTION:
- Wait at least 90 seconds after disconnecting the cable from the negative (-) battery terminal to disable the SRS system.
- NOTICE:
- When disconnecting the cable, some systems need to be initialized after the cable is reconnected (Click here).
| 2.
REMOVE FRONT SEAT ASSEMBLY LH |
|
for Manual Seat:
Remove the front seat assembly LH (Click here).
for Power Seat:
Remove the front seat assembly LH (Click here).
| 3.
REMOVE FRONT SEAT ASSEMBLY RH |
|
for Manual Seat:
Remove the front seat assembly RH (Click here).
for Power Seat:
Remove the front seat assembly RH (Click here).
- HINT:
- Use the same procedures described for the LH side.
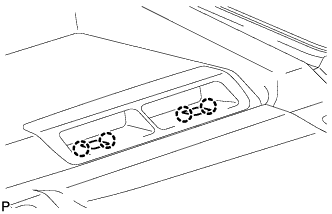
| 4.
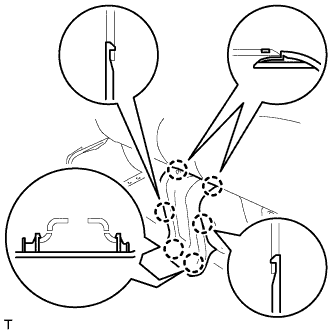
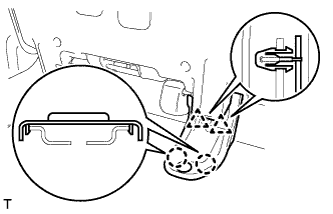
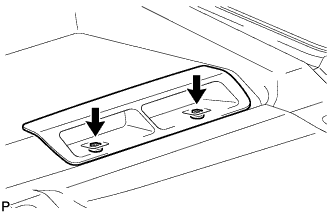
REMOVE REAR NO. 3 SEAT CUSHION HINGE COVER
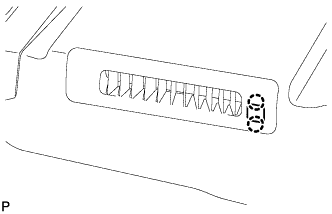
|
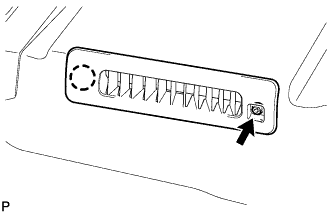
|
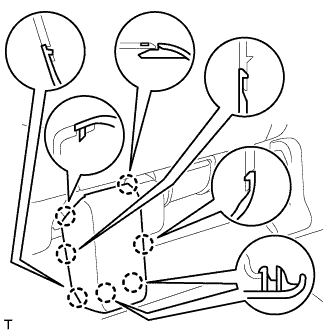
Using a screwdriver, detach the 6 claws and remove the cover.
- HINT:
- Tape the screwdriver tip before use.
| 5.
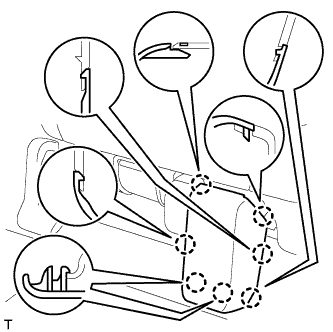
REMOVE REAR NO. 5 SEAT CUSHION HINGE COVER
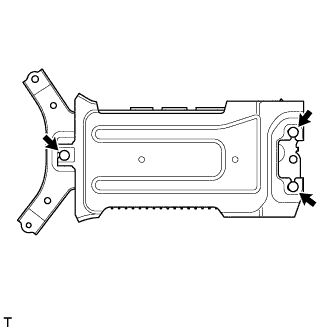
|
|
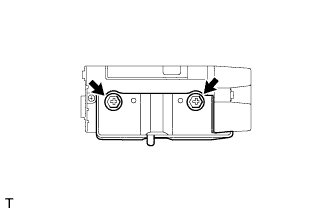
Using a screwdriver, detach the 7 claws and remove the cover.
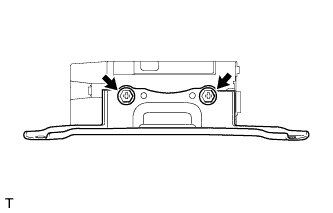
- HINT:
- Tape the screwdriver tip before use.
| 6.
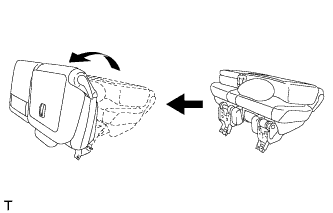
REMOVE REAR NO. 2 SEAT CUSHION HINGE COVER
|
|
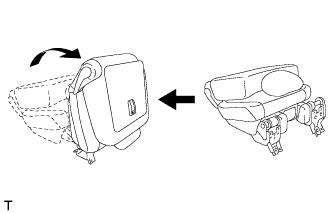
- Operate the reclining adjuster release handle to move the seat into the position shown in the illustration.
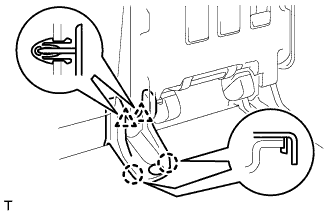
- Using a screwdriver, detach the 2 claws and 2 clips, and remove the cover.
- HINT:
- Tape the screwdriver tip before use.
| 7.
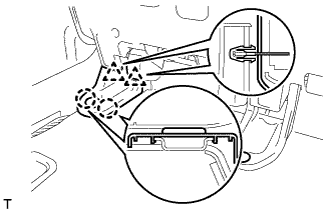
REMOVE REAR NO. 4 SEAT CUSHION HINGE COVER
|
|
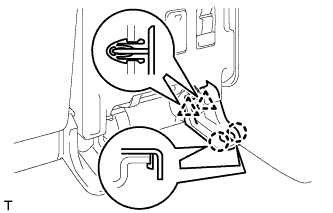
- Using a screwdriver, detach the 2 claws and 2 clips, and remove the cover.
- HINT:
- Tape the screwdriver tip before use.
| 8.
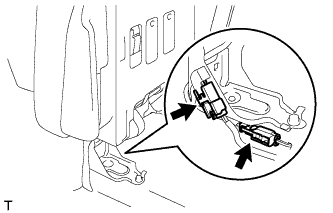
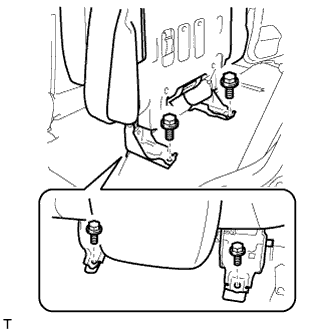
REMOVE REAR NO. 1 SEAT ASSEMBLY LH
|
|
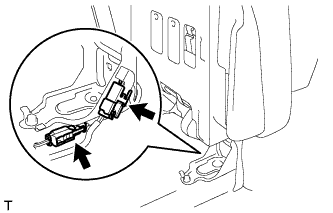
- w/ Rear Seat Side Airbag:
Disconnect the connector.
w/ Seat Heater System:
Disconnect the connector.
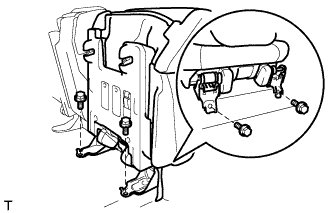
- Remove the 4 bolts and seat assembly.
- NOTICE:
- Be careful not to damage the vehicle body.
| 9.
REMOVE REAR NO. 2 SEAT CUSHION HINGE COVER
|
|
Using a screwdriver, detach the 6 claws and remove the cover.
- HINT:
- Tape the screwdriver tip before use.
| 10.
REMOVE REAR NO. 4 SEAT CUSHION HINGE COVER
|
|
Using a screwdriver, detach the 7 claws and remove the cover.
- HINT:
- Tape the screwdriver tip before use.
| 11.
REMOVE REAR NO. 1 SEAT CUSHION HINGE COVER
|
|
- Operate the reclining adjuster release handle to move the seat into the position shown in the illustration.
- Using a screwdriver, detach the 2 claws and 2 clips, and remove the cover.
- HINT:
- Tape the screwdriver tip before use.
| 12.
REMOVE REAR NO. 3 SEAT CUSHION HINGE COVER
|
|
- Using a screwdriver, detach the 2 claws and 2 clips, and remove the cover.
- HINT:
- Tape the screwdriver tip before use.
| 13.
REMOVE REAR NO. 1 SEAT ASSEMBLY RH
|
|
- w/ Rear Seat Side Airbag:
Disconnect the connector.
w/ Seat Heater System:
Disconnect the connector.
- Remove the 4 bolts and seat assembly.
- NOTICE:
- Be careful not to damage the vehicle body.
| 14.
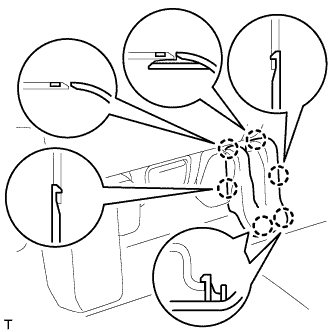
REMOVE INSTRUMENT SIDE PANEL LH
|
|
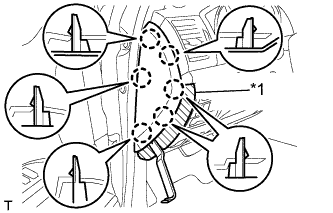
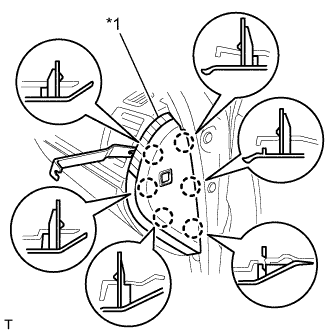
Place protective tape as shown in the illustration.
Text in Illustration
*1
|
Protective Tape
|
Using a moulding remover, detach the 6 claws and remove the instrument side panel.
| 15.
REMOVE INSTRUMENT SIDE PANEL RH (w/o Airbag Cut Off Switch)
|
|
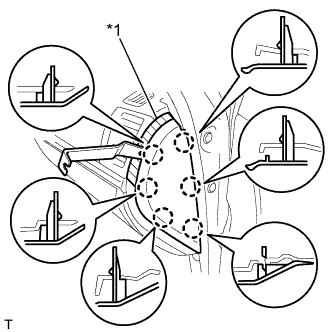
Place protective tape as shown in the illustration.
Text in Illustration
*1
|
Protective Tape
|
Using a moulding remover, detach the 6 claws and remove the instrument side panel.
| 16.
REMOVE INSTRUMENT SIDE PANEL RH (w/ Airbag Cut Off Switch)
|
|
Place protective tape as shown in the illustration.
Text in Illustration
*1
|
Protective Tape
|
Using a moulding remover, detach the 6 claws.
Disconnect the connector and remove the instrument side panel.
| 17.
REMOVE FRONT DOOR SCUFF PLATE LH
|
|
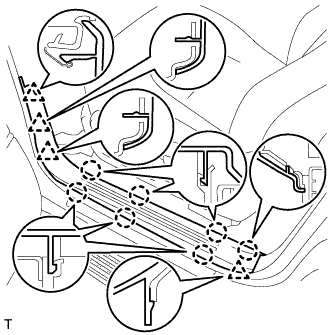
Detach the 7 claws and 4 clips, and remove the scuff plate.
| 18.
REMOVE FRONT DOOR SCUFF PLATE RH
|
|
- HINT:
- Use the same procedures described for the LH side.
| 19.
REMOVE NO. 1 INSTRUMENT PANEL UNDER COVER SUB-ASSEMBLY (w/ Floor Under Cover)
|
|
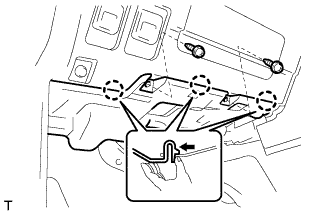
Remove the 2 screws.
Detach the 3 claws.
Disconnect the connectors and remove the No. 1 instrument panel under cover.
| 20.
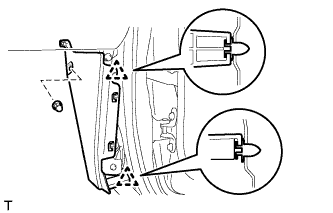
REMOVE COWL SIDE TRIM BOARD LH
|
|
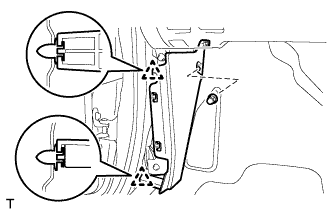
Remove the cap nut.
Detach the 2 clips and remove the cowl side trim board.
| 21.
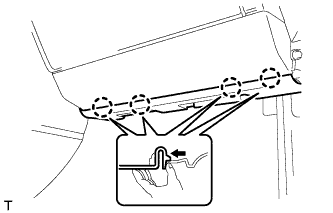
REMOVE NO. 2 INSTRUMENT PANEL UNDER COVER SUB-ASSEMBLY (w/ Floor Under Cover)
|
|
Detach the 4 claws and remove the No. 2 instrument panel under cover.
| 22.
REMOVE COWL SIDE TRIM BOARD RH
|
|
Remove the cap nut.
Detach the 2 clips and remove the cowl side trim board.
| 23.
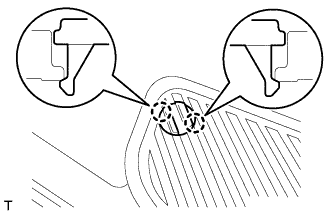
REMOVE REAR STEP COVER
|
|
- HINT:
- Use the same procedure to remove the step cover on the other side.
Detach the 2 claws and remove the step cover.
| 24.
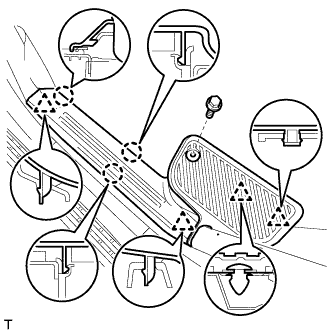
REMOVE REAR DOOR SCUFF PLATE LH
|
|
Remove the screw.
Detach the 3 claws and 4 clips, and remove the scuff plate.
| 25.
REMOVE REAR DOOR SCUFF PLATE RH
|
|
- HINT:
- Use the same procedures described for the LH side.
| 26.
REMOVE NO. 2 AIR DUCT PLUG |
|
- Detach the 4 claws and remove the 2 plugs.
- HINT:
- Use the same procedures for both sides.
| 27.
REMOVE AIR HEATER GUIDE |
|
- Remove the 2 screws and guide.
- HINT:
- Use the same procedures for both sides.
| 28.
REMOVE AIR DUCT PLUG |
|
- Detach the 2 claws and remove the plug.
- HINT:
- Use the same procedures for both sides.
| 29.
REMOVE REAR AIR DUCT GUIDE |
|
- Remove the screw.
Detach the claw and remove the guide.
- HINT:
- Use the same procedures for both sides.
| 30.
REMOVE REAR NO. 1 SEAT PROTECTOR |
|
- Detach the clip and 4 claws, and remove the protector.
- HINT:
- Use the same procedures to remove the protector on the other side.
| 31.
REMOVE REAR NO. 2 SEAT PROTECTOR |
|
- Detach the clip and 4 claws, and remove the protector.
- HINT:
- Use the same procedures to remove the protector on the other side.
| 32.
REMOVE COOLING BOX ASSEMBLY (w/ Cool Box) |
|
Remove the cooling box assembly (Click here).
| 33.
REMOVE REAR CONSOLE BOX SUB-ASSEMBLY (w/o Cool Box) |
|
Remove the rear console box sub-assembly (Click here).
| 34.
REMOVE FRONT FLOOR CARPET ASSEMBLY |
|
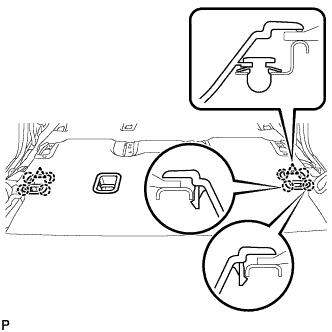
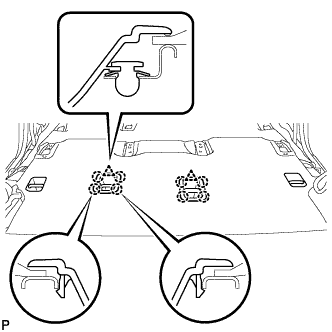
Detach the 2 clips and 8 claws.
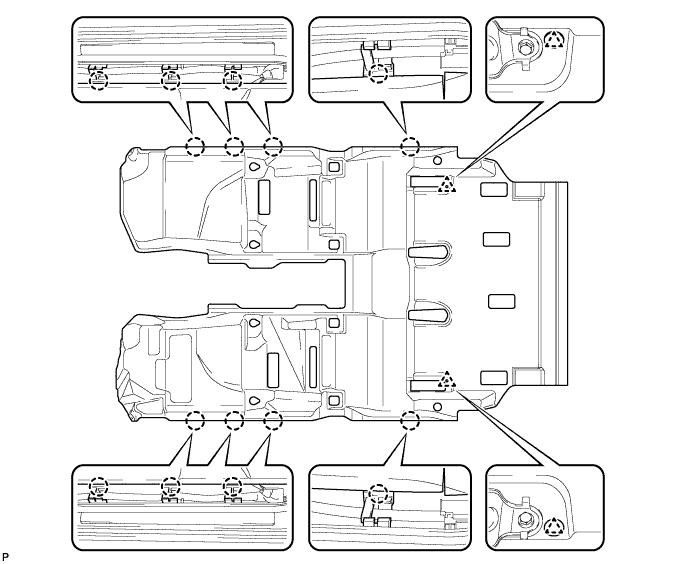

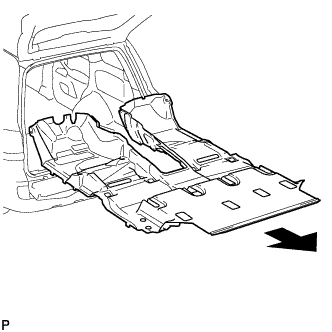
- Remove the carpet from the floor, open the back door and tail gate, and remove the carpet from the rear of the vehicle.
| 35.
REMOVE STEREO COMPONENT AMPLIFIER ASSEMBLY WITH BRACKET |
|
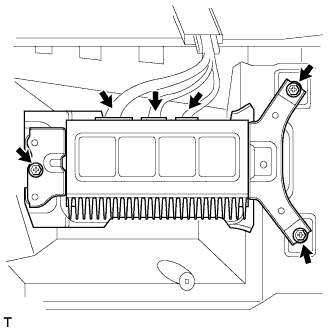
- Disconnect the 3 connectors.
Remove the 3 bolts and remove the amplifier with bracket.
| 36.
REMOVE AMPLIFIER COVER |
|
- Detach the 3 clips and remove the cover.
| 37.
REMOVE NO. 1 AMPLIFIER BRACKET |
|
Remove the 2 screws and bracket.
| 38.
REMOVE NO. 2 AMPLIFIER BRACKET |
|
Remove the 2 screws and bracket.