2011-2013 Land Cruiser · Service Manual Vehicle Interior

REMOVAL

Removal / installation · Vehicles built from Jan 2012

Versions by build date: Sep 2011 – Dec 2011 from Jan 2012

HINT:
  1. Use the same procedures for the LHD vehicle and RHD vehicle.
  2. The procedures listed below are for the LHD vehicle.


1. PRECAUTION

NOTICE:
After turning the ignition switch off, waiting time may be required before disconnecting the cable from the battery terminal. Therefore, make sure to read the disconnecting the cable from the battery terminal notice before proceeding with work (Click here).


2. DISCONNECT CABLE FROM NEGATIVE BATTERY TERMINAL

NOTICE:
When disconnecting the cable, some systems need to be initialized after the cable is reconnected (Click here).

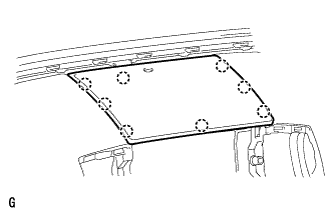
3. REMOVE NO. 1 SPEAKER OPENING COVER ASSEMBLY

B183763
  1. Detach the 8 claws and remove the opening cover.


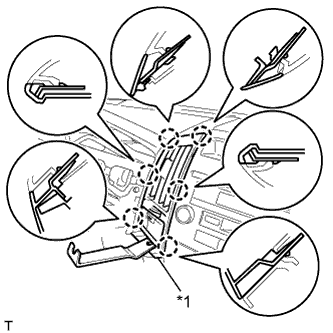
4. REMOVE NO. 3 INSTRUMENT PANEL REGISTER ASSEMBLY

B180307E02
  1. Place protective tape as shown in the illustration.

    Text in Illustration 
    *1
    Protective Tape

  1. Using a moulding remover, detach the 6 claws.

  1. Disconnect the connector and remove the No. 3 instrument panel register.


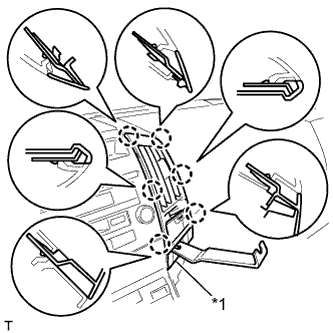
5. REMOVE NO. 4 INSTRUMENT PANEL REGISTER ASSEMBLY

B181944E02
  1. Place protective tape as shown in the illustration.

    Text in Illustration 
    *1
    Protective Tape

  1. Using a moulding remover, detach the 6 claws.

  1. Disconnect the connector and remove the No. 4 instrument panel register.


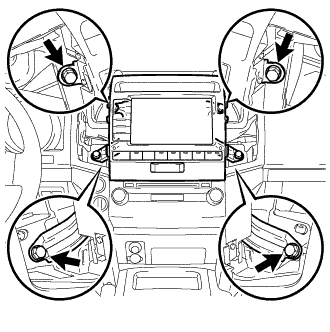
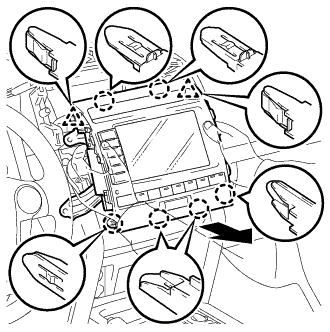
6. REMOVE MULTI-DISPLAY ASSEMBLY WITH BRACKET

  1. E247526
    Remove the 4 bolts.

  1. E247527
    Pull the radio receiver to detach the 8 claws on the backside of the radio receiver.

  1. Disconnect the connectors and remove the radio receiver.

← REMOVAL (Sep 2011 – Dec 2011)INSTALLATION (Sep 2011 – Dec 2011) →