JF2A TRANSFER / 4WD / AWD TRANSFER ASSEMBLY DISASSEMBLY
PROCEDURE

 37109A
1.REMOVE PROPELLER SHAFT HEAT INSULATOR BRACKET SUB-ASSEMBLY
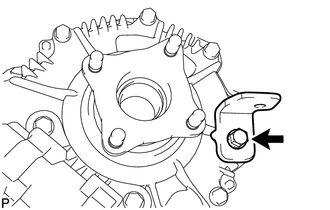
Remove the bolt and bracket.
36183A
2.REMOVE TRANSFER OIL PUMP PLATE
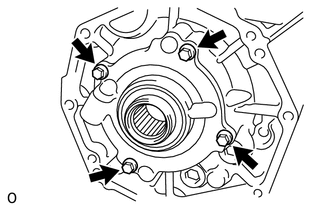
Remove the 4 bolts, oil pump plate and oil pump driven rotor.
- NOTICE:
-
Do not drop the oil pump driven rotor.
Remove the O-ring from the oil pump plate.
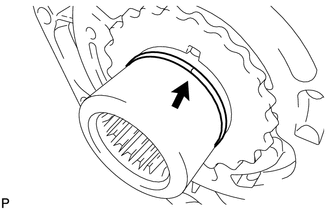
Remove the transfer oil seal ring from the input shaft.
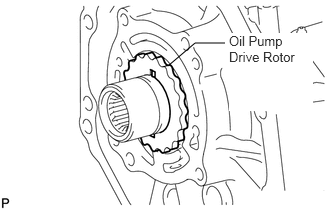
Remove the oil pump drive rotor from the input shaft.
36111G
3.REMOVE TRANSFER CASE STRAIGHT PIN
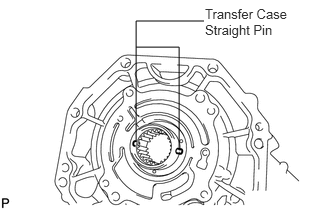
Remove the 2 straight pins.
- NOTICE:
-
Do not drop the straight pins.
36111F
4.REMOVE TRANSFER CASE PLUG
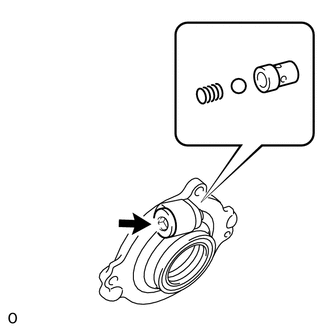
Using a 10 mm hexagon wrench, remove the case plug, compression spring, ball and relief valve seat.
36111B
5.REMOVE TRANSFER OIL PUMP PLATE OIL SEAL
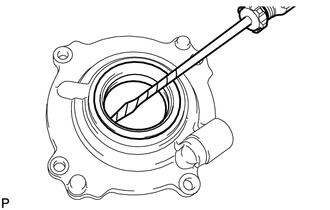
Using a screwdriver, pry out the oil seal from the oil pump plate.
- NOTICE:
-
Be careful not to damage the oil seal and oil pump plate contact surfaces.
- HINT:
-
Tape the screwdriver tip before use.
33309C
6.REMOVE FRONT OUTPUT SHAFT COMPANION FLANGE SUB-ASSEMBLY
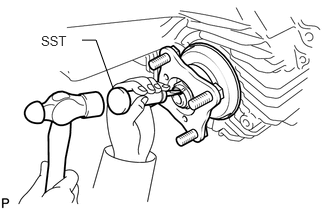
Using SST and a hammer, release the staked part of the nut.
- SST
- 09930-00010 (09931-00010, 09931-00020)
- NOTICE:
- ·
Be sure to use SST with the tapered surface facing the shaft.
·Do not grind the tip of SST with a grinder, etc.
·Completely loosen the staked part of the nut when removing it.
·Do not damage the threads of the transfer driven sprocket.
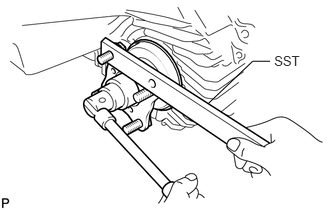
Using SST to hold the companion flange, remove the lock nut.
- SST
- 09330-00021
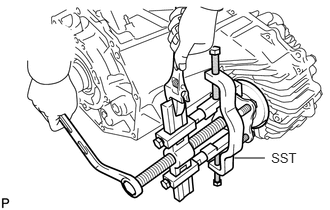
Using SST, remove the companion flange.
- SST
- 09950-40011 (09951-04020, 09952-04010, 09953-04030, 09954-04010, 09955-04051, 09957-04010, 09958-04011)
Remove the O-ring from the companion flange.
36104B
7.REMOVE TRANSFER OUTPUT SHAFT DUST DEFLECTOR
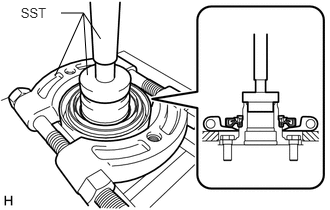
Using SST and a press, remove the transfer output shaft dust deflector.
- SST
- 09950-00020
09950-60010 (09951-00340, 09951-00470, 09952-06010)
09950-70010 (09951-07100)
- NOTICE:
-
Do not drop the front output shaft companion flange sub-assembly.
36102J
8.REMOVE TRANSFER CASE FRONT OIL SEAL
33309C
9.REMOVE REAR OUTPUT SHAFT COMPANION FLANGE SUB-ASSEMBLY
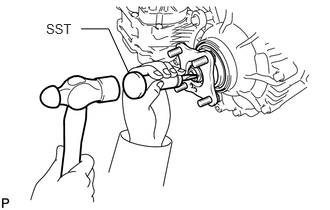
Using SST and a hammer, release the staked part of the nut.
- SST
- 09930-00010 (09931-00010, 09931-00020)
- NOTICE:
- ·
Be sure to use SST with the tapered surface facing the shaft.
·Do not grind the tip of SST with a grinder, etc.
·Completely loosen the staked part of the nut when removing it.
·Do not damage the threads of the rear transfer output shaft.
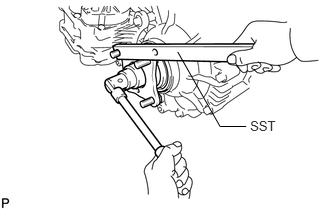
Using SST to hold the companion flange, remove the lock nut.
- SST
- 09330-00021
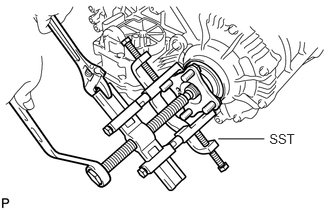
Using SST, remove the companion flange.
- SST
- 09950-40011 (09951-04020, 09952-04010, 09953-04030, 09954-04010, 09955-04051, 09957-04010, 09958-04011)
Remove the O-ring from the companion flange.
36115C
10.REMOVE TRANSFER CASE REAR OIL SEAL
36114B
11.REMOVE NO. 1 TRANSFER CASE PLUG
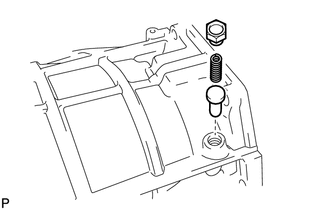
Remove the plug, compression spring and pin.
36113C
12.REMOVE TRANSFER CASE PLUG
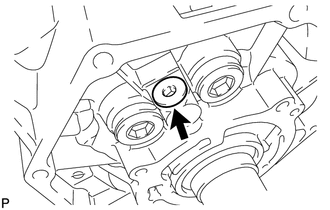
Using a 6 mm hexagon wrench, remove the plug.
36112
13.REMOVE REAR TRANSFER CASE ASSEMBLY
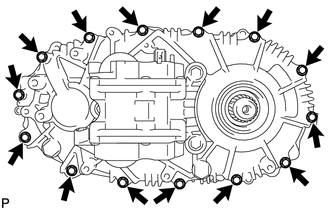
Remove the 14 bolts.
Remove the rear transfer case.
- HINT:
-
If necessary, tap the rear transfer case with a plastic-faced hammer to remove it.
36231E
14.REMOVE FRONT TRANSFER OUTPUT SHAFT NEEDLE ROLLER BEARING
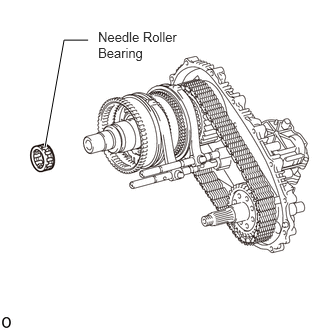
Remove the needle roller bearing from the output shaft.
36312F
15.REMOVE NO. 2 TRANSFER GEAR SHIFT FORK
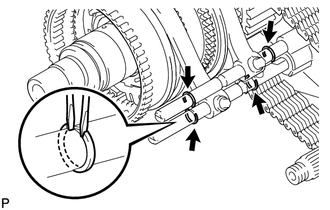
Using 2 screwdrivers and a hammer, tap out the 4 shift fork shaft snap rings.
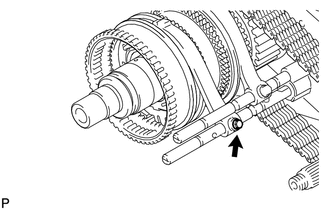
Remove the bolt. Then remove the No. 2 gear shift fork together with the high and low clutch sleeve from the shift actuator.
36410J
16.REMOVE TRANSFER SHIFT ACTUATOR ASSEMBLY
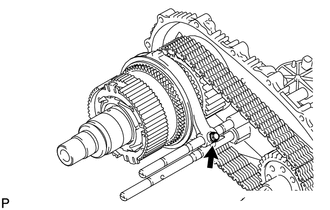
Remove the No. 1 gear shift fork bolt.
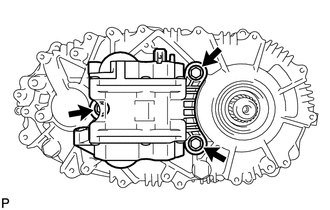
Remove the 3 bolts.
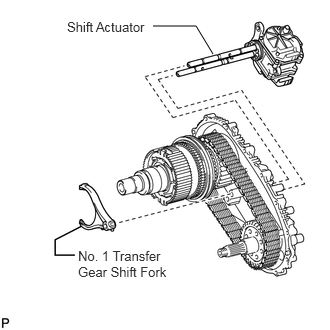
Remove the shift actuator and No. 1 gear shift fork from the rear transfer case.
- NOTICE:
-
Take care not to drop the No. 1 gear shift fork.
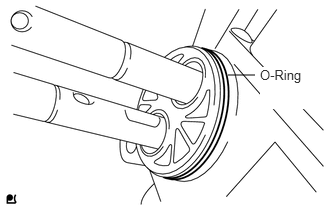
Remove the O-ring from the shift actuator.
17.REMOVE REAR TRANSFER OUTPUT SHAFT ASSEMBLY
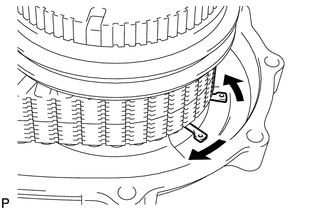
Using a snap ring expander, expand the snap ring as shown in the illustration.
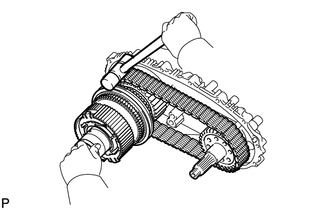
Using a plastic-faced hammer, carefully tap the rear transfer case, and remove the output shaft together with the drive chain and driven sprocket.
Remove the output shaft and driven sprocket from the drive chain.
- NOTICE:
-
Do not drop the output shaft washers.
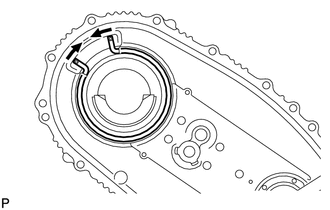
Using a snap ring expander, remove the snap ring from the rear transfer case.
36236
18.REMOVE FRONT DRIVE CLUTCH SLEEVE
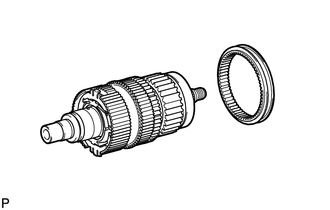
Remove the clutch sleeve from the output shaft.
41335D
19.REMOVE SIDE GEAR SHAFT HOLDER BEARING
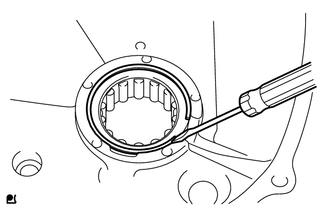
Using a screwdriver, remove the snap ring.
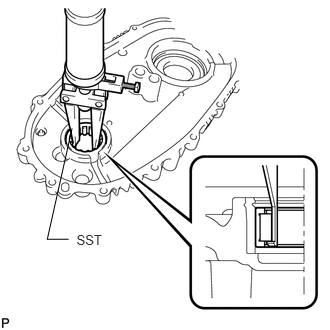
Using SST, remove the bearing.
- SST
- 09308-00010
36104K
20.REMOVE TRANSFER OIL SEPARATOR SUB-ASSEMBLY
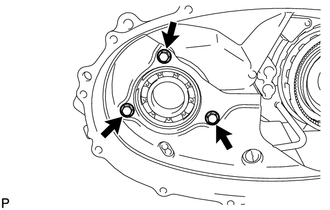
Remove the 3 bolts and oil separator.
Remove the O-ring from the oil separator.
33449D
21.REMOVE TRANSFER CASE MAGNET
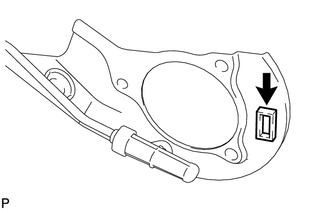
Remove the magnet from the oil separator.
22.REMOVE TRANSFER INPUT SHAFT ASSEMBLY
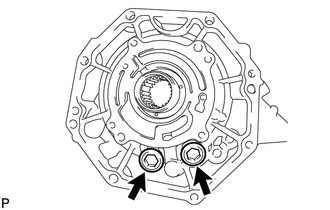
Using a 14 mm hexagon wrench, remove the 2 case plugs from the front transfer case.
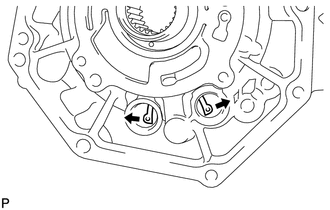
Using a snap ring expander, expand the snap ring as shown in the illustration. Then remove the input shaft from the front transfer case.
36273
23.REMOVE TRANSFER LOW PLANETARY RING GEAR
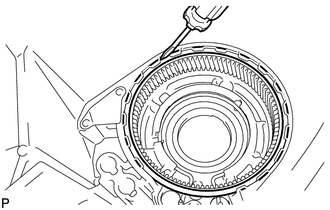
Using a screwdriver, remove the snap ring. Then remove the low planetary ring gear from the front transfer case.
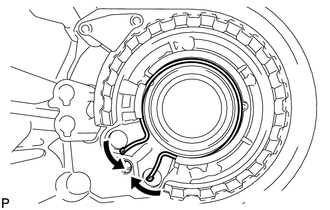
Using a snap ring expander, remove the snap ring from the front transfer case.
36292A
24.REMOVE TRANSFER DRIVEN SPROCKET BEARING
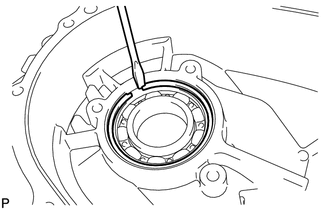
Using a screwdriver, remove the snap ring. Then remove the bearing from the front transfer case.
33367F
25.REMOVE NO. 1 SYNCHRONIZER RING (for Manual Transmission)
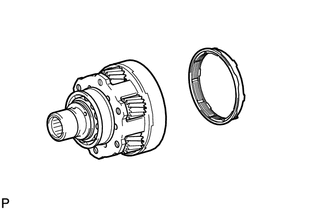
Remove the synchronizer ring from the input shaft.
36216A
26.REMOVE NO. 1 TRANSFER INPUT SHAFT SEAL RING
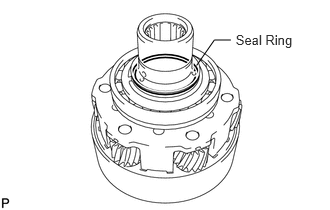
Remove the seal ring from the input shaft.
36210A
27.REMOVE TRANSFER INPUT SHAFT BEARING
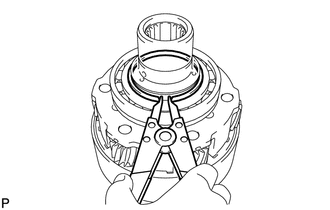
Using a snap ring expander, remove the snap ring.
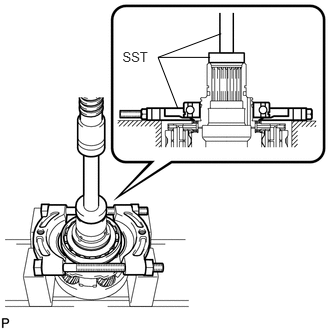
Using SST and a press, press out the bearing.
- SST
- 09555-55010
09950-60010 (09951-00490)
09950-70010 (09951-07100)
- NOTICE:
-
Be careful not to drop or damage the input shaft, low planetary gear and low planetary gear bearings.
- HINT:
-
When the bearing is removed, the input shaft, low planetary gear, and 2 low planetary gear bearings will come off.
36211H
28.REMOVE TRANSFER INPUT SHAFT BIMETAL FORMED BUSH
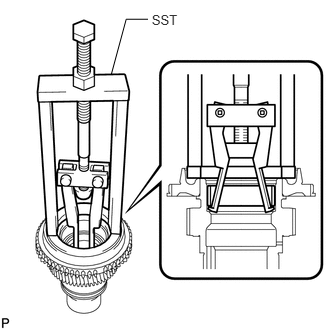
Using SST, remove the bush.
- SST
- 09387-00041 (09387-01021, 09387-01030, 09387-01040)
36218C
29.REMOVE TRANSFER INPUT SHAFT PLUG
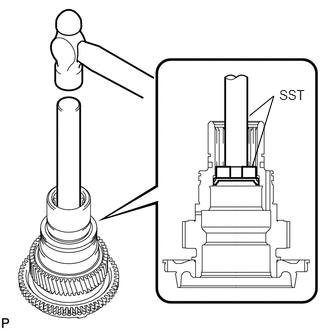
Using SST and a hammer, tap out the input shaft plug.
- SST
- 09950-70010 (09951-07150)
09950-60010 (09951-00300)
33309H
30.REMOVE TRANSFER OUTPUT SHAFT WASHER
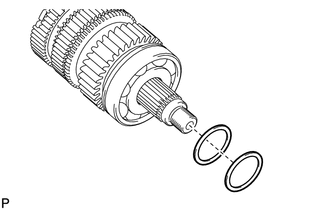
Remove the 2 output shaft washers from the output shaft.
36255
31.REMOVE NO. 1 TRANSFER OUTPUT SHAFT SPACER
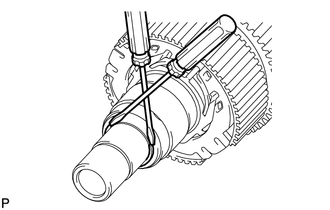
Using 2 screwdrivers and a hammer, tap out the snap ring.
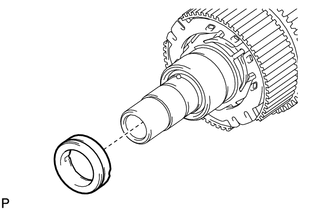
Remove the output shaft spacer from the output shaft.
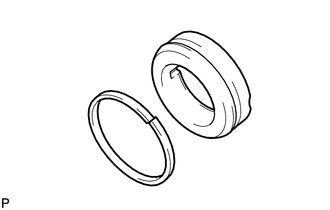
Remove the seal ring from the output shaft spacer.
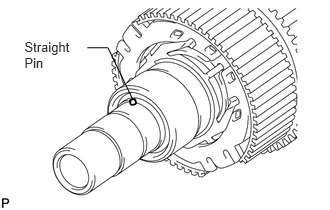
Remove the straight pin from the output shaft.
41311M
32.REMOVE CENTER DIFFERENTIAL CASE
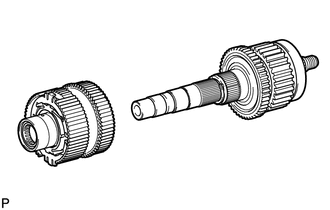
Remove the center differential case from the output shaft.
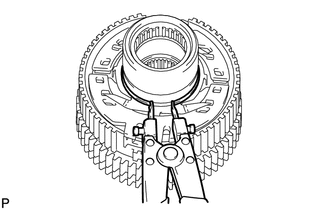
for Manual Transmission:
Using a snap ring expander, remove the snap ring.
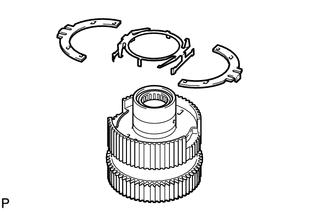
for Manual Transmission:
Remove the synchromesh shifting key spring and No. 2 synchromesh shifting keys from the center differential case.
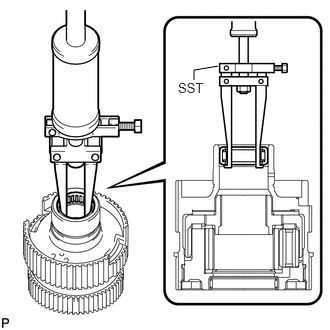
Using SST, remove the needle roller bearing.
- SST
- 09308-00010
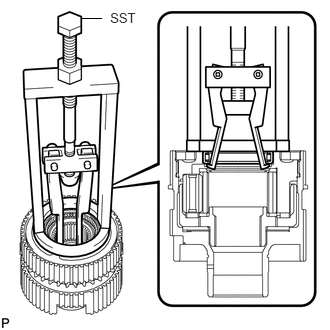
Using SST, remove the needle roller bearing.
- SST
- 09387-00041 (09387-01021, 09387-01030, 09387-01040)
36231A
33.REMOVE TRANSFER OUTPUT SHAFT SPACER
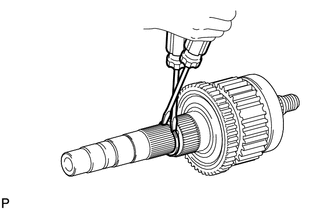
Using 2 screwdrivers and a hammer, tap out the snap ring.
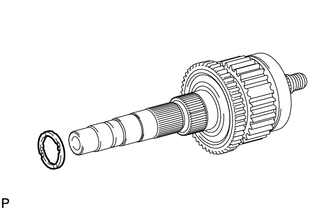
Remove the output shaft spacer from the output shaft.
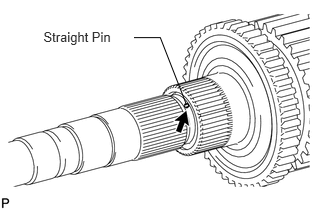
Remove the straight pin from the output shaft.
36205
34.REMOVE TRANSFER DRIVE SPROCKET SUB-ASSEMBLY
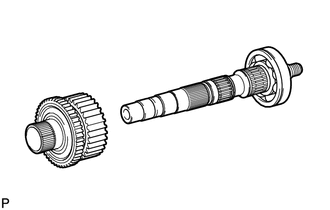
Remove the drive sprocket from the output shaft.
36291A
35.REMOVE TRANSFER DRIVE SPROCKET BEARING
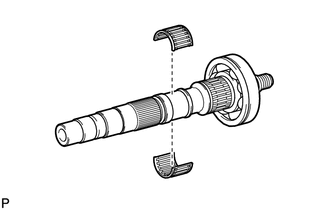
Remove the bearing from the output shaft.
36231
36.REMOVE REAR TRANSFER OUTPUT SHAFT
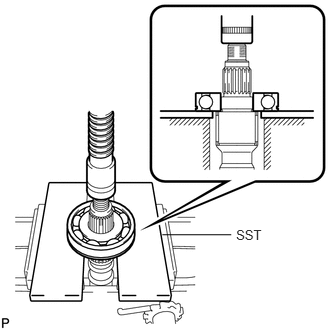
Using SST and a press, press out the bearing.
- SST
- 09527-10011
- NOTICE:
-
Be careful not to drop or damage the output shaft.
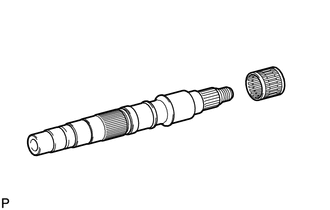
Remove the needle roller bearing from the output shaft.