AUDIO / VIDEO INSTRUMENT PANEL SPEAKER INSTALLATION
CAUTION / NOTICE / HINT
- HINT:
- ·
Use the same procedures for the LH side and RH side.
·The procedures listed below are for the LH side.
·A bolt without a torque specification is shown in the standard bolt chart (See page General>SPECIFICATIONS>STANDARD BOLT>SPECIFIED TORQUE FOR STANDARD BOLTS).
PROCEDURE

 86160P
1.INSTALL FRONT NO. 2 SPEAKER ASSEMBLY
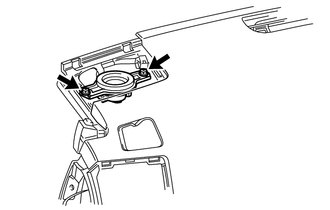
for 9 Speakers Models:
Connect the connector.
Temporarily install the speaker by aligning the positioning pins of the speaker with the instrument panel.
Install the speaker with the 2 bolts.
- NOTICE:
- ·
Do not touch the cone part of the speaker.
·When installing the speaker to the instrument panel be careful that the wires do not get caught between the parts.
except 9 Speakers Models:
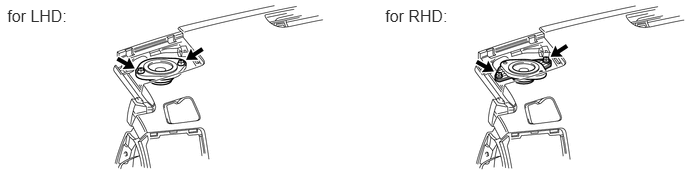
Connect the connector.
Temporarily install the speaker by aligning the positioning pins of the speaker with the instrument panel.
Install the speaker with the 2 bolts.
- NOTICE:
- ·
Do not touch the cone part of the speaker.
·When installing the speaker to the instrument panel be careful that the wires do not get caught between the parts.
55408F
2.INSTALL NO. 1 INSTRUMENT PANEL SPEAKER PANEL SUB-ASSEMBLY
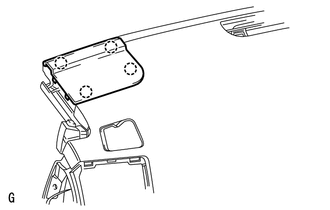
Attach the 4 claws to install the panel.
62212
3.INSTALL FRONT PILLAR GARNISH LH
74610A
4.INSTALL FRONT ASSIST GRIP SUB-ASSEMBLY
86160L
5.INSTALL FRONT NO. 4 SPEAKER ASSEMBLY
Connect the speaker connector.
Temporarily install the speaker by aligning the positioning pins of the speaker with the instrument panel.
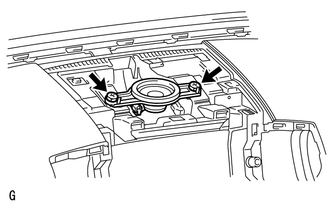
Install the speaker with the 2 bolts.
- NOTICE:
- ·
Do not touch the cone part of the speaker.
·When installing the speaker to the instrument panel be careful that the wires do not get caught between the parts.
55510F
6.INSTALL NO. 1 SPEAKER OPENING COVER ASSEMBLY
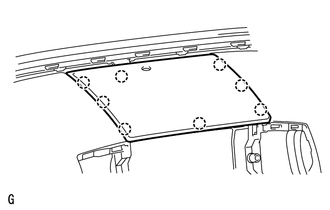
Attach the 8 claws to install the opening cover.
7.CONNECT CABLE TO NEGATIVE BATTERY TERMINAL
- NOTICE:
-
When disconnecting the cable, some systems need to be initialized after the cable is reconnected (See page General>INTRODUCTION>REPAIR INSTRUCTION>INITIALIZATION).