HEATING / AIR CONDITIONING DUCT TEMPERATURE SENSOR(w/ Heater) REMOVAL
PROCEDURE

 1. PRECAUTION
- NOTICE:
-
After turning the ignition switch off, waiting time may be required before disconnecting the cable from the battery terminal. Therefore, make sure to read the disconnecting the cable from the battery terminal notice before proceeding with work (See page General>INTRODUCTION>REPAIR INSTRUCTION>PRECAUTION).
2.DISCONNECT CABLE FROM NEGATIVE BATTERY TERMINAL
- CAUTION:
-
Wait at least 90 seconds after disconnecting the cable from the negative (-) battery terminal to disable the SRS system.
- NOTICE:
-
When disconnecting the cable, some systems need to be initialized after the cable is reconnected (See page General>INTRODUCTION>REPAIR INSTRUCTION>INITIALIZATION).
3.REMOVE REAR NO. 1 SEAT ASSEMBLY LH
for 60/40 Split Seat Type 40 Side:
(See page Vehicle Interior>SEAT>REAR NO. 1 SEAT ASSEMBLY (for 60/40 Split Seat Type 40 Side)>REMOVAL)
for 60/40 Split Seat Type 60 Side:
(See page Vehicle Interior>SEAT>REAR NO. 1 SEAT ASSEMBLY (for 60/40 Split Seat Type 60 Side)>REMOVAL)
4.REMOVE REAR NO. 1 SEAT ASSEMBLY RH
for 60/40 Split Seat Type 40 Side:
(See page Vehicle Interior>SEAT>REAR NO. 1 SEAT ASSEMBLY (for 60/40 Split Seat Type 40 Side)>REMOVAL)
for 60/40 Split Seat Type 60 Side:
(See page Vehicle Interior>SEAT>REAR NO. 1 SEAT ASSEMBLY (for 60/40 Split Seat Type 60 Side)>REMOVAL)
5.REMOVE REAR NO. 2 SEAT ASSEMBLY LH
for Face to Face Seat Type:
(See page Vehicle Interior>SEAT>REAR NO. 2 SEAT ASSEMBLY(for Face to Face Seat Type)>REMOVAL)
except Face to Face Seat Type:
(See page Vehicle Interior>SEAT>REAR NO. 2 SEAT ASSEMBLY(except Face to Face Seat Type)>REMOVAL)
6.REMOVE REAR NO. 2 SEAT ASSEMBLY RH
for Face to Face Seat Type:
(See page Vehicle Interior>SEAT>REAR NO. 2 SEAT ASSEMBLY(for Face to Face Seat Type)>REMOVAL)
except Face to Face Seat Type:
(See page Vehicle Interior>SEAT>REAR NO. 2 SEAT ASSEMBLY(except Face to Face Seat Type)>REMOVAL)
67918E
7.REMOVE REAR DOOR SCUFF PLATE LH
w/ Sliding Roof:
(See page Vehicle Interior>INTERIOR PANELS / TRIM>ROOF HEADLINING (w/ Sliding Roof)>REMOVAL)
w/o Sliding Roof:
(See page Vehicle Interior>INTERIOR PANELS / TRIM>ROOF HEADLINING (w/o Sliding Roof)>REMOVAL)
67917C
8.REMOVE REAR DOOR SCUFF PLATE RH
w/ Sliding Roof:
(See page Vehicle Interior>INTERIOR PANELS / TRIM>ROOF HEADLINING (w/ Sliding Roof)>REMOVAL)
w/o Sliding Roof:
(See page Vehicle Interior>INTERIOR PANELS / TRIM>ROOF HEADLINING (w/o Sliding Roof)>REMOVAL)
58574A
9.REMOVE REAR FLOOR MAT REAR SUPPORT PLATE
w/ Sliding Roof:
(See page Vehicle Interior>INTERIOR PANELS / TRIM>ROOF HEADLINING (w/ Sliding Roof)>REMOVAL)
w/o Sliding Roof:
(See page Vehicle Interior>INTERIOR PANELS / TRIM>ROOF HEADLINING (w/o Sliding Roof)>REMOVAL)
64910J
10.REMOVE TONNEAU COVER ASSEMBLY (w/ Tonneau Cover)
71845B
11.REMOVE REAR SEAT COVER CAP (w/ Rear No. 2 Seat)
w/ Sliding Roof:
(See page Vehicle Interior>INTERIOR PANELS / TRIM>ROOF HEADLINING (w/ Sliding Roof)>REMOVAL)
w/o Sliding Roof:
(See page Vehicle Interior>INTERIOR PANELS / TRIM>ROOF HEADLINING (w/o Sliding Roof)>REMOVAL)
62520P
12.REMOVE FRONT QUARTER TRIM PANEL ASSEMBLY LH
w/ Sliding Roof:
(See page Vehicle Interior>INTERIOR PANELS / TRIM>ROOF HEADLINING (w/ Sliding Roof)>REMOVAL)
w/o Sliding Roof:
(See page Vehicle Interior>INTERIOR PANELS / TRIM>ROOF HEADLINING (w/o Sliding Roof)>REMOVAL)
71845B
13.REMOVE REAR SEAT COVER CAP (w/ Rear No. 2 Seat)
w/ Sliding Roof:
(See page Vehicle Interior>INTERIOR PANELS / TRIM>ROOF HEADLINING (w/ Sliding Roof)>REMOVAL)
w/o Sliding Roof:
(See page Vehicle Interior>INTERIOR PANELS / TRIM>ROOF HEADLINING (w/o Sliding Roof)>REMOVAL)
62510P
14.REMOVE FRONT QUARTER TRIM PANEL ASSEMBLY RH
w/ Sliding Roof:
(See page Vehicle Interior>INTERIOR PANELS / TRIM>ROOF HEADLINING (w/ Sliding Roof)>REMOVAL)
w/o Sliding Roof:
(See page Vehicle Interior>INTERIOR PANELS / TRIM>ROOF HEADLINING (w/o Sliding Roof)>REMOVAL)
71695F
15.REMOVE REAR NO. 1 SEAT PROTECTOR
71696
16.REMOVE REAR NO. 2 SEAT PROTECTOR
58510D
17.REMOVE FRONT FLOOR CARPET ASSEMBLY
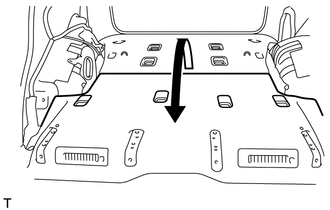
Fold back the floor carpet.
- HINT:
-
Fold back the carpet until it is possible to remove the rear No. 6 air duct.
87212K
18.REMOVE REAR NO. 6 AIR DUCT
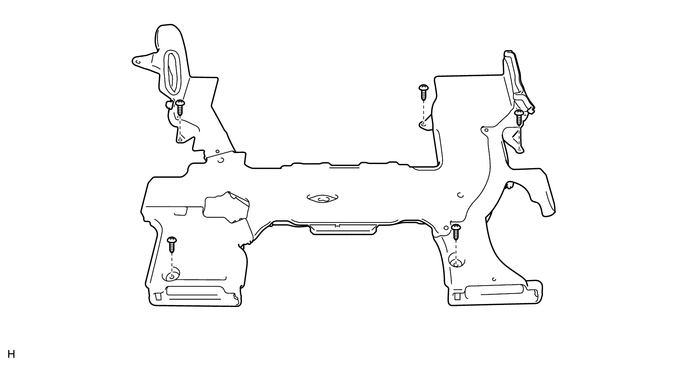
Disconnect the 2 connectors.
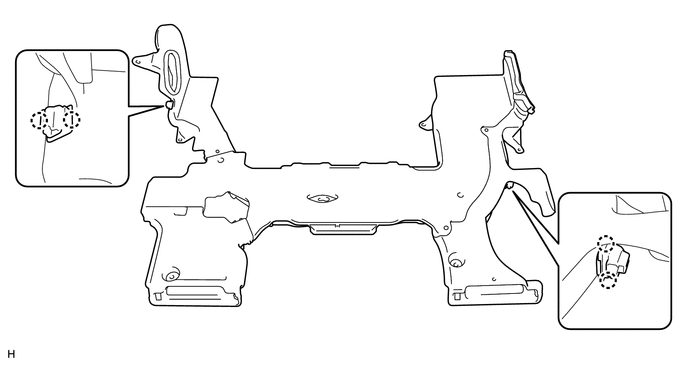
Remove the 5 screws and duct.
88625C
19.REMOVE DUCT TEMPERATURE SENSOR
Detach the 4 claws and remove the 2 sensors.