SLIDING ROOF / CONVERTIBLE SLIDING ROOF HOUSING REMOVAL
PROCEDURE

 1. PRECAUTION
- NOTICE:
-
After turning the ignition switch off, waiting time may be required before disconnecting the cable from the battery terminal. Therefore, make sure to read the disconnecting the cable from the battery terminal notice before proceeding with work (See page General>INTRODUCTION>REPAIR INSTRUCTION>PRECAUTION).
2.DISCONNECT CABLE FROM NEGATIVE BATTERY TERMINAL
- CAUTION:
-
Wait at least 90 seconds after disconnecting the cable from the negative (-) battery terminal to disable the SRS system.
- NOTICE:
-
When disconnecting the cable, some systems need to be initialized after the cable is reconnected (See page General>INTRODUCTION>REPAIR INSTRUCTION>INITIALIZATION).
63310
3.REMOVE ROOF HEADLINING ASSEMBLY
Remove the roof headlining (See page Vehicle Interior>INTERIOR PANELS / TRIM>ROOF HEADLINING (w/ Sliding Roof)>REMOVAL).
62180A
4.REMOVE CURTAIN SHIELD AIRBAG ASSEMBLY LH
Remove the curtain shield airbag (See page Vehicle Interior>SUPPLEMENTAL RESTRAINT SYSTEMS>CURTAIN SHIELD AIRBAG ASSEMBLY>REMOVAL).
62170A
5.REMOVE CURTAIN SHIELD AIRBAG ASSEMBLY RH
- HINT:
-
Use the same procedures described for the LH side.
88566V
6.REMOVE REAR NO. 5 ROOF AIR DUCT (w/ Rear Cooler)
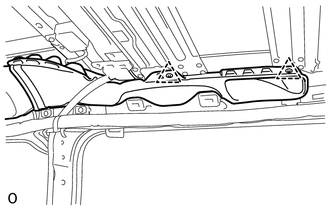
Detach the 2 clips and remove the No. 5 roof air duct.
88566U
7.REMOVE REAR NO. 4 ROOF AIR DUCT (w/ Rear Cooler)
- HINT:
-
Use the same procedures described for the No. 5 roof air duct.
63218G
8.REMOVE SLIDING ROOF SIDE GARNISH LH
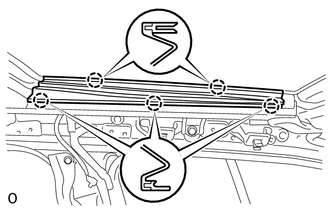
Detach the 5 claws and remove the side garnish.
63217K
9.REMOVE SLIDING ROOF SIDE GARNISH RH
- HINT:
-
Use the same procedures described for the LH side.
63201G
10.REMOVE SLIDING ROOF GLASS SUB-ASSEMBLY
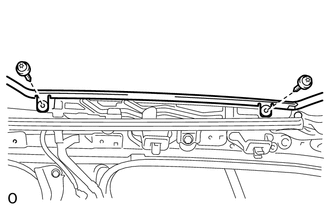
Using a T25 "TORX" driver, remove the 4 screws and glass.
63203F
11.REMOVE SLIDING ROOF HOUSING SUB-ASSEMBLY
Disconnect the 4 sliding roof drain hoses.
Remove the 4 bolts and 4 nuts.
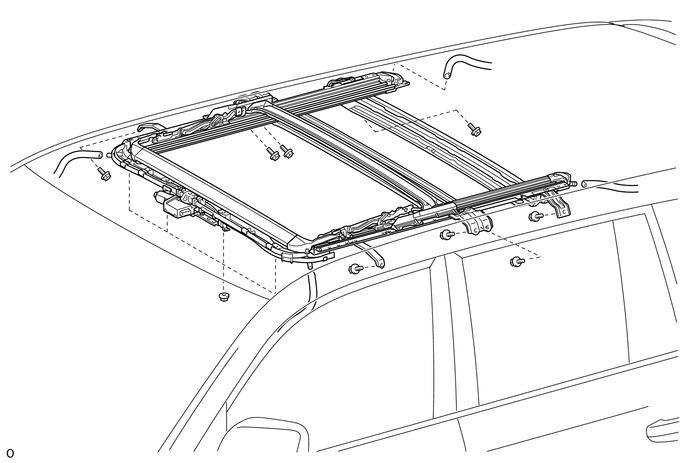
Loosen the 4 nuts as shown in the illustration.
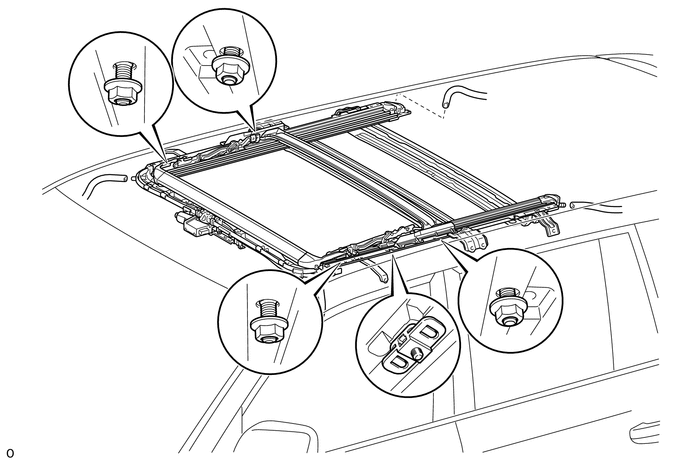
- NOTICE:
-
Be sure that the nuts are fully threaded onto the bolts.
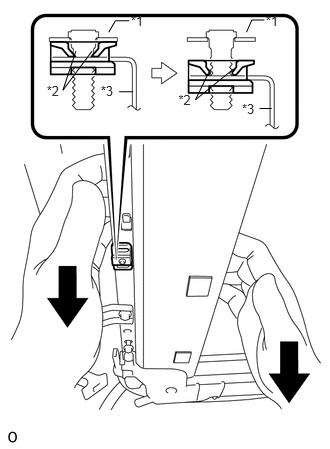
Pull the sliding roof housing sub-assembly downward and detach the 2 claws of the sliding roof lock catch plate LH form the stud bolt as shown in the illustration.
| *1 | Bracket (Roof Panel) |
| *2 | Sliding Roof Lock Catch Plate LH Claw |
| *3 | Sliding Roof Housing Sub-assembly |
- NOTICE:
-
Performing this procedure breaks the claws of the sliding roof lock catch plate LH so that the sliding roof housing sub-assembly can be removed. However, do not use excessive force.
Remove the 4 nuts and sliding roof housing subassembly.
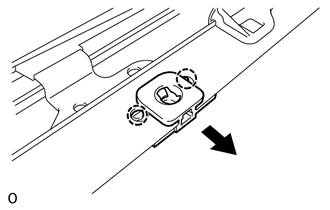
Detach the 2 claws and remove the sliding roof lock catch plate LH from the sliding roof housing subassembly.
- HINT:
-
The sliding roof lock catch plate LH is used when the vehicle is assembled at the factory and is not needed for reinstallation.