WINCH WINCH UNIT REMOVAL
PROCEDURE

 1. PRECAUTION
- NOTICE:
-
After turning the ignition switch off, waiting time may be required before disconnecting the cable from the battery terminal. Therefore, make sure to read the disconnecting the cable from the battery terminal notice before proceeding with work. (See page General>INTRODUCTION>REPAIR INSTRUCTION>PRECAUTION).
2.DISCONNECT CABLE FROM NEGATIVE BATTERY TERMINAL
- NOTICE:
-
When disconnecting the cable, some systems need to be initialized after the cable is reconnected (See page General>INTRODUCTION>REPAIR INSTRUCTION>INITIALIZATION).
53806
3.REMOVE FRONT FENDER SPLASH SHIELD SUB-ASSEMBLY LH
53805
4.REMOVE FRONT FENDER SPLASH SHIELD SUB-ASSEMBLY RH
53292A
5.REMOVE UPPER RADIATOR SUPPORT SEAL
52049
6.REMOVE FRONT BUMPER WINCH COVER SUB-ASSEMBLY
53111
7.REMOVE RADIATOR GRILLE ASSEMBLY
52119A
8.REMOVE FRONT BUMPER COVER
52113D
9.REMOVE FRONT BUMPER EXTENSION LH
52112D
10.REMOVE FRONT BUMPER EXTENSION RH
81150
11.REMOVE HEADLIGHT ASSEMBLY LH
81110
12.REMOVE HEADLIGHT ASSEMBLY RH
52521
13.REMOVE FRONT UPPER CENTER BUMPER RETAINER
53294C
14.REMOVE RADIATOR SIDE DEFLECTOR LH
53293C
15.REMOVE RADIATOR SIDE DEFLECTOR RH (w/o Oil Cooler)
32917
16.REMOVE TRANSMISSION OIL COOLER AIR DUCT (w/ Oil Cooler)
38649
17.REMOVE WINCH CONTROL WIRE
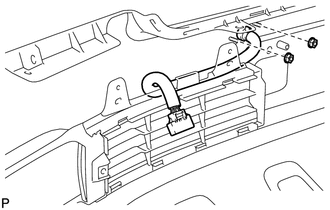
Remove the 2 nuts and winch control wire.
38110
18.REMOVE WINCH ASSEMBLY
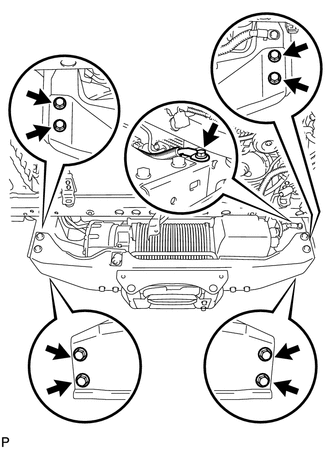
Remove the 9 bolts and mounting bracket.
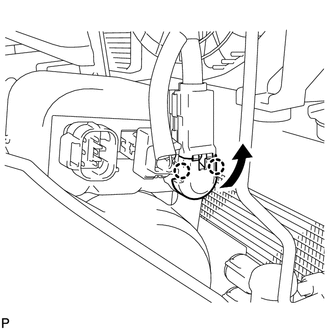
Detach the 2 claws and move the cover in the direction indicated by the arrow shown in the illustration.
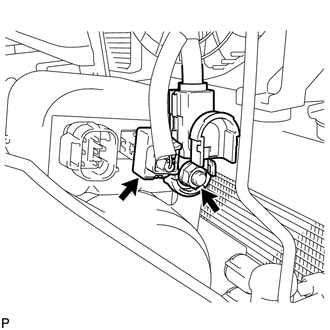
Disconnect the connector.
Remove the nut and disconnect the wire.
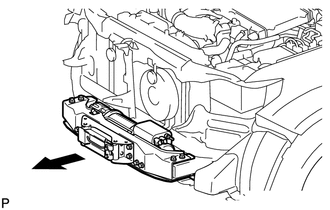
Using a crane or equivalent, remove the winch assembly.
- CAUTION:
-
Be careful as the winch assembly is very heavy.