TELEMATICS TELEMATICS TRANSCEIVER INSTALLATION
PROCEDURE

 86719A
1.INSTALL NO. 1 TELEPHONE BRACKET
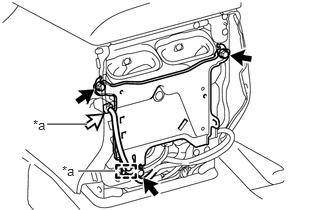
| *a | w/ Antenna Divider |
w/o Antenna Divider
Install the No. 1 telephone bracket with the 3 bolts.
- Torque:
- 8.5 N*m (87 kgf*cm, 75 in.*lbf)
w/ Antenna Divider
Install the No. 1 telephone bracket with the 3 bolts.
- Torque:
- 8.5 N*m (87 kgf*cm, 75 in.*lbf)
Attach the clamp and connect the connector.
86741A
2.INSTALL TELEMATICS TRANSCEIVER
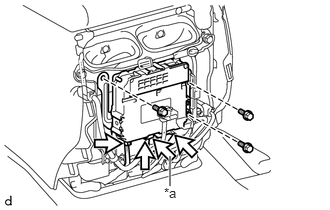
| *a | w/ Antenna Divider |
Install the telematics transceiver with the 3 screws.
Connect the connectors.
58903A
3.INSTALL REAR CONSOLE END PANEL SUB-ASSEMBLY
4.CONNECT CABLE TO NEGATIVE BATTERY TERMINAL
- NOTICE:
-
When disconnecting the cable, some systems need to be initialized after the cable is reconnected (See page General>INTRODUCTION>REPAIR INSTRUCTION>INITIALIZATION).
53292A
5.INSTALL UPPER RADIATOR SUPPORT SEAL
6.CHECK SRS WARNING LIGHT
Check the SRS warning light (See page Vehicle Interior>SUPPLEMENTAL RESTRAINT SYSTEMS>AIRBAG SYSTEM>DIAGNOSIS SYSTEM).
7.PERFORM REGISTRATION
Perform registration (See page Audio / Visual / Telematics>TELEMATICS>TELEMATICS SYSTEM (w/ Telematics Transceiver except G-BOOK)>REGISTRATION).
- NOTICE:
-
When replacing the telematics transceiver, perform registration.