WINCH REMOTE CONTROL SWITCH ON-VEHICLE INSPECTION
PROCEDURE

 52049 1.REMOVE FRONT BUMPER WINCH COVER SUB-ASSEMBLY
38640 2.INSPECT WINCH CONTROL SWITCH ASSEMBLY
Connect the remote control switch connector.

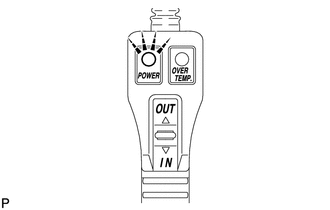
Turn the ignition switch to ON (IG) and check that the power indicator light illuminates.
Press the remote control switch, and check that the winch operates.
- NOTICE:
-
Be careful not to tighten or strain the winch wire.
Turn the ignition switch off.
3.REMOVE FRONT BUMPER ASSEMBLY
4.INSPECT OVERHEAT TEMPERATURE INDICATOR
Remove the 4 screws and magnet switch winch cover.

Disconnect the motor relay connector.

Remove the No. 1 winch wire.
Click hereVehicle Exterior>EXTERIOR PANELS / TRIM>FRONT BUMPER (for Standard)>DISASSEMBLY
Connect the bumper side winch control wire connector to the vehicle side winch control wire connector.
Connect the bumper side winch control wire connector to the winch control switch connector.
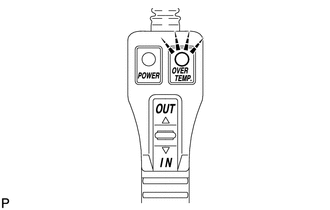
Turn the ignition switch to ON (IG) and check that the overheat temperature indicator light illuminates and the buzzer sounds.
Turn the ignition switch off.
Disconnect the bumper side winch control wire connector from the winch control switch connector.
Disconnect the bumper side winch control wire connector from the vehicle side winch control wire connector.
Install the No. 1 winch wire.
Click hereVehicle Exterior>EXTERIOR PANELS / TRIM>FRONT BUMPER (for Standard)>REASSEMBLY
Connect the motor relay connector.
Install the magnet switch winch cover with the 4 screws.
- Torque:
- 1.5 N*m (15 kgf*cm, 13 in.*lbf)
5.INSTALL FRONT BUMPER ASSEMBLY
52049 6.INSTALL FRONT BUMPER WINCH COVER SUB-ASSEMBLY