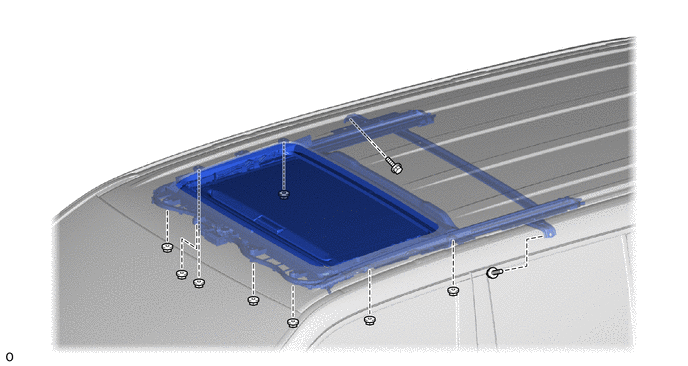
SLIDING ROOF / CONVERTIBLE SLIDING ROOF HOUSING REMOVAL
CAUTION / NOTICE / HINT
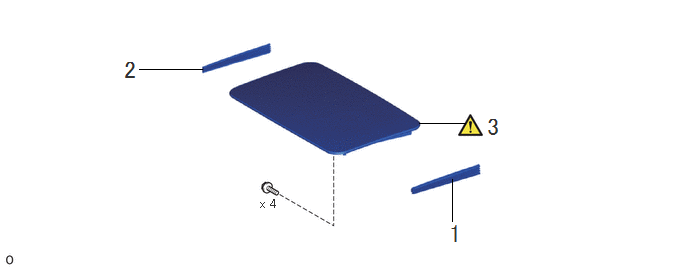
| Procedure | Part Name Code |

|

|

|
|
|---|---|---|---|---|---|
| 1 | SLIDING ROOF SIDE GARNISH LH | 63218M | - | - | - |
| 2 | SLIDING ROOF SIDE GARNISH RH | 63217K | - | - | - |
| 3 | SLIDING ROOF GLASS SUB-ASSEMBLY | 63201G | ( ) |
- | - |
| Procedure | Part Name Code |
|
|
|
|
|---|---|---|---|---|---|
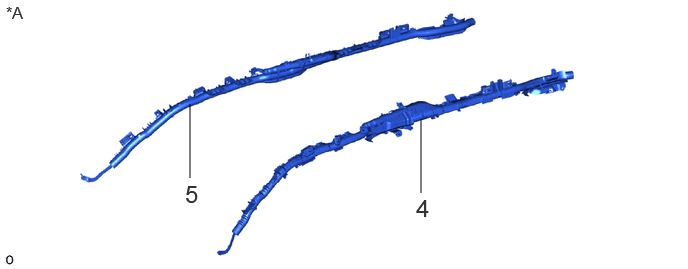
| 4 | CURTAIN SHIELD AIRBAG ASSEMBLY LH | 62180A | - | - | - |
| 5 | CURTAIN SHIELD AIRBAG ASSEMBLY RH | 62170A | - | - | - |
| *A | w/ Curtain Shield Airbag | - | - |
| Procedure | Part Name Code |
|
|
|
|
|---|---|---|---|---|---|
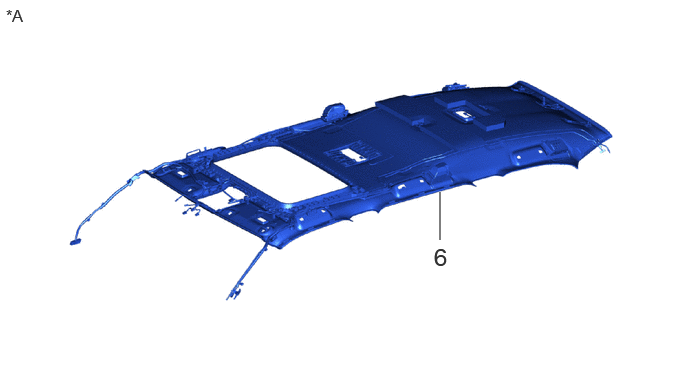
| 6 | ROOF HEADLINING ASSEMBLY | - | - | - | - |
| *A | w/o Curtain Shield Airbag | - | - |
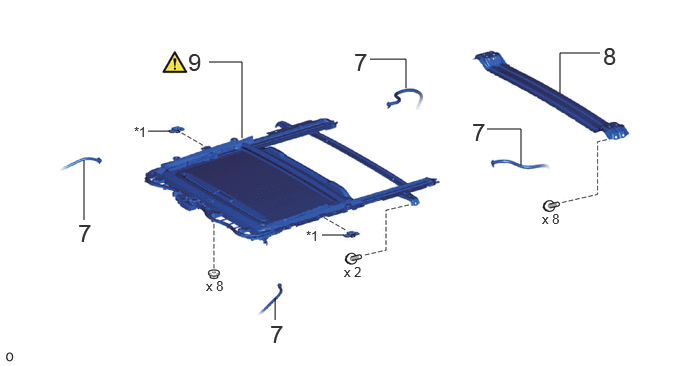
| Procedure | Part Name Code |
|
|
|
|
|---|---|---|---|---|---|
| 7 | SLIDING ROOF DRAIN HOSE | - | - | - | - |
| 8 | NO. 6 ROOF PANEL REINFORCE SUB-ASSEMBLY | 63108E | - | - | - |
| 9 | SLIDING ROOF HOUSING SUB-ASSEMBLY | 63203F | () |
- | - |
| *1 | Sliding Roof Lock Catch Plate | - | - |
CAUTION / NOTICE / HINT
The necessary procedures (adjustment, calibration, initialization or registration) that must be performed after parts are removed and installed, or replaced during sliding roof housing sub-assembly removal/installation are shown below.
| Replaced Part or Performed Procedures | Necessary Procedures | Effect/Inoperative Function when Necessary Procedures are not Performed | Link |
|---|---|---|---|
| Disconnect cable from negative (-) battery terminal | Memorize steering angle neutral point | Parking assist monitor system | () |
| Multi-terrain monitor system | () |
||
| Panoramic view monitor system | () |
||
|
·
Sliding roof glass sub-assembly
·
Sliding roof drive cable sub-assembly
·
Sliding roof ECU (sliding roof drive gear sub-assembly) |
Initialize sliding roof system |
·
Auto operation function
·
Jam protection function
·
Key-off operation
·
Wireless transmitter- linked operation
·
Key-linked function
·
Open warning function may not operate
·
Sliding roof may move in reverse or become misaligned |
() |
- HINT:
-
·
When the cable is disconnected/reconnected to the battery terminal, systems temporarily stop operating. However, each system has a function that completes learning the first time the system is used.
-Learning completes when vehicle is driven
Effect/Inoperative Function When Necessary Procedures are not Performed Necessary Procedures Link Stop and start system Drive the vehicle until stop and start control is permitted (approximately 5 to 60 minutes) ( )Lighting system (EXT) Cornering lights Drive the vehicle straight ahead at 35 km/h (22 mph) or more for 5 seconds or more. ( )Pre-collision system Lane tracing assist system Lane departure alert system Adaptive high beam system
-Learning completes when vehicle is operated normally
Effect/Inoperative Function When Necessary Procedures are not Performed Necessary Procedures Link Power back door system Fully close the back door by hand.
- HINT:
-
Initialization is not necessary if the above procedures are performed while the back door is closed.
( )Air conditioning system After the ignition switch is turned to ON, the servo motor and expansion valve standard position is recognized. -
PROCEDURE

 63218M 1.REMOVE SLIDING ROOF SIDE GARNISH LH
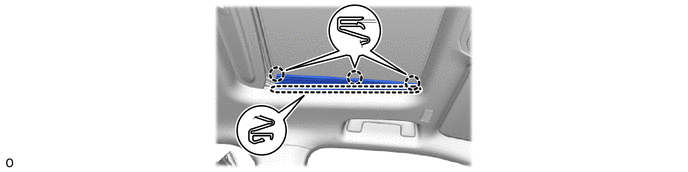
63217K 2.REMOVE SLIDING ROOF SIDE GARNISH RH
Use the same procedure described for the LH side.
63201G 3.REMOVE SLIDING ROOF GLASS SUB-ASSEMBLY
- NOTICE:
-
·
Carrying the sliding roof housing sub-assembly from the vehicle must be performed by multiple people.
·Be careful not to damage the sliding roof glass sub-assembly, body exterior or interior parts.
·To prevent the sliding roof glass sub-assembly and sliding roof drive gear assembly from becoming misaligned, move the sliding roof glass sub-assembly to the fully closed position before removing it.
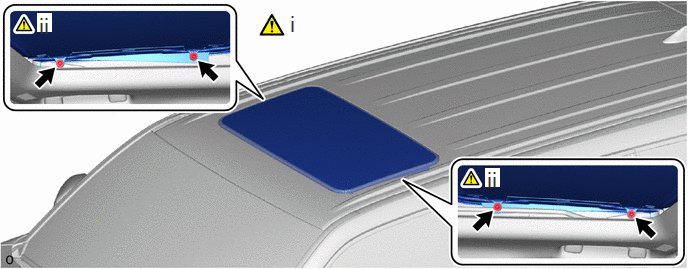
Move the sliding roof glass sub-assembly to the fully closed position.
Using a T25 "TORX" socket wrench, remove the 4 "TORX" screws and sliding roof glass sub-assembly.
62180A 4.REMOVE CURTAIN SHIELD AIRBAG ASSEMBLY LH (w/ Curtain Shield Airbag)
62170A 5.REMOVE CURTAIN SHIELD AIRBAG ASSEMBLY RH (w/ Curtain Shield Airbag)
- HINT:
-
Use the same procedure described for the LH side.
6.REMOVE ROOF HEADLINING ASSEMBLY (w/o Curtain Shield Airbag)
7.DISCONNECT SLIDING ROOF DRAIN HOSE
- HINT:
-
Use the same procedure for all of the sliding roof drain hoses.
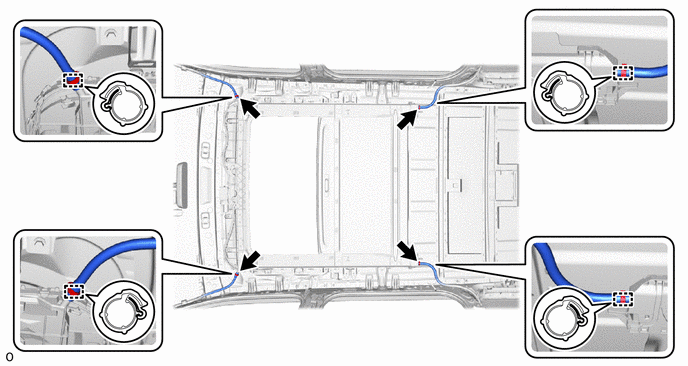
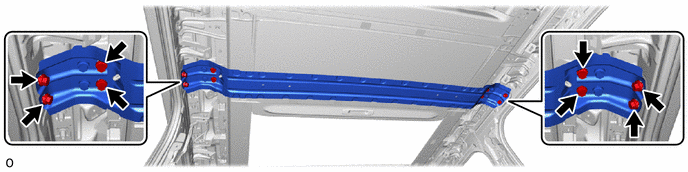
63108E 8.REMOVE NO. 6 ROOF PANEL REINFORCE SUB-ASSEMBLY
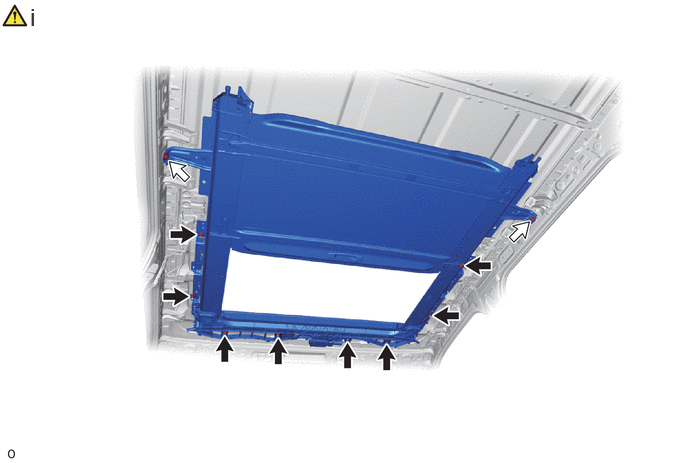
63203F 9.REMOVE SLIDING ROOF HOUSING SUB-ASSEMBLY

|
Nut |

|
Bolt |
Loosen the 8 nuts and 2 bolts as shown in the illustration.
- NOTICE:
-
Be sure that the nuts are fully threaded onto the bolts.
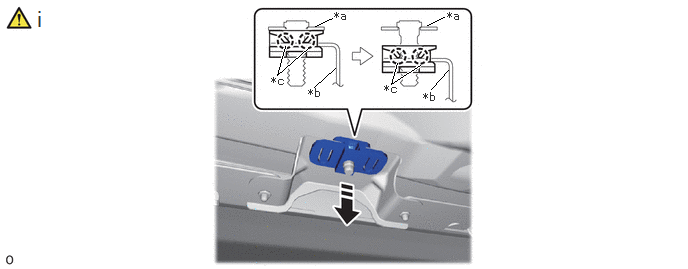
| *a | Bracket (Roof Panel) | *b | Sliding Roof Housing Sub-assembly |
| *c | Sliding Roof Lock Catch Plate Claw | - | - |

|
Remove in this Direction | - | - |
Pull the sliding roof housing sub-assembly downward and detach the 2 claws of the 2 sliding roof lock catch plates from the stud bolt as shown in the illustration.
- NOTICE:
-
Performing this procedure breaks the claws of the sliding roof lock catch plate so that the sliding roof housing sub-assembly can be removed. However, do not use excessive force.
- HINT:
-
·
The sliding roof lock catch plate is used when the vehicle is assembled at the factory and is not needed for reinstallation.
·The illustration shows the LH side. The vertical orientation of the RH side is opposite that of the image shown in the illustration.