SLIDING ROOF / CONVERTIBLE SLIDING ROOF HOUSING INSTALLATION
CAUTION / NOTICE / HINT
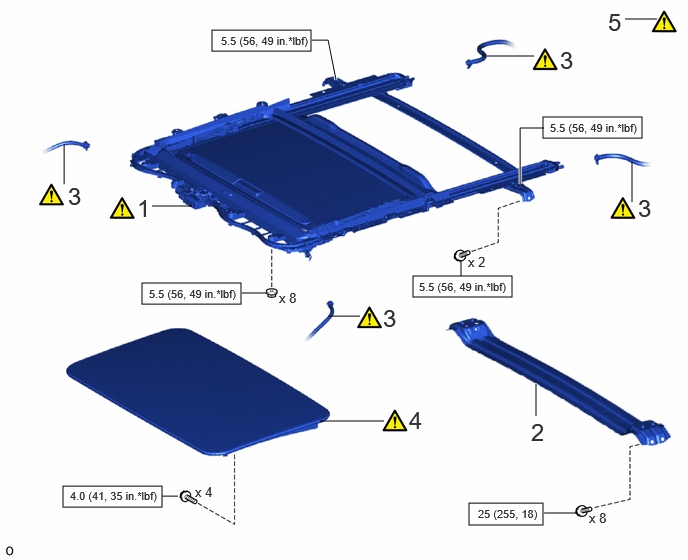
| Procedure | Part Name Code |

|

|

|
|
|---|---|---|---|---|---|
| 1 | SLIDING ROOF HOUSING SUB-ASSEMBLY | 63203F | ( ) |
- | - |
| 2 | NO. 6 ROOF PANEL REINFORCE SUB-ASSEMBLY | 63108E | - | - | - |
| 3 | SLIDING ROOF DRAIN HOSE | - | () |
- | - |
| 4 | SLIDING ROOF GLASS SUB-ASSEMBLY | 63201G | () |
- | - |
| 5 | INSPECT FOR LEAK | - | () |
- | - |

|
N*m (kgf*cm, ft.*lbf): Specified torque | - | - |
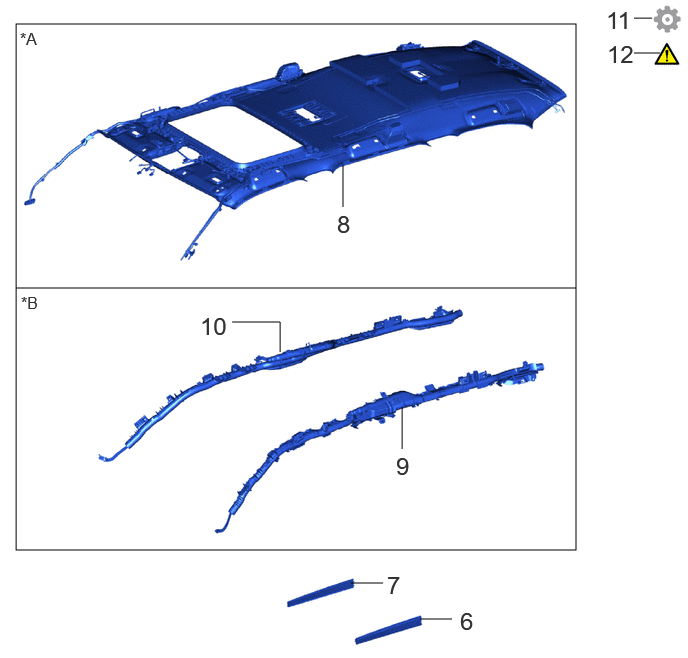
| Procedure | Part Name Code |
|
|
|
|
|---|---|---|---|---|---|
| 6 | SLIDING ROOF SIDE GARNISH LH | 63218M | - | - | - |
| 7 | SLIDING ROOF SIDE GARNISH RH | 63217K | - | - | - |
| 8 | ROOF HEADLINING ASSEMBLY | - | - | - | - |
| 9 | CURTAIN SHIELD AIRBAG ASSEMBLY LH | 62180A | - | - | - |
| 10 | CURTAIN SHIELD AIRBAG ASSEMBLY RH | 62170A | - | - | - |
| 11 | INITIALIZE SLIDING ROOF SYSTEM | - | - | - | () |
| 12 | CHECK SLIDING ROOF SYSTEM | - | () |
- | - |
| *A | w/o Curtain Shield Airbag | *B | w/ Curtain Shield Airbag |
PROCEDURE

 63203F 1.INSTALL SLIDING ROOF HOUSING SUB-ASSEMBLY
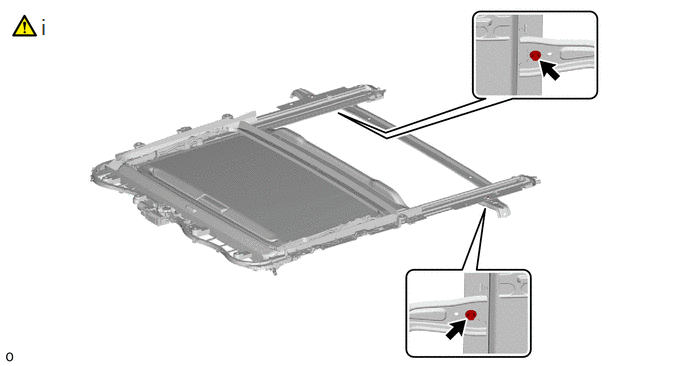
Loosen the 2 bolts of the brackets of the sliding roof housing assembly.
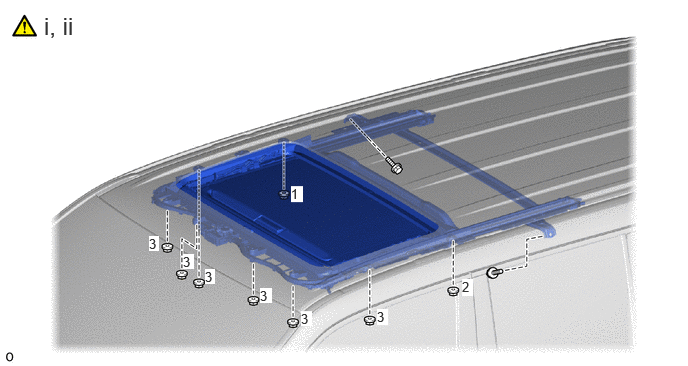
Temporarily install the sliding roof housing assembly with the 8 nuts and 2 bolts.
Tighten the 8 nuts.
- HINT:
-
Tighten the nuts in the order shown in the illustration.
- Torque:
- 5.5 N*m (56 kgf*cm, 49 in.*lbf)
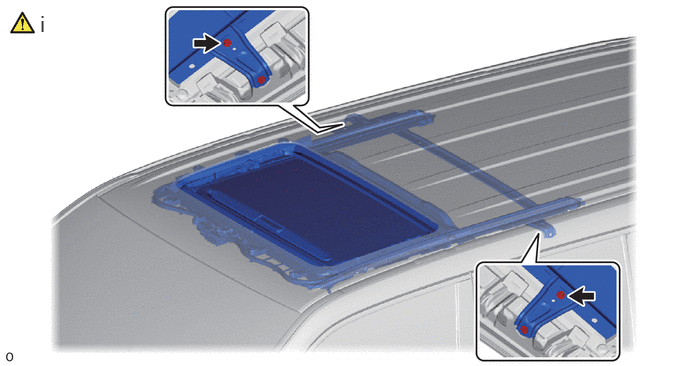

|
Bolt | - | - |
Tighten the 2 bolts to install the sliding roof housing assembly.
- Torque:
- 5.5 N*m (56 kgf*cm, 49 in.*lbf)
63108E 2.INSTALL NO. 6 ROOF PANEL REINFORCE SUB-ASSEMBLY
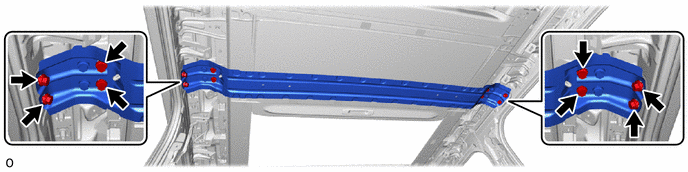
- Torque:
- 25 N*m (255 kgf*cm, 18 ft.*lbf)
3.CONNECT SLIDING ROOF DRAIN HOSE
- HINT:
-
Use the same procedure for all of the sliding roof drain hoses.
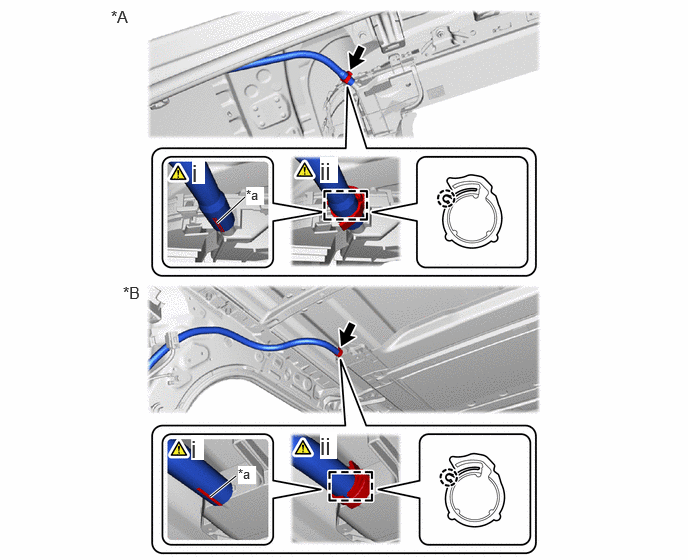
| *A | for Front Side | *B | for Rear Side |
| *a | Marking | - | - |
|
|
Sliding Roof Drain Hose Clamp | - | - |
Connect the sliding roof drain hose.
- HINT:
-
Slide the hose to the base of the drain pipe.
Attach the claw to secure the sliding roof drain hose.
- HINT:
-
Make sure that the sliding roof drain hose clamp is on the marking or between the marking and hose end.
63201G 4.INSTALL SLIDING ROOF GLASS SUB-ASSEMBLY
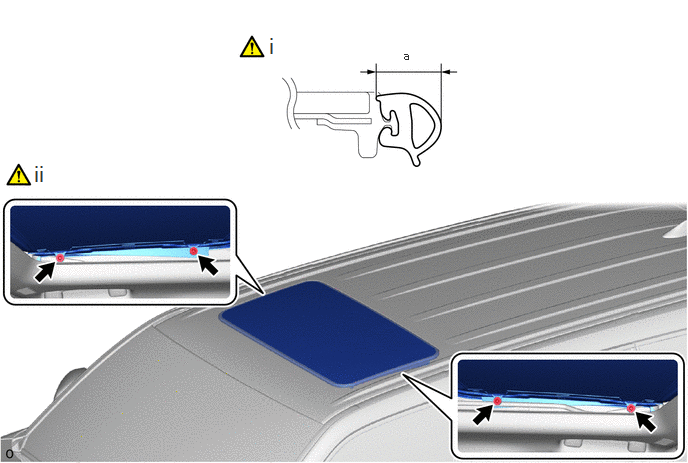
Measure the width "a" of the sliding roof weatherstrip.
- HINT:
-
This measurement will be used in a later step.
Using a T25 "TORX" socket wrench, temporarily install the sliding roof glass sub-assembly with the 4 screws.
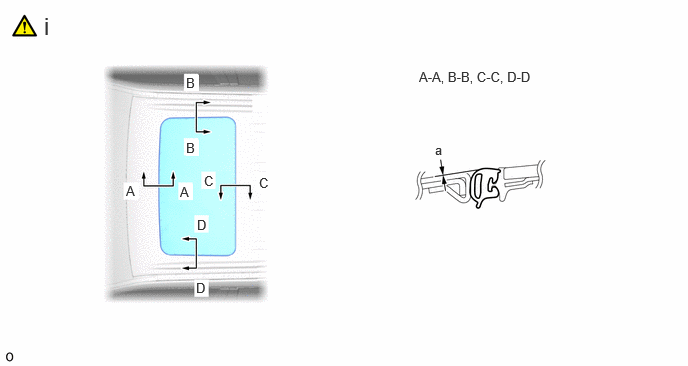
Perform a level check:
1. Check the difference in level "a" between the roof panel and the upper surface of the sliding roof glass sub-assembly when the sliding roof glass sub-assembly is fully closed.
- HINT:
-
"+" represents the condition that the glass is above the panel level. "-" represents the condition that the glass is the condition that the glass is below the panel level.
- Standard:
-
Area Measurement Area Measurement A-A (a) 0 + 1.0 mm (0 + 0.0394 in.)
0 - 2.0 mm (0 - 0.0787 in.)B-B (a) 0 + 1.5 mm (0 + 0.0591 in.)
0 - 1.5 mm (0 - 0.0591 in.)C-C (a) 0 + 2.0 mm (0 + 0.0787 in.) D-D (a) 0 + 1.5 mm (0 + 0.0591 in.)
0 - 1.5 mm (0 - 0.0591 in.)
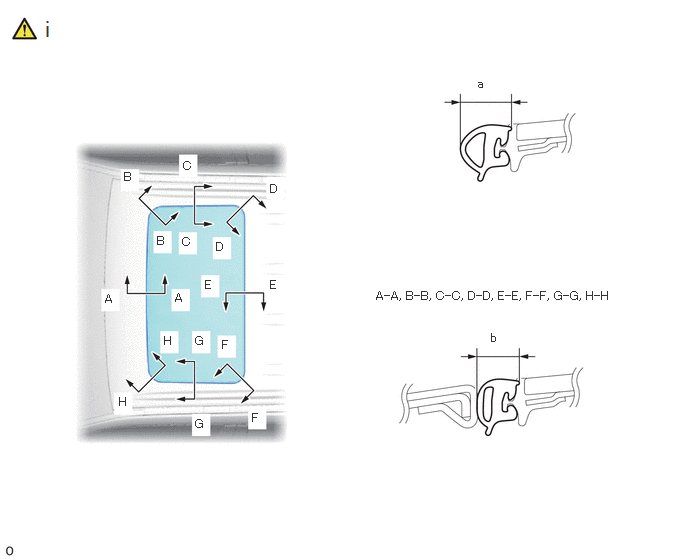
Check the deformation of the sliding roof weatherstrip:
1. With the sliding roof glass sub-assembly in the fully closed position, measure the width (b) of the sliding roof weatherstrip and, using the width (a) measured in step a., calculate the deformation of the sliding roof weatherstrip (a - b).
- Standard:
-
Area Measurement Area Measurement A-A (a - b) 0.9 to 2.9 mm (0.0354 to 0.114 in.) B-B (a - b) 1.2 to 3.2 mm (0.0472 to 0.126 in.) C-C (a - b) 0.9 to 2.9 mm (0.0354 to 0.114 in.) D-D (a - b) 1.2 to 3.2 mm (0.0472 to 0.126 in.) E-E (a - b) 1.2 to 2.9 mm (0.0472 to 0.114 in.) F-F (a - b) 1.2 to 3.2 mm (0.0472 to 0.126 in.) G-G (a - b) 0.9 to 2.9 mm (0.0354 to 0.114 in.) H-H (a - b) 1.2 to 3.2 mm (0.0472 to 0.126 in.)
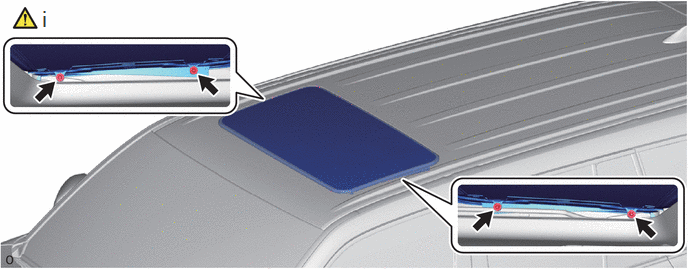
After adjusting the sliding roof glass sub-assembly, using a T25 "TORX" socket wrench, install the sliding roof glass sub-assembly with the 4 screws.
- Torque:
- 4.0 N*m (41 kgf*cm, 35 in.*lbf)
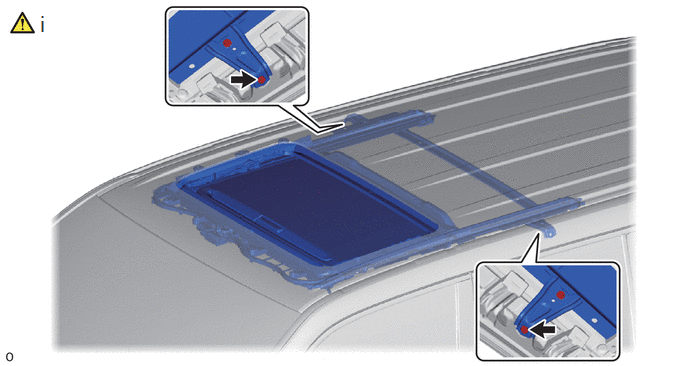
|
|
Bolt | - | - |
Tighten the 2 bolts to install the sliding roof housing assembly.
- Torque:
- 5.5 N*m (56 kgf*cm, 4 ft.*lbf)
5.INSPECT FOR LEAK
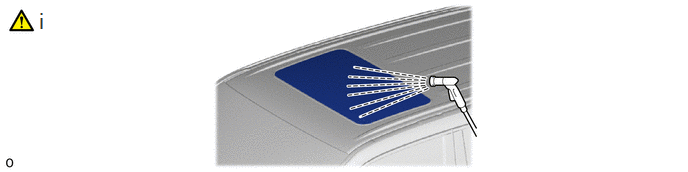
Inspect for leaks by the following procedure.
1. After adjusting the sliding roof glass sub-assembly, check for water leakage into the vehicle interior.
2. If there are any leaks, readjust the sliding roof glass sub-assembly.
63218M 6.INSTALL SLIDING ROOF SIDE GARNISH LH
63217K 7.INSTALL SLIDING ROOF SIDE GARNISH RH
8.INSTALL ROOF HEADLINING ASSEMBLY (w/o Curtain Shield Airbag)
62180A 9.INSTALL CURTAIN SHIELD AIRBAG ASSEMBLY LH (w/ Curtain Shield Airbag)
62170A 10.INSTALL CURTAIN SHIELD AIRBAG ASSEMBLY RH (w/ Curtain Shield Airbag)
Use the same procedure described for the LH side.
11. INITIALIZE SLIDING ROOF SYSTEM
12. CHECK SLIDING ROOF SYSTEM