1GR-FE ENGINE MECHANICAL REAR CRANKSHAFT OIL SEAL REMOVAL
CAUTION / NOTICE / HINT
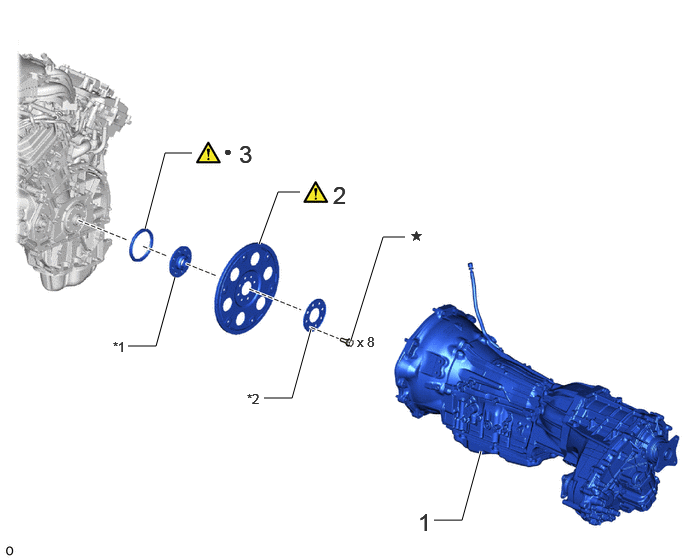
| Procedure | Part Name Code |

|

|

|
|
|---|---|---|---|---|---|
| 1 | AUTOMATIC TRANSMISSION ASSEMBLY | 35000 | - | - | - |
| 2 | DRIVE PLATE AND RING GEAR SUB-ASSEMBLY | 32101 | ( ) |
- | - |
| 3 | REAR CRANKSHAFT OIL SEAL | 11381A | () |
- | - |
| *1 | FRONT DRIVE PLATE SPACER | *2 | REAR DRIVE PLATE SPACER |
| ● | Non-reusable part | ★ | Precoated part |
CAUTION / NOTICE / HINT
The necessary procedures (adjustment, calibration, initialization, or registration) that must be performed after parts are removed, installed, or replaced during the rear crankshaft oil seal removal/installation are shown below.
| Replaced Part or Performed Procedure | Necessary Procedure | Effect/Inoperative Function when Necessary Procedure not Performed | Link |
|---|---|---|---|
| Automatic transmission assembly | Reset memory |
·
Large shift shock
·
Engine overruns |
() |
| Automatic transmission fluid | ATF thermal degradation estimate reset | The value of the Data List item "ATF Thermal Degradation Estimate" is not estimated correctly. |
PROCEDURE

 35000 1.REMOVE AUTOMATIC TRANSMISSION ASSEMBLY
32101 2.REMOVE DRIVE PLATE AND RING GEAR SUB-ASSEMBLY
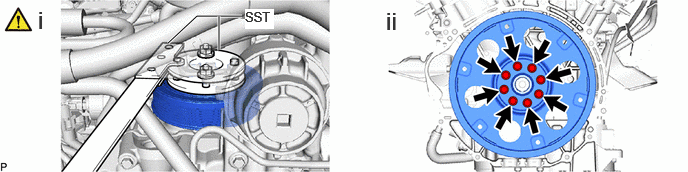
Using SST, hold the crankshaft pulley.
- SST
-
09213-54015 (91651-60855)
09330-00021
Remove the 8 bolts, rear drive plate spacer, drive plate and ring gear sub-assembly and front drive plate spacer.
11381A 3.REMOVE REAR CRANKSHAFT OIL SEAL
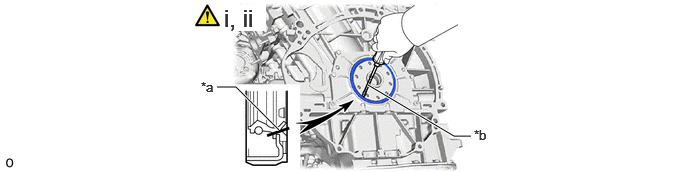
| *a | Cut Position | *b | Protective Tape |
Using a knife, cut off the lip of the rear crankshaft oil seal.
Using a screwdriver, pry out the rear crankshaft oil seal.
- NOTICE:
-
Do not damage the surface of the oil seal press fit hole or crankshaft.