WIPER / WASHER WASHER MOTOR(for Rear) REMOVAL
PROCEDURE

 1.REMOVE REAR NO. 2 SEAT ASSEMBLY (for Model Code #J71 Series, w/ REAR NO. 2 SEAT ASSEMBLY)
73297B 2.REMOVE QUARTER TRIM BELT HOLE COVER RH (for Model Code #J71 Series)
73298 3.REMOVE NO. 2 QUARTER TRIM BELT HOLE COVER RH (for Model Code #J71 Series)
62511 4.REMOVE QUARTER INSIDE TRIM BOARD RH (for Model Code #J71 Series)
62903 5.REMOVE QUARTER VENTILATOR DUCT SUB-ASSEMBLY RH (for Model Code #J71 Series)
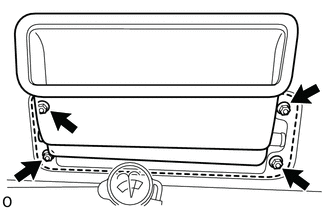
Remove the 4 nuts and quarter ventilator duct sub-assembly RH at vehicle outside.
85330R 6.REMOVE REAR WASHER JAR ASSEMBLY (for Model Code #J71 Series)
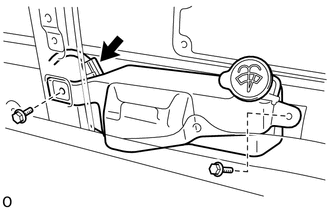
Disconnect the connector.
Remove the 2 bolts and rear washer jar assembly.
7.DRAIN WASHER FLUID (for Model Code #J71 Series)
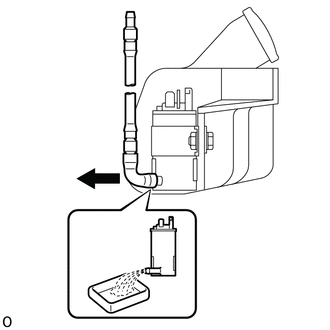
Disconnect the rear washer hose from the rear washer motor assembly, and drain the washer fluid.
- HINT:
-
Use a container to collect the washer fluid.
85310R 8.REMOVE REAR WASHER MOTOR ASSEMBLY (for Model Code #J71 Series)
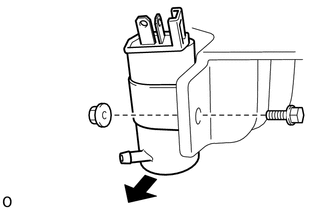
Remove the bolt, nut and rear washer motor assembly from the rear washer jar assembly.
85316R 9.REMOVE REAR WASHER MOTOR SUPPORT (for Model Code #J71 Series)
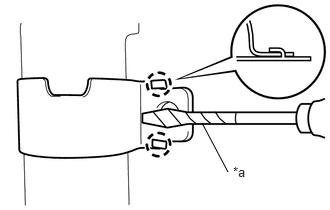
| *a | Protective Tape |
Using a screwdriver, detach the 2 claws and remove the rear washer motor support from the rear washer motor assembly.
- HINT:
-
Tape the screwdriver tip before use.
10.REMOVE REAR NO. 2 SEAT ASSEMBLY (for Model Code #J76 Series, w/ REAR NO. 2 SEAT ASSEMBLY)
67917A 11.REMOVE REAR DOOR SCUFF PLATE RH (for Model Code #J76 Series)
- HINT:
-
Use the same procedure described for the LH side.
-
Click hereVehicle Interior>INTERIOR PANELS / TRIM>ROOF HEADLINING (for Semi-long Body)>REMOVAL
62551F 12.REMOVE REAR SEAT SIDE GARNISH RH (for Model Code #J76 Series)
62511 13.REMOVE QUARTER INSIDE TRIM BOARD RH (for Model Code #J76 Series)
85330R 14.REMOVE REAR WASHER JAR ASSEMBLY (for Model Code #J76 Series)
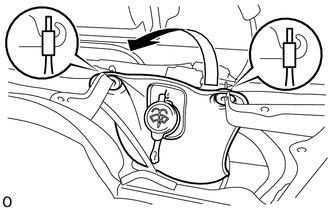
Detach the 2 claws and remove the rear washer jar assembly as shown in the illustration.
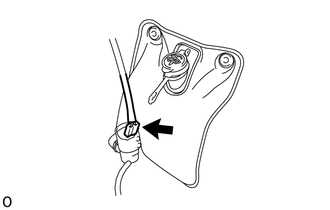
Disconnect the connector.
15.DRAIN WASHER FLUID (for Model Code #J76 Series)
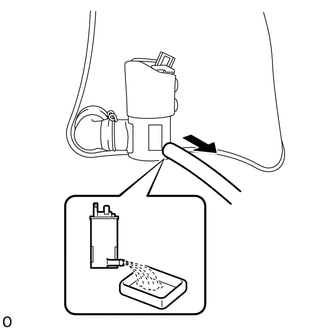
Disconnect the rear washer hose from the rear washer motor assembly, and drain the washer fluid.
- HINT:
-
Use a container to collect the washer fluid.
85310R 16.REMOVE REAR WASHER MOTOR ASSEMBLY (for Model Code #J76 Series)
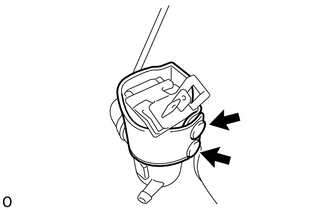
Detach the 2 clips.
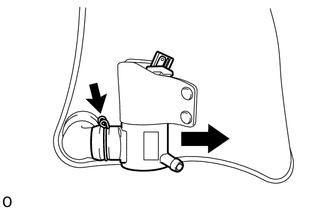
Loosen the clip and remove the rear washer motor assembly.
85326 17.REMOVE WASHER PACKING (for Model Code #J76 Series)
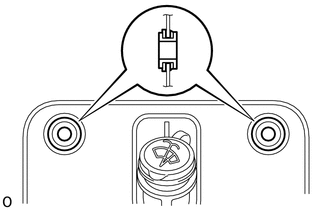
Remove the 2 washer packings from the rear washer jar assembly.
18.REMOVE REAR NO. 2 SEAT ASSEMBLY (for Model Code #J78 Series, w/ REAR NO. 2 SEAT ASSEMBLY)
09115 19.REMOVE JACK HANDLE ROD SUB-ASSEMBLY (for Model Code #J78 Series)
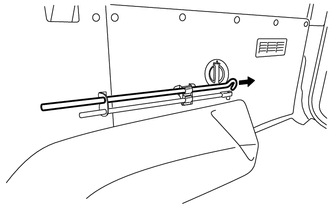
Remove the jack handle rod sub-assembly.
09114 20.REMOVE JACK HANDLE EXTENSION SUB-ASSEMBLY (for Model Code #J78 Series)
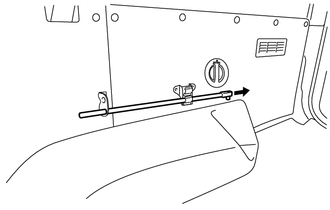
Remove the jack handle extension sub-assembly.
58706 21.REMOVE JACK HANDLE BRACKET SUB-ASSEMBLY (for Model Code #J78 Series)
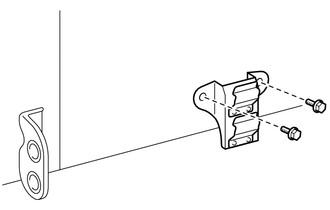
Remove the 2 bolts and jack handle bracket sub-assembly.
62630P 22.REMOVE REAR QUARTER TRIM PANEL ASSEMBLY RH (for Model Code #J78 Series)
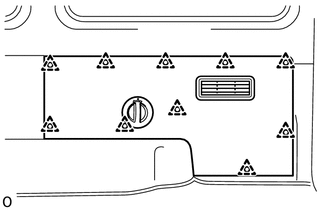
Remove the 10 clips and rear quarter trim panel assembly RH.
85330R 23.REMOVE REAR WASHER JAR ASSEMBLY (for Model Code #J78 Series)
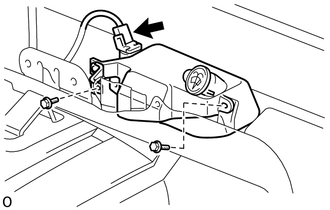
Disconnect the connector.
Remove the 2 bolts and rear washer jar assembly.
24.DRAIN WASHER FLUID (for Model Code #J78 Series)
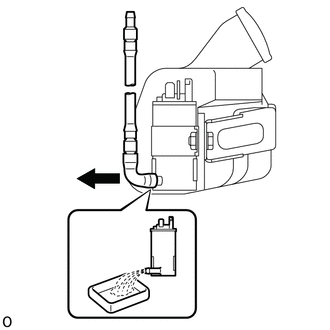
Disconnect the rear washer hose from the rear washer motor assembly, and drain the washer fluid.
- HINT:
-
Use a container to collect the washer fluid.
85360R 25.REMOVE REAR WASHER BRACKET ASSEMBLY (for Model Code #J78 Series)
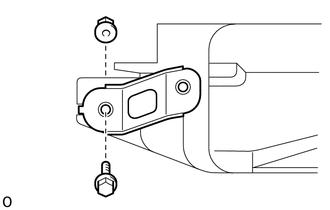
Remove the bolt, nut and the rear washer bracket assembly.
85310R 26.REMOVE REAR WASHER MOTOR ASSEMBLY (for Model Code #J78 Series)
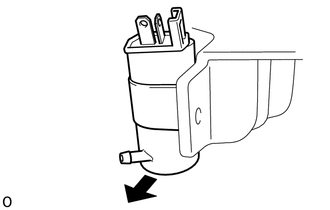
Remove the rear washer motor assembly from the rear washer jar assembly.
85316R 27.REMOVE REAR WASHER MOTOR SUPPORT (for Model Code #J78 Series)
| *a | Protective Tape |
Using a screwdriver, detach the 2 claws and remove the rear washer motor support from the rear washer motor assembly.
- HINT:
-
Tape the screwdriver tip before use.