LIGHTING (EXT) HEADLIGHT ECU REMOVAL
CAUTION / NOTICE / HINT
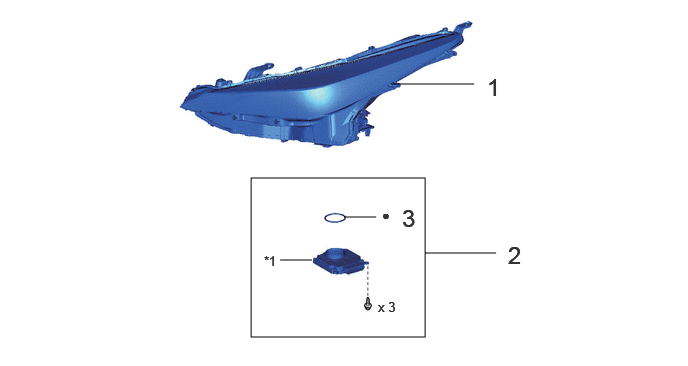
| Procedure | Part Name Code | 
|

|

|
|
|---|---|---|---|---|---|
| 1 | HEADLIGHT ASSEMBLY LH | - | - | - | - |
| 2 | HEADLIGHT ECU SUB-ASSEMBLY LH | 81056A | - | - | - |
| 3 | HEADLIGHT GASKET | 81134 | - | - | - |
| *1 | HEADLIGHT ECU LH | - | - |
| ● | Non-reusable part | - | - |
CAUTION / NOTICE / HINT
The necessary procedures (adjustment, calibration, initialization, or registration) that must be performed after parts are removed and installed, or replaced during headlight ECU sub-assembly LH removal/installation are shown below.
| Replaced Part or Performed Procedures | Necessary Procedures | Effect/Inoperative Function when Necessary Procedures are not Performed | Link |
|---|---|---|---|
| Disconnect cable from negative (-) auxiliary battery terminal | Memorize steering angle neutral point | Parking assist monitor system | ( ) |
| Panoramic view monitor system | ()
|
||
| Front bumper assembly (Including removal and installation) | ·
Measurement of ultrasonic sensor detection angle ·
Ultrasonic sensor detection angle registration |
·
TOYOTA Parking assist- sensor system ·
Parking support brake system ·
Advanced park |
w/ Advanced Park:
( )
w/o Advanced Park: ( )
|
| Front television camera view adjustment | Panoramic view monitor system | ()
|
|
| Front television camera assembly, front bumper assembly or radiator grille | ·
Television camera view adjustment
|
Panoramic view monitor system | ()
|
| Headlight ECU sub-assembly LH | ·
Synchronize the vehicle information ·
Perform headlight ECU sub-assembly LH initialization |
·
Automatic headlight beam level control system ·
Adaptive high beam system |
()
|
- HINT:
- ·
When the cable is disconnected/reconnected to the auxiliary battery terminal, systems temporarily stop operating. However, each system has a function that completes learning the first time the system is used.
-Learning completes when vehicle is driven
Effect/Inoperative Function When Necessary Procedures are not Performed Necessary Procedures Link Lane tracing assist system Drive the vehicle straight ahead at 35 km/h (22 mph) or more for 5 seconds or more. ( )
Pre-collision system Adaptive high beam system
-Learning completes when vehicle is operated normally
Effect/Inoperative Function When Necessary Procedures are not Performed Necessary Procedures Link Air conditioning system After the ignition switch is turned to ON, the servo motor and expansion valve standard position is recognized. -
- NOTICE:
- ·
Handle components indoors as much as possible to prevent foreign matter from entering and adhering to headlight assembly components.
·Do not reuse parts which have reduced fastening force due to thread damage.
·When installing components, make sure that the wire harness is not caught or pulled.
PROCEDURE

 1.REMOVE HEADLIGHT ASSEMBLY LH
81056A
2.REMOVE HEADLIGHT ECU SUB-ASSEMBLY LH
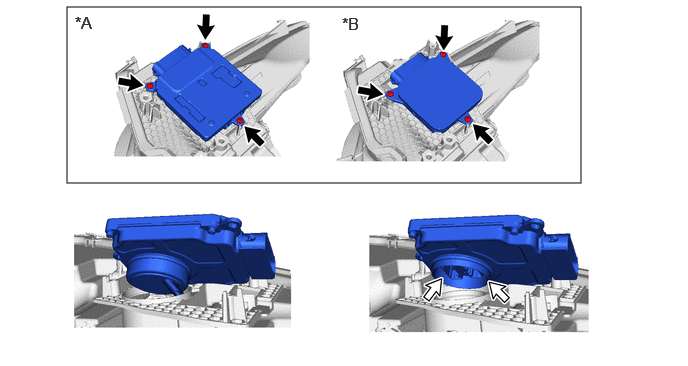
| *A | w/ Adaptive High Beam System | *B | w/o Adaptive High Beam System |

|
Screw | 
|
Connector |
81134
3.REMOVE HEADLIGHT GASKET