HYBRID / BATTERY CONTROL HV BATTERY REMOVAL
PROCEDURE

 1. PRECAUTION
2.CHECK FOR DTCS
Check for DTCs (See page Engine / Hybrid System>HYBRID / BATTERY CONTROL>HYBRID CONTROL SYSTEM>DTC CHECK / CLEAR).
- NOTICE:
-
Confirm that P0AA6 (Hybrid Battery Voltage System Isolation Fault) is not output before removing or installing the HV battery. If this DTC is output, perform troubleshooting for this DTC first.
G3834
3.REMOVE SERVICE PLUG GRIP
4.REMOVE REAR SEAT CUSHION ASSEMBLY (for Separate Type Seatback)
5.REMOVE REAR SEAT CUSHION ASSEMBLY (for Bench Type Seatback)
71033
6.REMOVE REAR SEAT CUSHION LEG SUB-ASSEMBLY
G9223
7.REMOVE INVERTER TERMINAL COVER
G9221
8.REMOVE INVERTER COVER
9.CHECK TERMINAL VOLTAGE
G9221
10.INSTALL INVERTER COVER
G9223
11.INSTALL INVERTER TERMINAL COVER
G92F1
12.REMOVE NO. 1 HYBRID BATTERY EXHAUST DUCT
G9230
13.REMOVE BATTERY COOLING BLOWER ASSEMBLY
- NOTICE:
- ·
Be sure not to touch the fan part of the battery cooling blower assemblies.
·Do not lift the battery cooling blower assemblies using the wire harness.
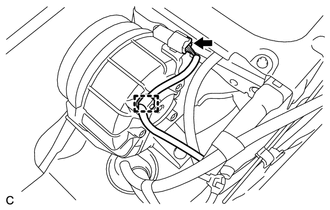
Disconnect the battery cooling blower assembly connector and clamp.
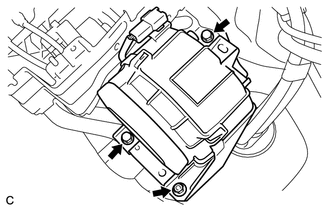
Remove the 2 bolts, nut and battery cooling blower assembly.
G92N1A
14.REMOVE NO. 1 HYBRID VEHICLE BATTERY COVER PANEL LH
899A0B
15.REMOVE NO. 3 INDOOR ELECTRICAL KEY ANTENNA ASSEMBLY
16.REMOVE WIRE HARNESS
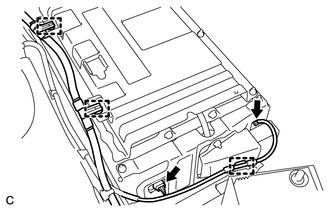
Disconnect the 2 connectors and 3 clamps as shown in the illustration.
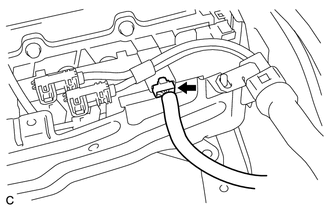
Disconnect the connector as shown in the illustration.
82164
17.DISCONNECT FRAME WIRE
G9510
18.REMOVE HV BATTERY
- CAUTION:
-
Wear insulating gloves.
- NOTICE:
-
When removing/installing/moving the HV battery, make sure not to tilt it more than 80°.
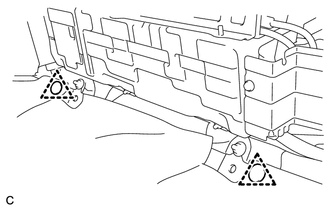
Remove the 2 clips.
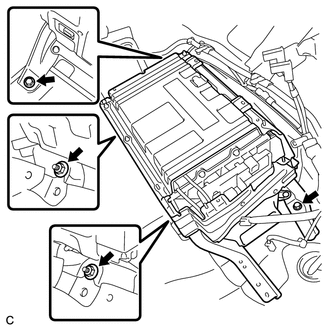
Remove the 2 bolts and 2 nuts.
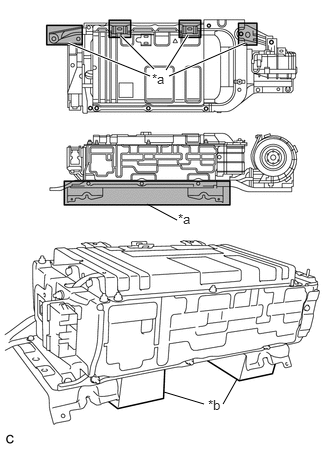
Remove the HV battery.
| *a | Area A |
| *b | Attachment |
- NOTICE:
- ·
When moving the HV battery, be sure to hold area A shown in the illustration.
·Place the HV battery on the attachment.
G92T9
19.REMOVE HYBRID BATTERY SERVICE PLUG COVER
G920Q
20.REMOVE NO. 1 HYBRID BATTERY SHIELD SUB-ASSEMBLY
G920C
21.REMOVE NO. 2 HYBRID VEHICLE BATTERY CARRIER BRACKET SUB-ASSEMBLY
89892A
22.REMOVE BATTERY SMART UNIT
G920R
23.REMOVE NO. 2 HYBRID BATTERY SHIELD SUB-ASSEMBLY
- CAUTION:
-
Wear insulating gloves.
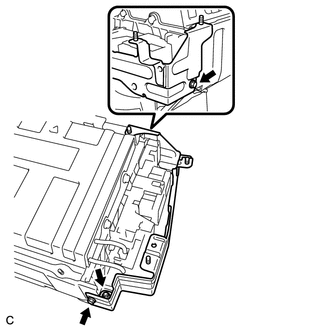
Remove the 2 bolts, nut and No. 2 hybrid battery shield sub-assembly.
G92Z0
24.REMOVE HYBRID BATTERY JUNCTION BLOCK ASSEMBLY
G92E1
25.REMOVE NO. 1 HYBRID BATTERY COVER INTAKE DUCT
- CAUTION:
-
Wear insulating gloves.
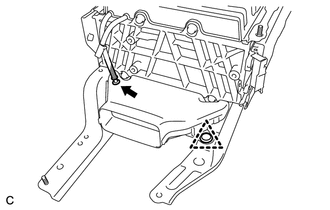
Disconnect the HV battery thermistor.
Remove the clip and No. 1 hybrid battery cover intake duct.
G920N
26.REMOVE UPPER HYBRID BATTERY COVER SUB-ASSEMBLY
- CAUTION:
-
Be sure to wear insulated gloves and protective goggles.
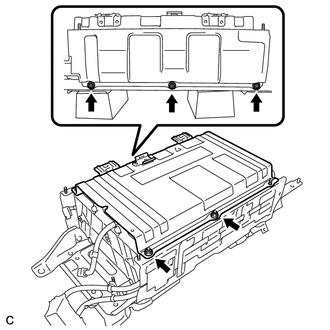
Remove the 5 nuts and upper hybrid battery cover sub-assembly.
G92J5
27.DISCONNECT NO. 1 HYBRID BATTERY PACKING
- CAUTION:
-
Be sure to wear insulated gloves and protective goggles.
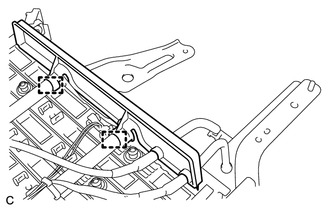
Disconnect the 2 clamps.
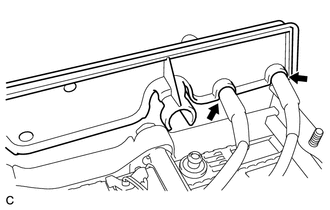
Disconnect the 2 wire harnesses and remove the No. 1 hybrid battery packing.