HYBRID / BATTERY CONTROL FRAME WIRE REMOVAL
PROCEDURE

 G3834
1.REMOVE SERVICE PLUG GRIP
58534H
2.REMOVE CENTER FLOOR CARPET COVER LH
58533F
3.REMOVE CENTER FLOOR CARPET COVER RH
58804A
4.REMOVE UPPER CONSOLE PANEL SUB-ASSEMBLY
58817A
5.REMOVE FRONT NO. 2 CONSOLE BOX INSERT
58810J
6.REMOVE CONSOLE BOX ASSEMBLY
G920Q
7.REMOVE NO. 1 HYBRID BATTERY SHIELD SUB-ASSEMBLY
G9200
8.REMOVE INVERTER WITH CONVERTER ASSEMBLY
17410
9.REMOVE FRONT EXHAUST PIPE ASSEMBLY
58151
10.REMOVE FRONT NO. 1 FLOOR HEAT INSULATOR
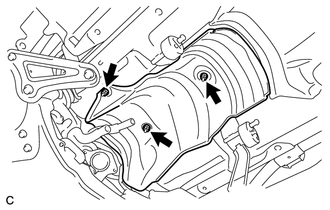
Remove the 3 nuts and front No. 1 floor heat insulator.
52257
11.REMOVE FRONT SUSPENSION MEMBER REAR BRACE RH
Using a transmission jack, hold the front suspension cross member.
- NOTICE:
-
Be sure to position the transmission jack to properly support the front suspension cross member.
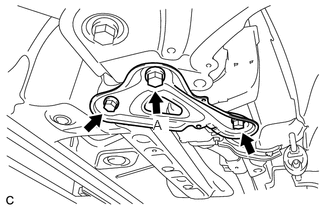
Remove the 3 bolts and front suspension member rear brace RH.
Temporarily install bolt A.
64910J
12.REMOVE TONNEAU COVER ASSEMBLY (w/ Tonneau Cover)
13.REMOVE REAR NO. 1 SEAT ASSEMBLY (for Side)
14.REMOVE REAR NO. 1 SEAT ASSEMBLY (for Center)
15.REMOVE REAR NO. 2 SEAT ASSEMBLY
67935A
16.REMOVE BACK DOOR SCUFF PLATE
73360C
17.DISCONNECT REAR NO. 1 SEAT OUTER BELT ASSEMBLY RH
- HINT:
-
Use the same procedure as for the LH side (See page Vehicle Interior>SEAT BELT>REAR NO. 1 SEAT OUTER BELT ASSEMBLY>REMOVAL).
73560
18.DISCONNECT REAR NO. 2 SEAT OUTER BELT ASSEMBLY RH
- HINT:
-
Use the same procedure as for the LH side (See page Vehicle Interior>SEAT BELT>REAR NO. 2 SEAT OUTER BELT ASSEMBLY>REMOVAL).
64721G
19.REMOVE NO. 1 DECK TRIM COVER (for RH Side)
- HINT:
-
Use the same procedure as for the LH side (See page Vehicle Interior>INTERIOR PANELS / TRIM>ROOF HEADLINING>REMOVAL).
58460D
20.REMOVE LUGGAGE HOLD BELT STRIKER ASSEMBLY (for RH Side)
- HINT:
-
Use the same procedure as for the LH side (See page Vehicle Interior>INTERIOR PANELS / TRIM>ROOF HEADLINING>REMOVAL).
64712F
21.REMOVE FRONT DECK SIDE TRIM COVER RH
- HINT:
-
Use the same procedure as for the LH side (See page Vehicle Interior>INTERIOR PANELS / TRIM>ROOF HEADLINING>REMOVAL).
55548C
22.REMOVE NO. 1 CUP HOLDER
64730B
23.REMOVE DECK TRIM SIDE PANEL ASSEMBLY RH
- HINT:
-
Use the same procedure as for the LH side (See page Vehicle Interior>INTERIOR PANELS / TRIM>ROOF HEADLINING>REMOVAL).
24.DISCONNECT CABLE FROM POSITIVE AUXILIARY BATTERY TERMINAL
Remove the terminal cover.
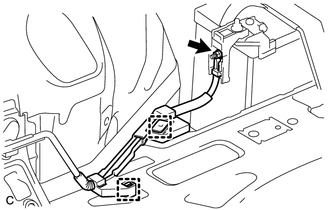
Disconnect the 2 clamps and remove the nut.
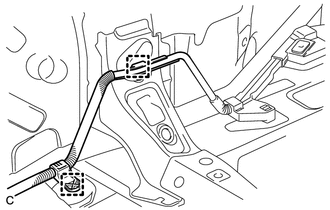
Disconnect the 2 clamps and disconnect the cable from positive auxiliary battery terminal.
G92Z0
25.DISCONNECT HYBRID BATTERY JUNCTION BLOCK ASSEMBLY
- CAUTION:
-
Wear insulated gloves.
- NOTICE:
-
Insulate the removed terminals with insulating tape.
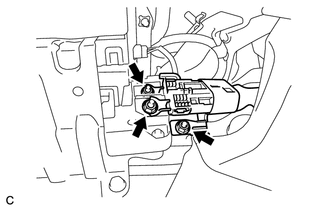
Remove the 3 nuts and disconnect the frame wire from the hybrid battery junction block assembly.
82164
26.REMOVE FRAME WIRE
- CAUTION:
-
Wear insulated gloves.
- NOTICE:
-
Insulate the disconnected terminals with insulating tape.
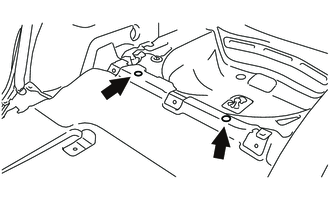
Remove the 2 clips.
Turn over the front floor carpet.
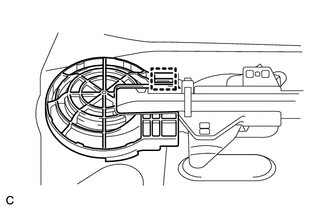
Disconnect the clamp and remove the wire harness protector from the floor panel.
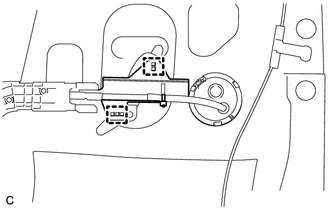
Disconnect the 2 wire harness clamps from the floor panel.
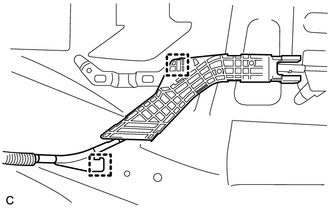
Disconnect the 2 clamps from the floor panel.
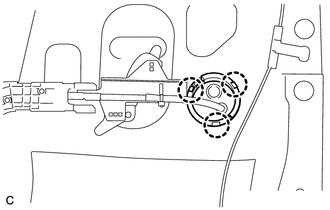
Disengage the 3 claws and push the frame wire out from the floor panel.
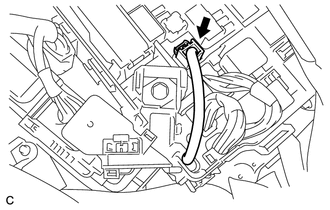
Disconnect the connector from the engine room junction block assembly.
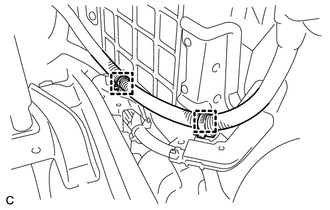
Disconnect the 2 clamps.
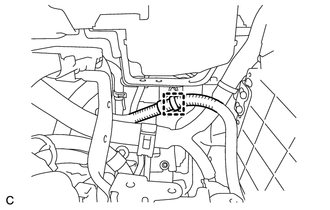
Disconnect the clamp.
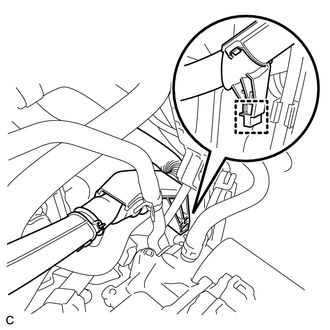
Disconnect the clamp.
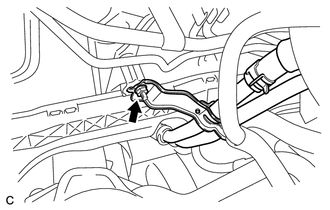
Remove the nut and separate the heater water pipe sub-assembly.
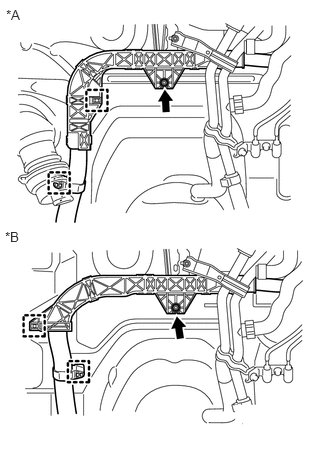
Remove the nut and disconnect the 2 clamps.
| *A | for RHD: |
| *B | for LHD: |
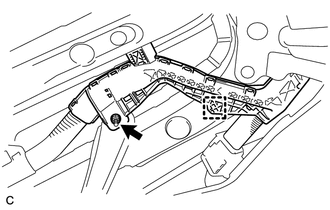
Remove the nut and disconnect the clamp.
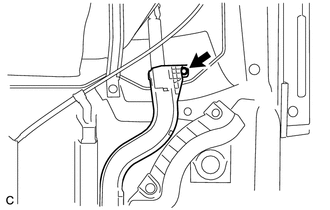
Remove the bolt.
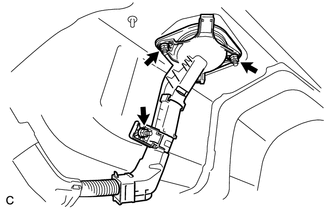
Remove the 3 nuts and frame wire out from the floor panel.
Disconnect the 3 clamps and remove the frame wire.
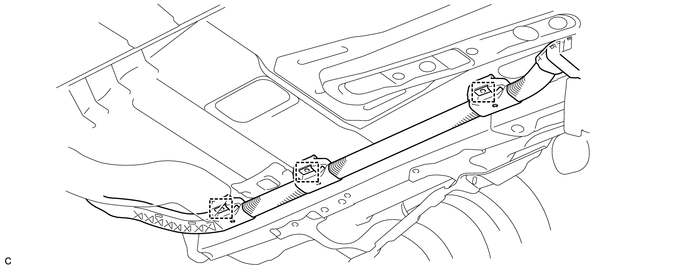
- NOTICE:
-
The clamps are non-reusable parts.