INTERIOR PANELS / TRIM LOWER INSTRUMENT PANEL REMOVAL
PROCEDURE

 1. PRECAUTION
2.REMOVE UPPER INSTRUMENT PANEL ASSEMBLY
67911B
3.REMOVE FRONT DOOR SCUFF PLATE RH
- HINT:
-
Use the same procedure as for the LH side (See page Vehicle Interior>INTERIOR PANELS / TRIM>ROOF HEADLINING>REMOVAL).
62111C
4.REMOVE COWL SIDE TRIM SUB-ASSEMBLY RH
- HINT:
-
Use the same procedure as for the LH side (See page Vehicle Interior>INTERIOR PANELS / TRIM>ROOF HEADLINING>REMOVAL).
55607
5.REMOVE NO. 2 INSTRUMENT PANEL UNDER COVER SUB-ASSEMBLY
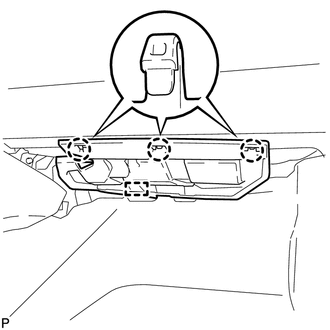
Disengage the 3 claws and guide.
Disconnect the connector to remove the No. 2 instrument panel under cover sub-assembly.
55550
6.REMOVE GLOVE COMPARTMENT DOOR ASSEMBLY
Open the glove compartment door.
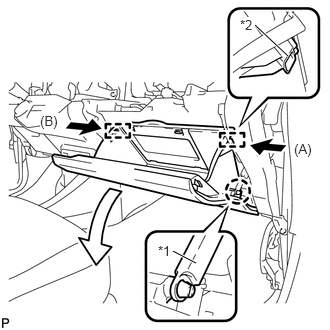
Disengage the claw and release the glove compartment door stopper sub-assembly.
| *1 | Glove Compartment Door Stopper Sub-assembly |
| *2 | Stopper |
Slightly bend stoppers (A) and (B) in the directions indicated by the arrows in the illustration and pull the glove compartment door assembly until the stoppers are released.
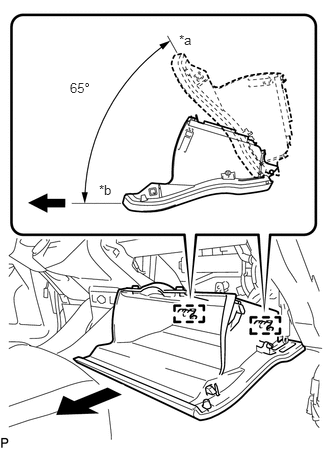
Open the glove compartment door assembly to approximately 65° from its closed position. Pull it horizontally in the direction indicated by the arrow to disengage the 2 hinges and remove the glove compartment door assembly.
- NOTICE:
-
Pulling the glove compartment door assembly upward to remove it causes the hinges to deform. Be sure to pull out the glove compartment door assembly horizontally.
| *a | Closed |
| *b | Opened Approximately 65° |
55054
7.REMOVE GLOVE COMPARTMENT DOOR STOPPER SUB-ASSEMBLY
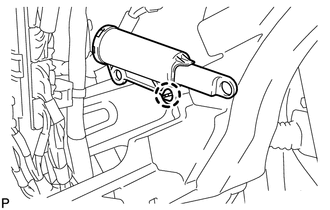
Disengage the claw to remove the glove compartment door stopper sub-assembly.
58533F
8.REMOVE CENTER FLOOR CARPET COVER RH
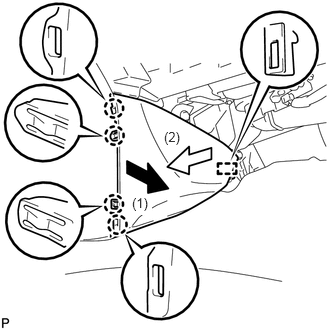
Pull the front center floor carpet cover RH in the direction indicated by the arrow to disengage the 4 claws and guide, and remove the center floor carpet cover RH.
58534H
9.REMOVE CENTER FLOOR CARPET COVER LH
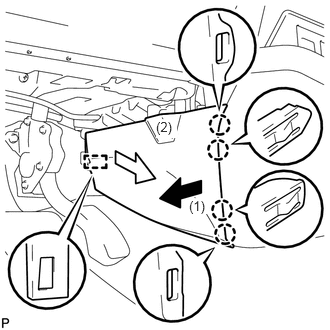
Pull the front center floor carpet cover LH in the direction indicated by the arrow to disengage the 4 claws and guide, and remove the center floor carpet cover LH.
58821C
10.REMOVE UPPER CONSOLE PANEL
58804A
11.REMOVE UPPER CONSOLE PANEL SUB-ASSEMBLY
58817A
12.REMOVE FRONT NO. 2 CONSOLE BOX INSERT
58810J
13.REMOVE CONSOLE BOX ASSEMBLY
14.REMOVE COMBINATION METER ASSEMBLY
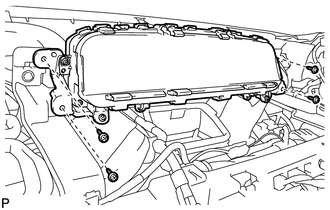
Remove the 4 screws <E>.
Disengage the clamp.
Disconnect each connector to remove the combination meter assembly.
55405B
15.REMOVE CENTER INSTRUMENT CLUSTER FINISH PANEL SUB-ASSEMBLY (w/o Radio Receiver)
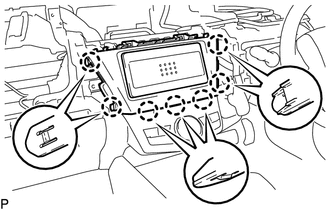
Disengage the 7 claws and remove the center instrument cluster finish panel sub-assembly.
16.REMOVE RADIO TUNER OPENING COVER WITH BRACKET (w/o Radio Receiver)
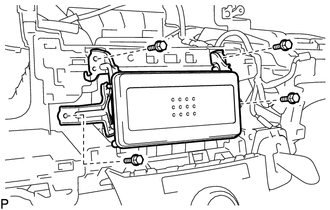
Remove the 4 bolts <A> and radio tuner opening cover with bracket.
17.REMOVE RADIO AND DISPLAY RECEIVER ASSEMBLY WITH BRACKET (for Radio Receiver Type)
18.REMOVE NAVIGATION RECEIVER ASSEMBLY WITH BRACKET (for Navigation Receiver Type)
19.REMOVE LOWER INSTRUMENT PANEL FINISH PANEL SUB-ASSEMBLY
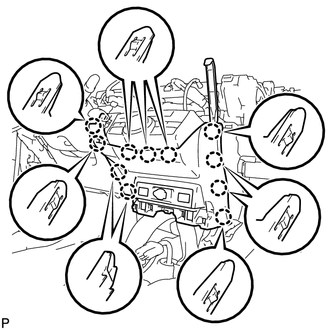
Using a moulding remover, disengage the 11 claws.
Disengage the clamp.
Disconnect each connector to remove the lower instrument panel finish panel sub-assembly.
55900
20.REMOVE AIR CONDITIONING CONTROL ASSEMBLY
33560
21.REMOVE SHIFT LOCK CONTROL UNIT ASSEMBLY
67914
22.REMOVE FRONT DOOR SCUFF PLATE LH
62112A
23.REMOVE COWL SIDE TRIM SUB-ASSEMBLY LH
55606
24.REMOVE NO. 1 INSTRUMENT PANEL UNDER COVER SUB-ASSEMBLY
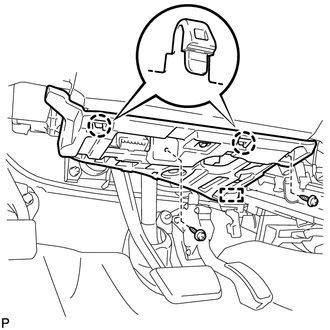
Remove the 2 screws <E>.
Disengage the 2 claws and guide.
Disconnect each connector.
Disengage the clamp to remove the No. 1 instrument panel under cover sub-assembly.
73900
25.REMOVE LOWER NO. 1 INSTRUMENT PANEL AIRBAG ASSEMBLY
81260
26.REMOVE GLOVE BOX LIGHT ASSEMBLY
53601
27.DISCONNECT HOOD LOCK CONTROL LEVER SUB-ASSEMBLY
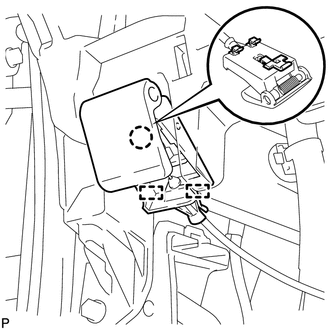
Disengage the claw and 2 guides to disconnect the hood lock control lever sub-assembly.
86101
28.REMOVE ANTENNA CORD SUB-ASSEMBLY (for LHD)
86101
29.REMOVE ANTENNA CORD SUB-ASSEMBLY (for RHD)
55303B
30.REMOVE LOWER INSTRUMENT PANEL SUB-ASSEMBLY (for LHD)
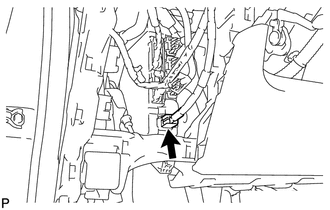
Disconnect the connector.
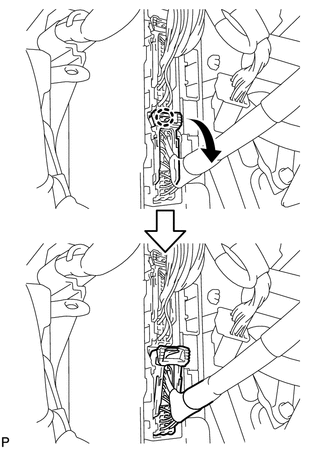
Disengage the claw and disconnect the connector as shown in the illustration.
Disengage each clamp.
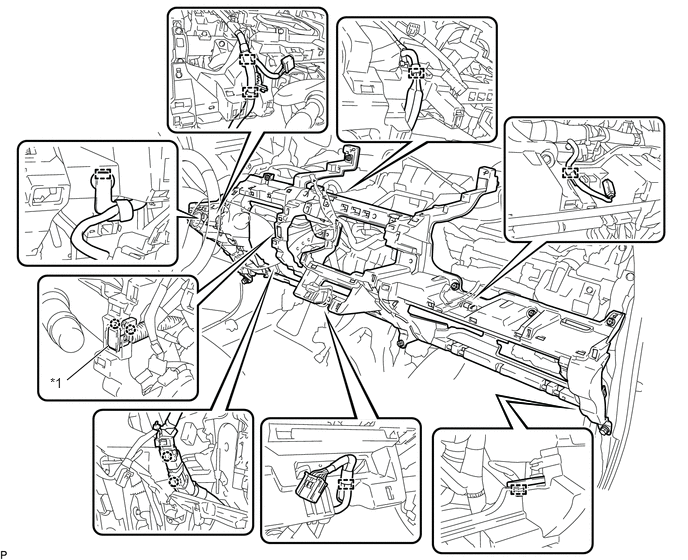
| *1 | Room Temperature Sensor | - | - |
Disengage the 2 claws to disconnect the room temperature sensor from the lower instrument panel sub-assembly.
Disengage the 2 claws.
Remove the 2 bolts <A>, 10 screws <C> and screw <D> and lower instrument panel sub-assembly.
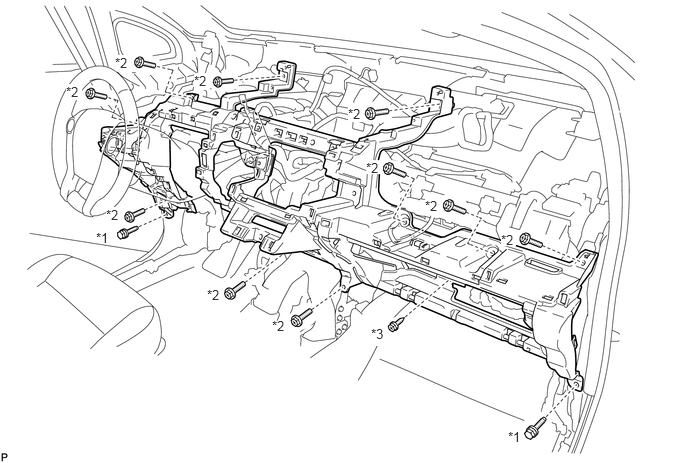
| *1 | Bolt <A> | *2 | Screw <C> |
| *3 | Screw <D> | - | - |
55303B
31.REMOVE LOWER INSTRUMENT PANEL SUB-ASSEMBLY (for RHD)
Disengage the 2 claws to disconnect the DLC3.
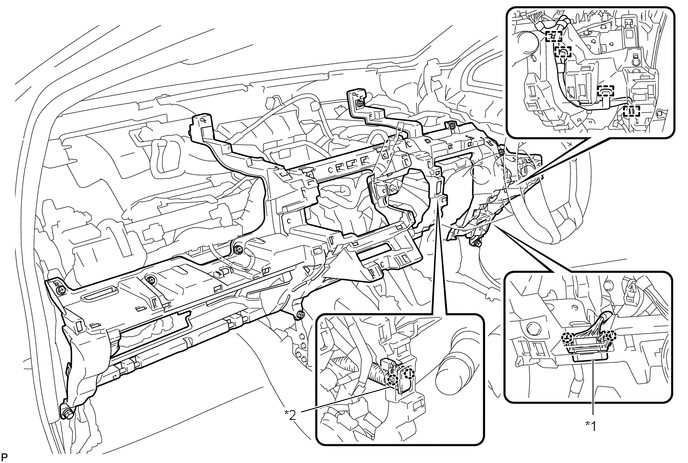
| *1 | DLC3 | *2 | Room Temperature Sensor |
Disengage each clamp.
Disengage the 2 claws to disconnect the room temperature sensor from the lower instrument panel sub-assembly.
Remove the 2 bolts <A>, 10 screws <C> and screw <D> and lower instrument panel sub-assembly.
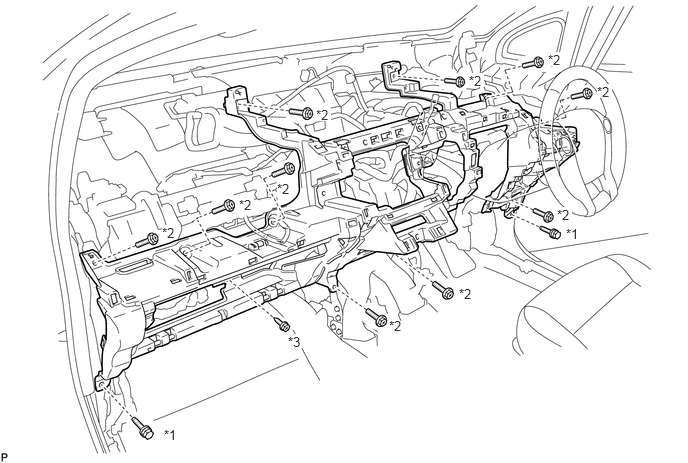
| *1 | Bolt <A> | *2 | Screw <C> |
| *3 | Screw <D> | - | - |