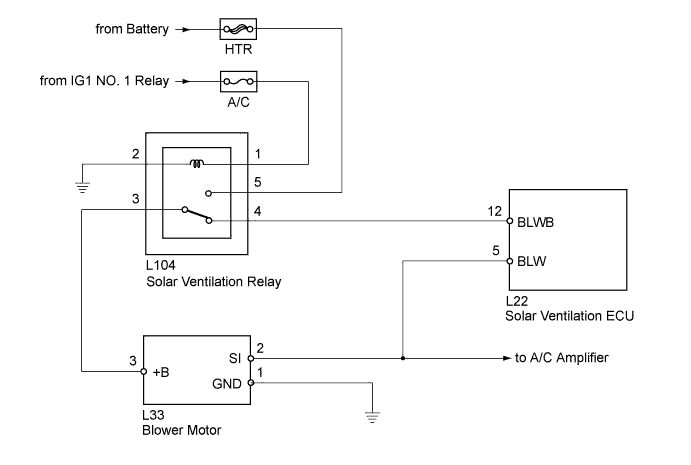
SOLAR VENTILATION SYSTEM > Blower Motor Circuit |
| 1.PERFORM ACTIVE TEST USING TECHSTREAM |
Connect the Techstream to the DLC3.
Turn the power switch on (IG).
Turn the Techstream on.
Enter the following menus: Body Electrical / Air Conditioner / Active Test.
Check the operation by referring to the table below.
| Tester Display | Test Part | Control Range | Diagnostic Note |
| Blower Motor | Blower motor | Min.: 0, Max.: 31 | - |
|
| ||||
| OK | |
 |
| 2.INSPECT SOLAR VENTILATION RELAY |
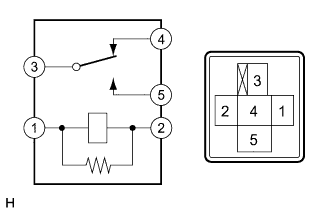 |
Remove the solar ventilation relay.
Measure the resistance according to the value(s) in the table below.
| Tester Connection | Specified Condition |
| 3 - 5 | 10 kΩ or higher |
| 3 - 4 | Below 1 Ω |
| 3 - 5 | Below 1 Ω (when battery voltage is applied to terminals 1 and 2) |
| 3 - 4 | 10 kΩ or higher (when battery voltage is applied to terminals 1 and 2) |
|
| ||||
| OK | |
|
| 3.INSPECT SOLAR VENTILATION ECU |
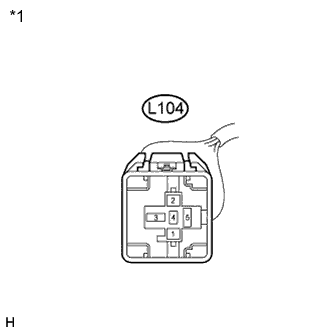 |
Disconnect the solar ventilation relay connector.
Measure the voltage according to the value(s) in the table below.
| Tester Connection | Condition | Specified Condition |
| L104-4 - Body ground | Power switch off Solar ventilation switch off | Below 1 V |
| L104-4 - Body ground | Power switch off Solar ventilation switch on (System operation conditions reference table met (Click here)) | 1 to 28 V |
| *1 | Front view of wire harness connector (to Solar Ventilation Relay) |
|
| ||||
| OK | |
|
| 4.CHECK HARNESS AND CONNECTOR (SOLAR VENTILATION ECU - BLOWER MOTOR) |
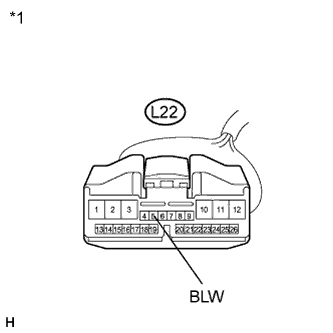 |
Disconnect the solar ventilation ECU connector.
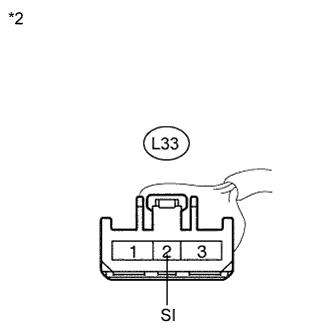 |
Disconnect the blower motor connector.
Measure the resistance according to the value(s) in the table below.
| Tester Connection | Condition | Specified Condition |
| L22-5 (BLW) - L33-2 (SI) | Always | Below 1 Ω |
| L22-5 (BLW) - Body ground | Always | 10 kΩ or higher |
| *1 | Front view of wire harness connector (to Solar Ventilation ECU) |
| *2 | Front view of wire harness connector (to Blower Motor) |
|
| ||||
| OK | |
|
| 5.INSPECT SOLAR VENTILATION ECU |
Reinstall the solar ventilation relay.
Reconnect the solar ventilation relay connector.
Reconnect the blower motor connector.
Reconnect the solar ventilation ECU connector.
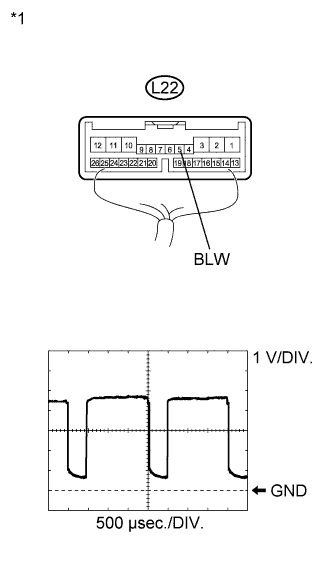 |
Measure the waveform between terminal L22-5 (BLW) of the solar ventilation ECU and body ground.
| Item | Content |
| Tool setting | 1 V/DIV., 500 μs/DIV. |
| Vehicle condition | Power switch off Solar ventilation switch on (blower motor operating) |
| *1 | Component with harness connected (Solar Ventilation ECU) |
|
| ||||
| OK | ||
 | ||
| ||
| 6.REPLACE BLOWER MOTOR |
Replace the blower motor with a known good one and check if the same problem occurs again (Click here).
|
| ||||
| OK | ||
| ||
| ||
| 7.CHECK HARNESS AND CONNECTOR (SOLAR VENTILATION ECU - SOLAR VENTILATION RELAY) |
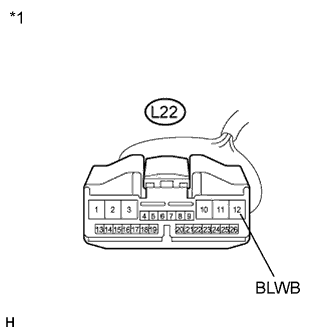 |
Disconnect the solar ventilation ECU connector.
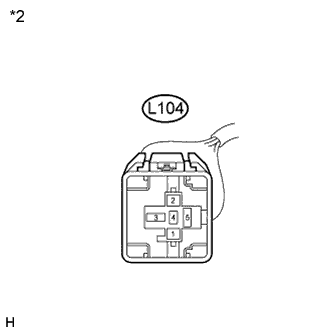 |
Measure the resistance according to the value(s) in the table below.
| Tester Connection | Condition | Specified Condition |
| L22-12 (BLWB) - L104-4 | Always | Below 1 Ω |
| L22-12 (BLWB) - Body ground | Always | 10 kΩ or higher |
| *1 | Front view of wire harness connector (to Solar Ventilation ECU) |
| *2 | Front view of wire harness connector (to Solar Ventilation Relay) |
|
| ||||
| OK | ||
| ||
| ||

