 |
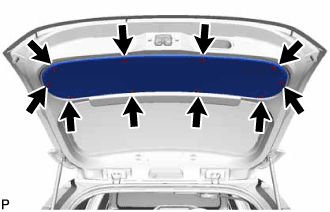
Remove the 10 clips and back door trim board assembly.
BACK DOOR > DISASSEMBLY |
| 1. REMOVE BACK DOOR TRIM BOARD ASSEMBLY |
|
Remove the 10 clips and back door trim board assembly.
| 2. REMOVE BACK DOOR TRIM COVER |
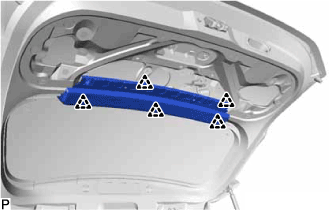 |
Disengage the 5 clips and back door trim cover.
| 3. REMOVE DOOR PULL HANDLE |
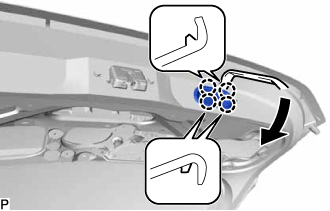 |
Using a moulding remover, disengage the 4 claws as shown in the illustration and remove the door pull handle.
| 4. REMOVE BACK DOOR PANEL CUSHION |
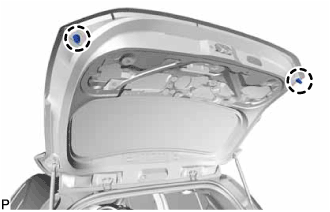 |
Disengage the 2 claws to remove the 2 back door panel cushions.
| 5. REMOVE BACK DOOR LOCK ASSEMBLY |
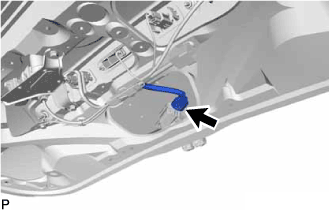 |
Disconnect the connector.
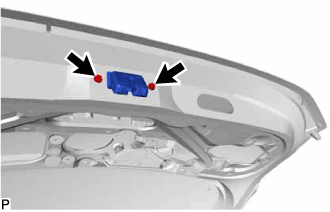 |
Remove the 2 bolts and back door lock assembly.
| 6. REMOVE REAR TELEVISION CAMERA ASSEMBLY (w/ Rear Monitor) |
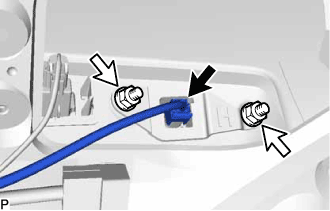 |
Disconnect the connector and remove the 2 nuts.
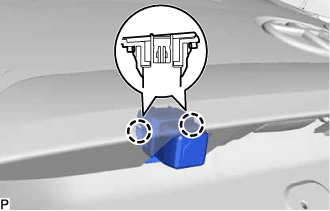 |
Disengage the 2 claws to remove the rear television camera assembly.
| 7. REMOVE LUGGAGE COMPARTMENT DOOR OUTSIDE GARNISH SUB-ASSEMBLY |
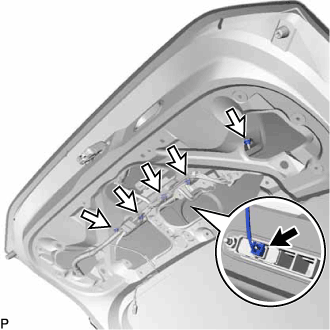 |
Disconnect the connector.
Remove the 5 nuts.
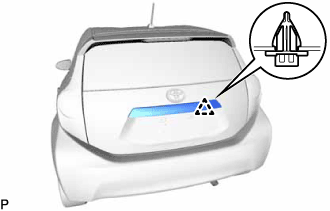 |
Disengage the clip and remove the luggage compartment door outside garnish sub-assembly.
Remove the back door opener switch assembly (Click here).
Remove the 5 gaskets from the luggage compartment door outside garnish sub-assembly.
| 8. REMOVE LICENSE PLATE LIGHT ASSEMBLY LH |
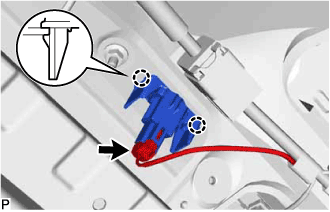 |
Disconnect the connector.
Disengage the 2 claws and remove the license plate light assembly.
| 9. REMOVE LICENSE PLATE LIGHT ASSEMBLY RH |
| 10. REMOVE REAR SPOILER ASSEMBLY |
| 11. REMOVE REAR WASHER NOZZLE |
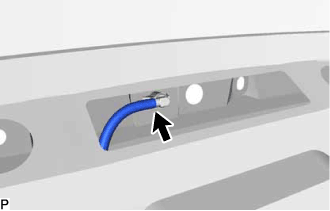 |
Disconnect the washer hose.
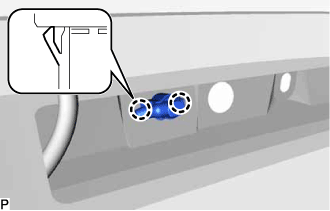 |
Disengage the 2 claws and remove the rear washer nozzle.
| 12. REMOVE REAR WIPER MOTOR ASSEMBLY |
| 13. REMOVE BACK DOOR STAY ASSEMBLY LH |
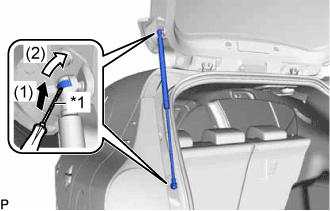 |
Using a screwdriver, remove the 2 stop rings as indicated by the arrows, in the order shown in the illustration.
| *1 | Protective Tape |
Release the ball joint and remove the back door stay assembly.
| 14. REMOVE BACK DOOR STAY ASSEMBLY RH |
| 15. REMOVE BACK DOOR DAMPER STAY UPPER BRACKET LH |
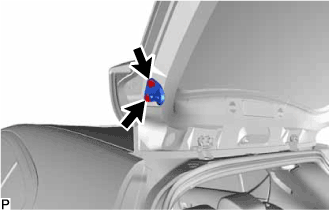 |
Remove the 2 bolts and back door damper stay upper bracket.
| 16. REMOVE BACK DOOR DAMPER STAY UPPER BRACKET RH |
| 17. REMOVE BACK DOOR STAY BOLT LH |
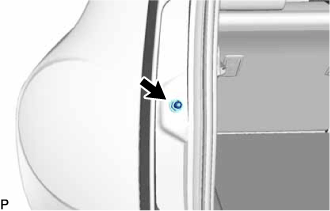 |
Remove the back door stay bolt.
| 18. REMOVE BACK DOOR STAY BOLT RH |