LIGHTING (EXT) HEADLIGHT ECU REMOVAL
CAUTION / NOTICE / HINT
The necessary procedures (adjustment, calibration, initialization or registration) that must be performed after parts are removed and installed, or replaced during No. 1 headlight ECU sub-assembly removal/installation are shown below.
| Replaced Part or Performed Procedure | Necessary Procedure | Effect/Inoperative Function when Necessary Procedure not Performed | Link |
|---|---|---|---|
| Front bumper assembly | ·
Ultrasonic sensor detection angle ·
Ultrasonic sensor detection angle registration |
·
Intelligent clearance sonar system ·
Simple advanced parking guidance system |
( ) |
| Change grille shutter control modes and/or perform initialization | Grille Shutter system | ()
|
|
| No. 1 headlight ECU sub-assembly LH | ·
Synchronize vehicle information ·
Initialize No. 1 headlight ECU sub-assembly LH |
Automatic headlight beam level control system | ()
|
- NOTICE:
-
If the No. 1 headlight ECU sub-assembly RH is replaced with a new one, vehicle information registration and initialization are not necessary.
- HINT:
- ·
Use the same procedure for the RH side and LH side.
·The following procedure is for the LH side.
PROCEDURE

 1.REMOVE HEADLIGHT ASSEMBLY
81056
2.REMOVE NO. 1 HEADLIGHT ECU SUB-ASSEMBLY
- NOTICE:
-
Make sure to replace the headlight gasket with a new one. Failure to do so may cause water ingress.
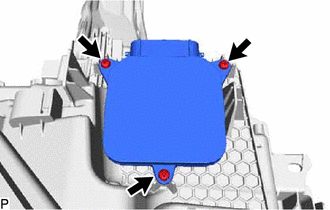
Remove the 3 screws.
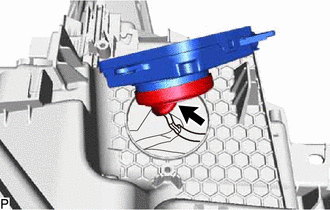
Separate the connector cover from the No. 1 headlight ECU sub-assembly.
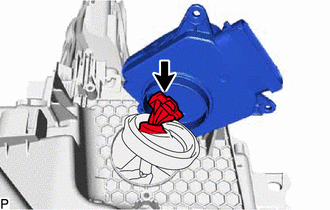
Disconnect the connector to remove the No. 1 headlight ECU sub-assembly.
- NOTICE:
-
If the No. 1 headlight ECU sub-assembly has been struck or dropped, replace it with a new one.
81134
3.REMOVE HEADLIGHT GASKET
- NOTICE:
-
Make sure to replace the headlight gasket with a new one. Failure to do so may cause water ingress.
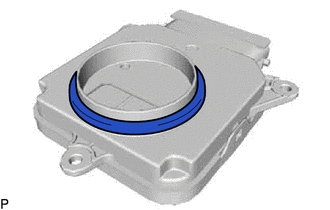
Remove the headlight gasket.