INTERIOR PANELS / TRIM UPPER INSTRUMENT PANEL INSTALLATION
PROCEDURE

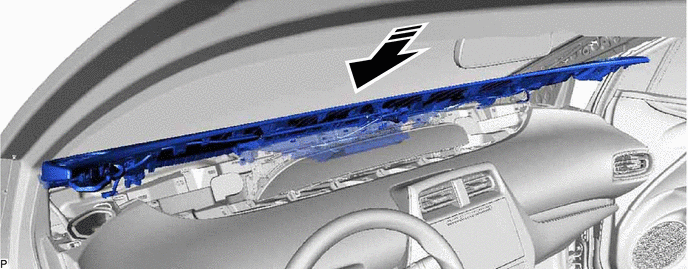
 1.TEMPORARILY INSTALL UPPER INSTRUMENT PANEL ASSEMBLY
Insert the upper instrument panel assembly as shown in the illustration.

|
Install in this Direction | - | - |
- NOTICE:
- ·
Do not damage the upper instrument panel assembly.
·Do not allow the wire harnesses to interfere with the surrounding parts.
Connect each connector.
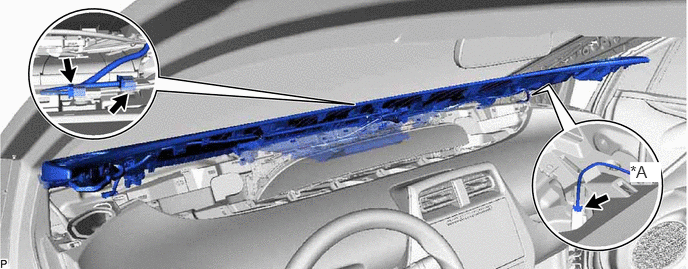
| *A | w/ Navigation Antenna | - | - |
55410C
2.INSTALL INSTRUMENT CLUSTER FINISH PANEL ASSEMBLY
55414A
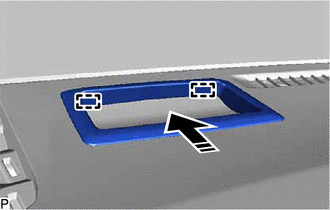
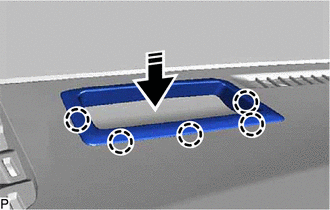
3.INSTALL INSTRUMENT CLUSTER FINISH PANEL END (w/ Headup Display)
|
|
Install in this Direction |
Engage the 2 guides as shown in the illustration.
|
|
Install in this Direction |
Engage the 5 claws to install the instrument cluster finish panel end as shown in the illustration.
86160P
4.INSTALL FRONT NO. 2 SPEAKER ASSEMBLY (for RH Side)
- HINT:
-
Use the same procedure as for the LH side.
-
Click hereAudio / Visual / Telematics>AUDIO / VIDEO>INSTRUMENT PANEL SPEAKER>INSTALLATION
55409F
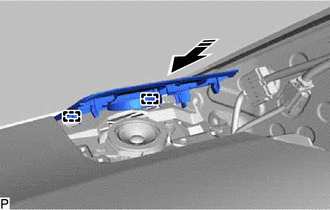
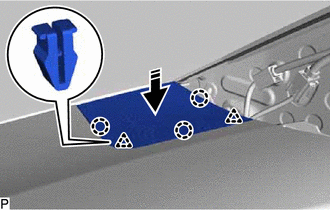
5.INSTALL NO. 2 INSTRUMENT PANEL SPEAKER PANEL SUB-ASSEMBLY
|
|
Install in this Direction |
Engage the 2 guides as shown in the illustration.
|
|
Install in this Direction |
Engage the 2 clips and 3 claws to install the No. 2 instrument panel speaker panel sub-assembly as shown in the illustration.
62211
6.INSTALL FRONT PILLAR GARNISH RH
- HINT:
-
Use the same procedure as for the LH side.
-
Click hereVehicle Interior>INTERIOR PANELS / TRIM>ROOF HEADLINING>INSTALLATION
62311B
7.INSTALL FRONT DOOR OPENING TRIM WEATHERSTRIP RH
86160P
8.INSTALL FRONT NO. 2 SPEAKER ASSEMBLY (for LH Side)
55408F
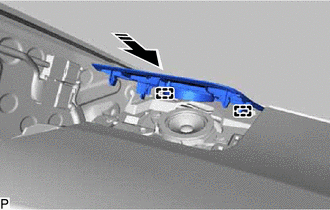
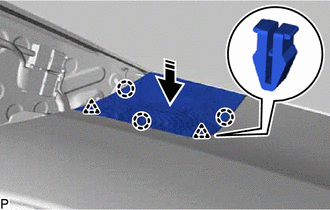
9.INSTALL NO. 1 INSTRUMENT PANEL SPEAKER PANEL SUB-ASSEMBLY
|
|
Install in this Direction |
Engage the 2 guides as shown in the illustration.
|
|
Install in this Direction |
Engage the 2 clips and 3 claws to install the No. 1 instrument panel speaker panel sub-assembly as shown in the illustration.
62212
10.INSTALL FRONT PILLAR GARNISH LH
62312B
11.INSTALL FRONT DOOR OPENING TRIM WEATHERSTRIP LH