INTERIOR PANELS / TRIM UPPER INSTRUMENT PANEL REMOVAL
PROCEDURE

 1. PRECAUTION
62312B
2.DISCONNECT FRONT DOOR OPENING TRIM WEATHERSTRIP LH
Disconnect the front door opening trim weatherstrip LH.
62212
3.REMOVE FRONT PILLAR GARNISH LH
55408F
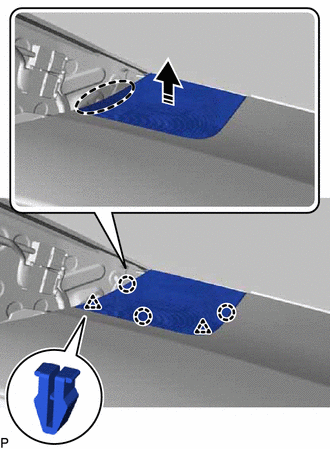
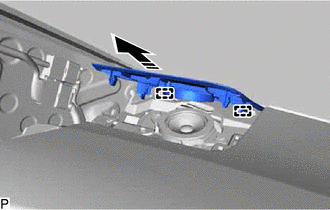
4.REMOVE NO. 1 INSTRUMENT PANEL SPEAKER PANEL SUB-ASSEMBLY

|
Place Hand Here |

|
Remove in this Direction |
Disengage the 2 clips and 3 claws as shown in the illustration.
|
|
Remove in this Direction |
Disengage the 2 guides to remove the No. 1 instrument panel speaker panel sub-assembly as shown in the illustration.
86160P
5.REMOVE FRONT NO. 2 SPEAKER ASSEMBLY (for LH Side)
62311B
6.DISCONNECT FRONT DOOR OPENING TRIM WEATHERSTRIP RH
Disconnect the front door opening trim weatherstrip RH.
62211
7.REMOVE FRONT PILLAR GARNISH RH
- HINT:
-
Use the same procedure as for the LH side.
55409F
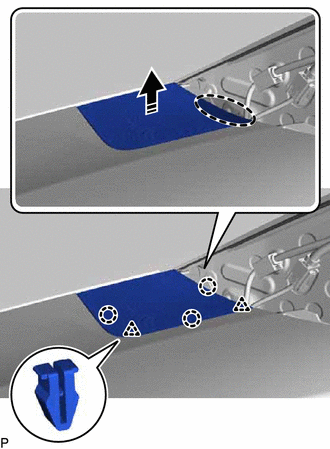
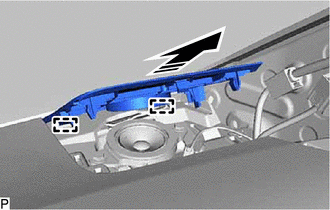
8.REMOVE NO. 2 INSTRUMENT PANEL SPEAKER PANEL SUB-ASSEMBLY
|
|
Place Hand Here |
|
|
Remove in this Direction |
Disengage the 2 clips and 3 claws as shown in the illustration.
|
|
Remove in this Direction |
Disengage the 2 guides to remove the No. 2 instrument panel speaker panel sub-assembly as shown in the illustration.
86160P
9.REMOVE FRONT NO. 2 SPEAKER ASSEMBLY (for RH Side)
- HINT:
-
Use the same procedure as for the LH side.
55414A
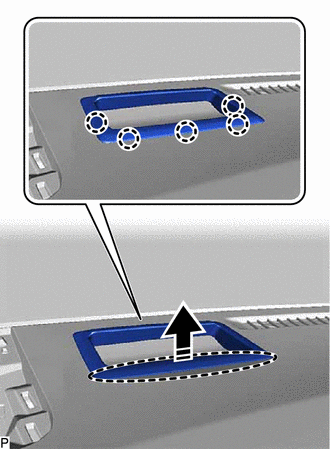
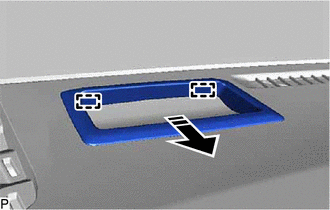
10.REMOVE INSTRUMENT CLUSTER FINISH PANEL END (w/ Headup Display)
|
|
Place Hand Here |
|
|
Remove in this Direction |
Disengage the 5 claws as shown in the illustration.
|
|
Remove in this Direction |
Disengage the 2 guides to remove the instrument cluster finish panel end as shown in the illustration.
55410C
11.REMOVE INSTRUMENT CLUSTER FINISH PANEL ASSEMBLY
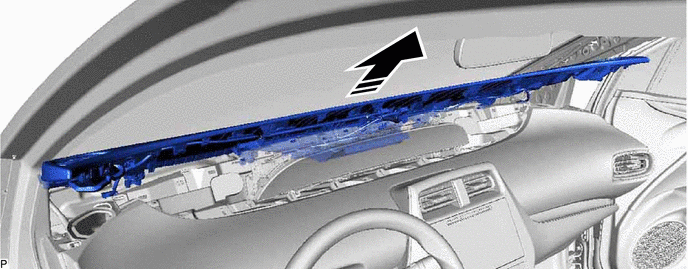
12.REMOVE UPPER INSTRUMENT PANEL ASSEMBLY
Disconnect each connector.
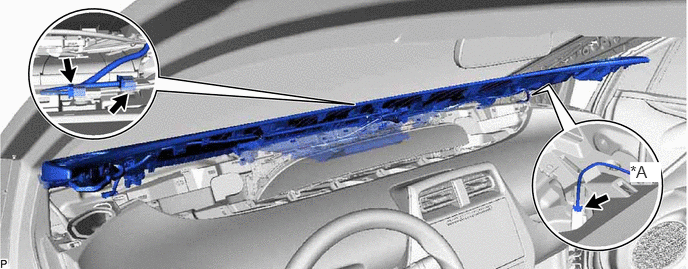
| *A | w/ Navigation Antenna | - | - |
Remove the upper instrument panel assembly as shown in the illustration.
|
|
Remove in this Direction | - | - |
- NOTICE:
- ·
Do not damage the upper instrument panel assembly.
·Do not allow the wire harnesses to interfere with the surrounding parts.