SLIDING ROOF / CONVERTIBLE SLIDING ROOF HOUSING REMOVAL
CAUTION / NOTICE / HINT
The necessary procedures (adjustment, calibration, initialization or registration) that must be performed after parts are removed and installed, or replaced during sliding roof glass sub-assembly, sliding roof housing sub-assembly, sliding roof drive gear assembly or sliding roof drive cable sub-assembly removal/installation are shown below.
| Replaced Part or Performed Procedure | Necessary Procedure | Effect/Inoperative Function when Necessary Procedure not Performed | Link |
|---|---|---|---|
·
Sliding roof ECU (sliding roof drive gear sub-assembly) ·
Sliding roof glass sub-assembly ·
Sliding roof drive cable sub-assembly ·
Sliding roof housing sub-assembly |
Initialize Sliding Roof System | ·
Auto operation function ·
Jam protection function ·
Key-off operation function ·
Key-linked function ·
Wireless transmitter-linked function ·
Sliding roof open warning function |
( ) |
| Disconnect cable from negative auxiliary battery terminal | Memorize steering angle neutral point | Lane departure alert system (w/ Steering Control) | ()
|
| Intelligent clearance sonar system*1 | |||
| Simple intelligent parking assist system*1 | |||
| Pre-crash safety system | |||
| Parking assist monitor system | ()
|
||
| Initialize back door lock | Power door lock control system | ()
|
*1: When performing learning using the GTS.
Click hereAudio / Visual / Telematics>PARK ASSIST / MONITORING>INTELLIGENT CLEARANCE SONAR SYSTEM>CALIBRATION
PROCEDURE

 63218G
1.REMOVE SLIDING ROOF SIDE GARNISH LH
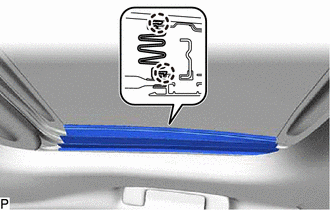
Disengage the 2 claws to remove the sliding roof side garnish LH.
63217G
2.REMOVE SLIDING ROOF SIDE GARNISH RH
- HINT:
-
Use the same procedure as for the LH side.
63201G
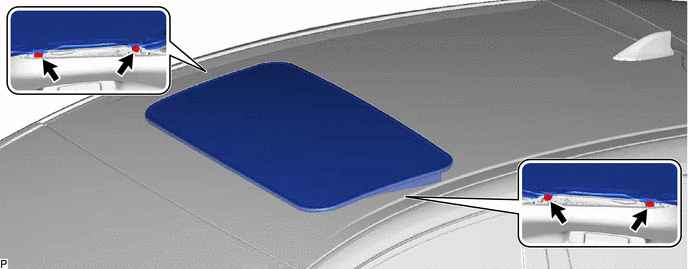
3.REMOVE SLIDING ROOF GLASS SUB-ASSEMBLY
Move the sliding roof glass sub-assembly to the fully closed position.
Using a T25 "TORX" socket wrench, remove the 4 screws and sliding roof glass sub-assembly.
- NOTICE:
-
To prevent the sliding roof glass sub-assembly and sliding roof drive gear sub-assembly from becoming misaligned, move the sliding roof glass sub-assembly (sliding roof drive cable sub-assembly) to the fully closed position before removing.
63251K
4.REMOVE SLIDING ROOF WEATHERSTRIP
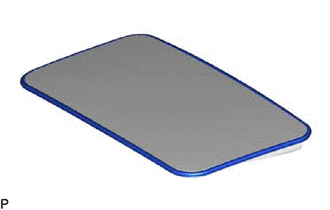
Remove the sliding roof weatherstrip from the sliding roof panel sub-assembly.
62180A
5.REMOVE CURTAIN SHIELD AIRBAG ASSEMBLY LH
62170A
6.REMOVE CURTAIN SHIELD AIRBAG ASSEMBLY RH
- HINT:
-
Use the same procedure as for the LH side.
63240A
7.DISCONNECT SLIDING ROOF DRAIN HOSE ASSEMBLY LH
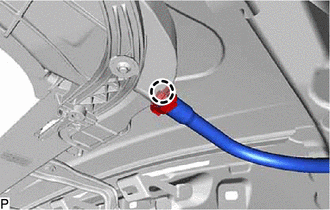
Disengage the claw and disconnect the sliding roof drain hose assembly LH.
63220A
8.DISCONNECT SLIDING ROOF DRAIN HOSE ASSEMBLY RH
- HINT:
-
Use the same procedure as for the LH side.
63249E
9.DISCONNECT SLIDING ROOF DRAIN HOSE
- HINT:
- ·
Use the same procedure as for the sliding roof drain hose assembly LH.
·Use the same procedure for both sliding roof drain hoses.
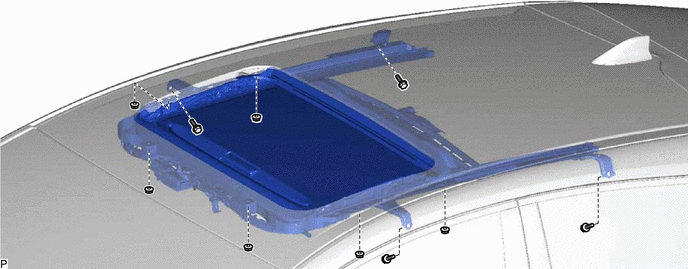
10.REMOVE SLIDING ROOF HOUSING ASSEMBLY
Remove the 4 bolts, 6 nuts and sliding roof housing assembly.