P610 HYBRID TRANSMISSION / TRANSAXLE HYBRID VEHICLE TRANSAXLE REMOVAL
CAUTION / NOTICE / HINT
The necessary procedures (adjustment, calibration, initialization, or registration) that must be performed after parts are removed and installed, or replaced during hybrid vehicle transaxle assembly removal/installation are shown below.
| Replaced Part or Performed Procedure | Necessary Procedure | Effect/Inoperative Function when Necessary Procedure not Performed | Link |
|---|---|---|---|
|
*1: When performing learning using the GTS. Click here( |
|||
| Auxiliary battery terminal is disconnected/reconnected | Memorize steering angle neutral point | Lane departure alert system (w/ Steering Control) | ( ) |
| Intelligent clearance sonar system*1 | |||
| Simple intelligent parking assist system*1 | |||
| Pre-crash safety system | |||
| Parking assist monitor system | ()
|
||
| Initialize back door lock | Power door lock control system | ()
|
|
for SFI system (w/ Canister Pump Module)
Replacement of ECM |
Perform Vehicle Identification Number (VIN) registration | MIL comes on | ()
|
for SFI system (w/o Canister Pump Module)
Replacement of ECM |
Perform Vehicle Identification Number (VIN) or frame number registration | MIL comes on | ()
|
for SFI system (w/ Canister Pump Module)
·
Replacement of throttle body assembly ·
Replacement of engine assembly ·
Gas leak from exhaust system is repaired |
Inspection after repair | ·
Poor idle, etc. ·
Engine start function, etc. |
()
|
for SFI system (w/o Canister Pump Module)
·
Replacement of throttle body assembly ·
Replacement of engine assembly ·
Gas leak from exhaust system is repaired |
Inspection after repair | ·
Poor idle, etc. ·
Engine start function, etc. |
()
|
| Suspension, tires, etc.
(The vehicle height changes because of suspension or tire replacement) |
·
Ultrasonic sensor detection angle ·
Ultrasonic sensor detection angle registration |
·
Intelligent clearance sonar system ·
Simple advanced parking guidance system |
()
|
| Rear television camera assembly optical axis (Back camera position setting) | Parking assist monitor system | ()
|
|
| Initialize No. 1 headlight ECU sub-assembly LH | Automatic headlight beam level control system | ()
|
|
| Front wheel alignment adjustment | 1.
Clear zero point calibration data. 2.
Perform yaw rate and acceleration sensor zero point calibration. |
·
DTCs are stored ·
ABS warning light illuminates ·
Brake warning light / yellow (minor malfunction) illuminates ·
Slip indicator light illuminates ·
VSC disabled or malfunctions |
()
|
| Replacement of hybrid vehicle transaxle assembly | ·
Resolver learning ·
Initialize resolver |
·
DTCs are stored ·
Slight vibration at a vehicle speed of 5 km/h (3 mph) or less ·
Shock or vibration during acceleration |
()
|
| Replacement of inverter with converter assembly | Resolver learning | ||
- CAUTION:
- ·
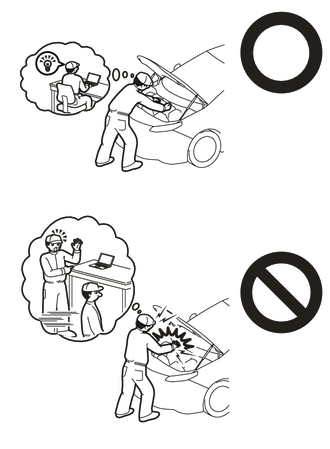
Orange wire harnesses and connectors indicate high-voltage circuits. To prevent electric shock, always follow the procedure described in the repair manual.
Click hereEngine / Hybrid System>HYBRID / BATTERY CONTROL>HYBRID CONTROL SYSTEM>PRECAUTION
·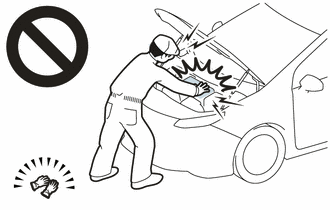
To prevent electric shock, wear insulated gloves when working on wire harnesses and components of the high voltage system.
·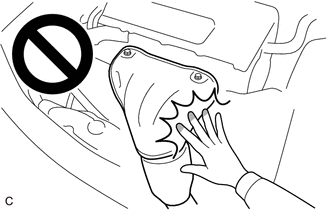
To prevent burns, do not touch the engine, exhaust manifold or other high temperature components while the engine is hot.
·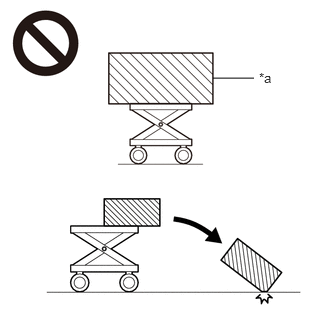 2.219,0.813 2.646,0.813 false 2.698,0.729 3.01,0.927 0.313,0.198 10 false *a
*a An Object Exceeding Weight Limit of Engine Lifter
The engine assembly with hybrid vehicle transaxle assembly is very heavy. Be sure to follow the procedure described in the repair manual, or the engine lifter may suddenly drop or the engine assembly with transaxle may fall off the engine lifter.
PROCEDURE

 1. PERFORM RESOLVER INITIALIZATION
- NOTICE:
-
If it is necessary to replace the hybrid vehicle transaxle assembly, make sure to perform resolver initialization before starting work.
-
Click hereEngine / Hybrid System>HYBRID / BATTERY CONTROL>MOTOR GENERATOR CONTROL SYSTEM>UTILITY
2.REMOVE ENGINE ASSEMBLY WITH TRANSAXLE
3.INSTALL ENGINE HANGERS
82121
4.DISCONNECT ENGINE WIRE
Disconnect the motor revolution sensor wire connector.
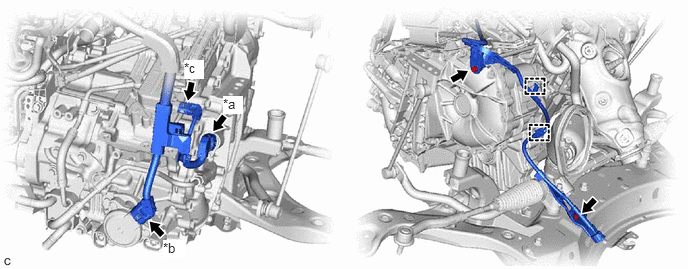
| *a | Motor Revolution Sensor Wire Connector | *b | Shift Control Actuator Assembly Connector |
| *c | Motor Temperature Sensor Connector | - | - |
Disconnect the shift control actuator assembly connector.
Disconnect the motor temperature sensor connector.
Remove the 2 bolts.
Disengage the 2 clamps to disconnect the engine wire from the hybrid vehicle transaxle assembly.
82311A
5.DISCONNECT AIR CONDITIONING WIRE
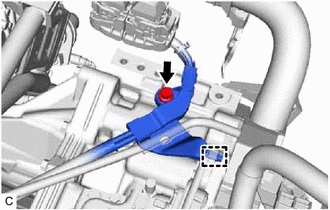
Remove the bolt.
Disengage the guide to disconnect the air conditioning wire from the hybrid vehicle transaxle assembly.
28193
6.REMOVE STARTER HOLE INSULATOR
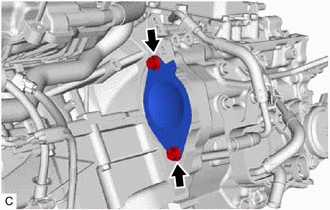
Remove the 2 bolts and starter hole insulator from the engine assembly.
11363A
7.REMOVE FLYWHEEL HOUSING SIDE COVER
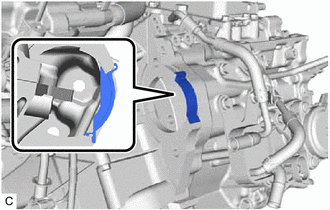
Remove the flywheel housing side cover from the engine assembly.
8.REMOVE ENGINE ASSEMBLY
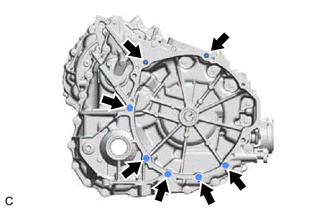
Remove the 7 bolts and engine assembly from the hybrid vehicle transaxle assembly.
- NOTICE:
- ·
To avoid damaging the knock pins, do not pry between the hybrid vehicle transaxle assembly and engine assembly.
·To prevent the splines of the transmission input damper assembly from becoming misaligned, do not allow the hybrid vehicle transaxle assembly to hit the transmission input damper assembly during hybrid vehicle transaxle assembly removal and installation.
51201
9.REMOVE FRONT SUSPENSION CROSSMEMBER SUB-ASSEMBLY
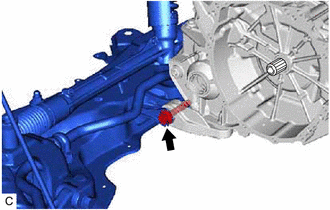
Remove the bolt and front suspension crossmember sub-assembly from the No. 2 engine moving control rod.
12364B
10.REMOVE NO. 2 ENGINE MOVING CONTROL ROD
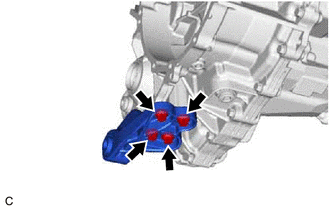
Remove the 4 bolts and No. 2 engine moving control rod from the hybrid vehicle transaxle assembly.
G1148
11.REMOVE MOTOR CABLE
G125A
12.REMOVE MOTOR COOLING COOLER
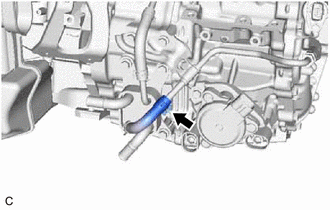
Slide the clip and disconnect the No. 1 motor cooling hose from the No. 1 motor cooling pipe.
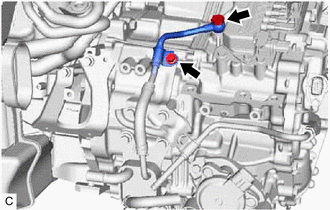
Remove the bolt and No. 1 oil cooler tube clamp from the hose bracket.
Remove the union bolt and gasket to disconnect the No. 2 motor cooling pipe from the hybrid vehicle transaxle assembly.
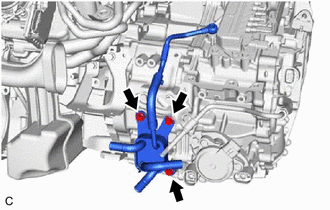
Remove the 3 bolts and motor cooling cooler with No. 2 motor cooling pipe from the hybrid vehicle transaxle assembly.
- NOTICE:
-
Make sure not to remove the No. 1 motor cooling hose and No. 2 motor cooling hose from the motor cooling cooler as the motor cooling cooler may be deformed.
G1251B
13.REMOVE NO. 1 MOTOR COOLING PIPE
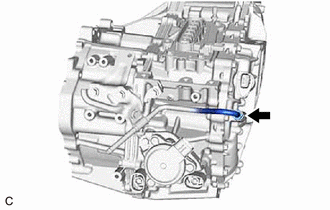
Loosen the flare nut of the No. 1 motor cooling pipe and disconnect the No. 1 motor cooling pipe from the union.
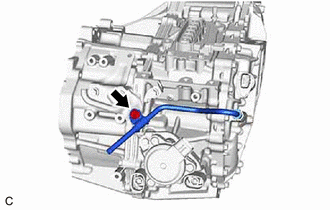
Remove the bolt, No. 1 oil cooler tube clamp and No. 1 motor cooling pipe from the hose bracket.
44781E
14.REMOVE HOSE BRACKET
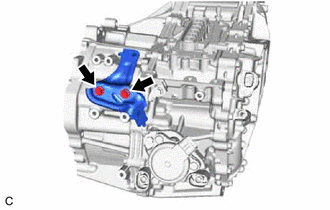
Remove the 2 bolts and hose bracket from the hybrid vehicle transaxle assembly.
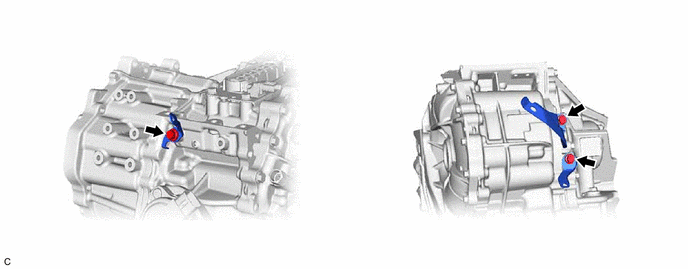
15.REMOVE WIRE HARNESS CLAMP BRACKET
Remove the 3 bolts and 3 wire harness clamp brackets from the hybrid vehicle transaxle assembly.
16.REMOVE TRANSAXLE HOUSING PLUG
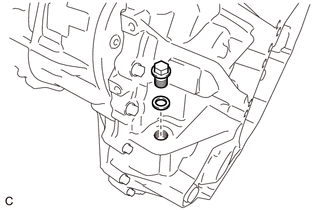
Remove the transaxle housing plug and gasket from the hybrid vehicle transaxle assembly.